
How to Make a Butterfly Knife Out of Popsicle Sticks?

Most people assume that building a working trick knife requires specialized workshop gear or metal parts. In reality, anyone can craft a smooth-swinging toy butterfly knife at the kitchen table using basic wooden craft sticks, glue, and round toothpicks. The design works by pinning a blunt wooden blade between two layered, hollow handles. Small toothpick pegs act as hinges, letting both sides swing open and shut freely without any sharp edges.
Getting a balanced flip depends on three simple details. Easing the hinge holes through the wood slowly prevents brittle sticks from cracking. Leaving just enough space around each peg keeps the handles rotating smoothly instead of binding stiff or wobbling loose. Letting the glue fully cure is just as vital, so the joints stay rock-solid when the handles start moving. Here is how to shape, pin, and tune every piece from start to finish.
Tools and Materials for Your Wooden Project
Gathering the right supplies ahead of time keeps your build moving smoothly and prevents broken craft sticks. You do not need power tools or a workshop. A few simple craft items and household supplies are all it takes to build a working toy balisong.
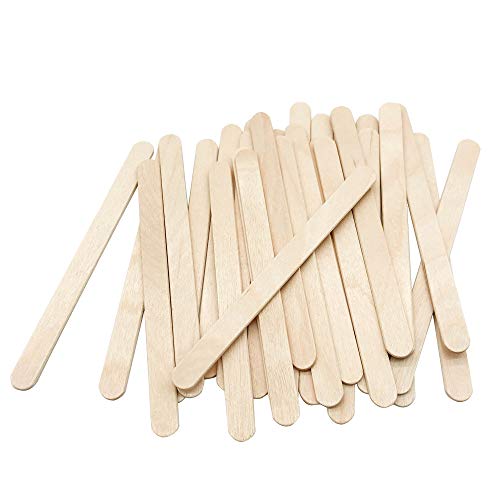
- Wooden craft sticks: Use standard natural wood craft sticks measuring 4.5 inches long and 2 millimeters thick. Choose sticks that lie flat without warps or surface splits. You will need six or seven sticks.
- Round wooden toothpicks: Round toothpicks act as your hinge pegs. Their smooth, cylindrical shape allows the handles to rotate freely without catching on flat edges.
- Wood glue or craft PVA glue: Wood glue bonds deep into the wood fibers, creating a solid joint that handles the vibration of swinging. Avoid hot glue guns because thick glue beads jam moving parts and keep the handles from closing flush.
- Sharp craft shears or heavy snips: These cut cleanly across dried wood fibers without crushing them. Do not use fine kitchen cutlery like those in German high carbon steel knife sets to cut craft wood, as hard wooden sticks can damage delicate culinary slicing edges or cause fingers to slip.
- Pushpin or thumbtack: A sharp point lets you bore clean pivot holes without splitting thin craft wood.
- Fine sandpaper: A small sheet of 150-grit to 220-grit sandpaper lets you smooth cut ends, thin down blade cheeks, and round off outer edges.
- Ruler and pencil: Used to measure hole spacing and mark straight cut lines.
- Binder clips or clothespins: Useful for clamping glued handle ends while the glue cures.
Preparing and Cutting Your Stick Pieces
A toy butterfly knife relies on five main wooden parts: one central blade and two swinging handles. Each handle uses two sticks sandwiched together with a small gap block at the bottom, leaving a hollow channel inside for the blade to rest when closed.
Start by sorting through your craft sticks to find the straightest pieces. Lay them on a flat table and set aside any stick that rocks or curves upward. Crooked sticks will drag against the blade and ruin the smooth swinging action.
Mark your cuts with a pencil and ruler:
- The blade piece: Use one full-length 4.5-inch stick. Sketch a rounded, blunt tip at one end to keep the practice knife safe.
- The handle pieces: Keep four full-length sticks intact. These form the outer walls of your two handles, giving your hands plenty of grip area.
- The gap blocks: Cut two small square pieces, each roughly three-eighths of an inch long, from a spare stick. These sit between the bottom tips of each handle pair to maintain the blade channel.
- The stop bumpers: Cut two short slivers from a toothpick or a scrap stick. These act as stops at the blade base to keep the handles aligned when open and shut.
When cutting craft sticks, avoid snapping them with your fingers. Craft wood splits easily along the grain. Score the cut line lightly with your shears or a craft blade on both sides, then snip through firmly. Smooth every cut end with sandpaper so no loose splinters remain.
How to Bore Clean Pivot Holes Without Splitting Wood
Popsicle sticks are made of dried birch with long, straight grain lines running from end to end. If you try to force a nail or thick screw directly through the wood, the wedge force pushes the grain apart and splits the stick instantly. Boring clean holes requires a gentle scraping action rather than blunt force.
Always lay the stick flat on a piece of scrap wood or cardboard before starting. Holding the stick in the air while pressing down bends the wood and snaps it across the middle.
Mark your hole location with a pencil dot roughly a quarter-inch from the rounded tip of the stick. Center the dot between the side edges so the remaining wood walls stay strong.
Press the sharp point of your pushpin into the pencil mark. Instead of shoving the pin straight through, spin the pin back and forth between your fingertips. The sharp point acts like a tiny drill bit, shaving away fine wood dust to form a cone-shaped pilot hole.
Once the pin point barely pokes through the bottom, flip the stick over. Insert the pin into the tiny hole from the reverse side and spin it again. Boring from both directions stops the wood fibers from tearing out around the exit hole.
After clearing the pushpin hole, gently twist the tapered tip of a round toothpick through the opening. Spin the toothpick slowly until the hole expands to match the toothpick thickness. Finish by twisting a rolled cone of fine sandpaper inside the hole to smooth away any rough inner burrs.
Step-by-Step Assembly: Building the Blade and Swinging Handles
Follow these steps in order to pin the parts together with smooth, free-swinging action.
- Shape the blunt blade trainer profile. Sand the top end of your blade stick into a rounded, smooth shape with fine sandpaper. Reason: A smooth, rounded point makes the toy safe for practice and prevents accidental finger scratches during flips.
- Bore two hinge holes into the blade base. Measure one-quarter inch from the bottom edge of the blade stick and bore two parallel holes spaced about five-sixteenths of an inch apart using the twisting pin method. Reason: Proper spacing between these holes allows both handles to swing side by side without hitting each other at the pivot point.
- Bore matching hinge holes in the four handle sticks. Bore a single pivot hole through the top rounded tip of each handle stick, keeping each hole centered and the same distance from the edge. Reason: Identical pivot hole placement ensures both handles hang evenly and close flush around the blade.
- Assemble both handles with gap blocks. Spread a thin layer of wood glue onto both sides of each gap block, sandwich one block between the bottom tips of two handle sticks, and clamp both handles with binder clips. Reason: Spacers create a hollow channel inside each handle so the blade has room to fold away cleanly.
- Sand the sides of the blade base thin. Rub both flat faces of the lower blade stick against sandpaper until the base feels slightly thinner than the rest of the stick. Reason: Thinning the base reduces friction so the blade swings freely without rubbing against the inner handle walls.
- Mount the handles onto the blade base with toothpicks. Slide the open, unglued top of each handle over its matching blade hole and push a smooth, round toothpick through all layers. Reason: The round toothpicks act as smooth axles that let both handles rotate freely under their own weight.
- Glue the outer hinge peg tips in place. Apply a tiny drop of wood glue strictly to the outside surface of the handle where each toothpick exits, avoiding the inner gap entirely. Reason: Gluing only the outside locks the peg in place while leaving the inner blade hole free to rotate smoothly.
- Snip the excess toothpick ends flush. Wait twenty minutes for the outer glue drops to dry, then trim the pointed toothpick ends flush with craft snips and sand them flat. Reason: Flush hinge pegs prevent rough wood points from poking your fingers during flipping practice.
- Install the stop bumpers on the blade base. Glue two small toothpick pieces horizontally across the blade base just below the hinge holes so the handles bump against them when opened and closed. Reason: Stop bumpers prevent the handles from flopping past the center line and keep them from pinching your hand.
- Allow the glue to cure completely overnight. Place the assembled knife flat on a table and let all glued joints dry undisturbed for several hours. Reason: Flipping the toy before the glue fully hardens will crack the gap block joints and loosen the hinge pegs permanently.
Tuning the Swing and Fixing Common Assembly Glitches
Once the glue dries, check how the handles move. A well-built wooden butterfly knife should fall open smoothly under its own weight when you hold one handle and release the other. If your toy feels stiff or loose, minor adjustments will fix it.
Fixing stiff hinges: If a handle binds or refuses to swing, stray glue likely seeped into the pivot hole. Gently rock the handle back and forth by hand to break any thin glue film. If the joint remains frozen, slip a thin strip of sandpaper into the gap between the handle and blade, facing the abrasive side toward the blade base, and pull it through once to clear away excess glue.
Correcting handle wobble: If the handles rattle from side to side, the hinge holes were bored slightly too large. You can take up the extra slack by sliding a tiny paper washer over the hinge peg. Cut a small circle from an index card, punch a hole through the center with a pin, and slide it between the blade and the inner handle stick before securing the outer peg.
Clearing a sticking blade: If the blade gets stuck inside the handle channel when closed, the gap block at the bottom may be slightly too thin. Sand the flat faces of the blade with 220-grit sandpaper until it drops in and out of the handle channel without catching.
Adjusting stop bumpers: If the handles do not sit parallel when closed or opened, one side of your stop bumper is too tall. Sand down the high side a tiny bit at a time until both handles rest symmetrically against the stops.
When to Upgrade to a Metal Butterfly Trainer
Crafting a wooden butterfly knife out of popsicle sticks is a fun craft project that teaches you how the folding mechanism works. Wood is safe, lightweight, and easy to shape at the kitchen table. However, wooden craft sticks have natural limits. They weigh less than an ounce, which makes momentum tricks difficult, and thin craft wood can crack when dropped onto hard floors during practice.
When you want to learn advanced flipping tricks, finger rollovers, and smooth aerial transitions, upgrading to a purpose-built metal butterfly trainer provides the durability you need. Here is what to look for when choosing a metal trainer:
- Blunt practice blade: Choose a model with a completely unsharpened, rounded blade made for safe practice. Many trainers feature skeletonized cutouts in the blade metal to prevent anyone from sharpening the edge.
- Balanced weight: Look for a trainer weighing between 3.5 and 5 ounces. Metal construction provides the natural momentum required to carry the handles through finger twirls smoothly.
- Adjustable pivot screws: Unlike glued wooden pegs, metal trainers use threaded pivot hardware. This allows you to tighten or loosen the handles with a small driver to maintain the exact swing tension you want.
- Smooth handle edges: Look for handles with rounded, chamfered corners that will not pinch or blister your fingers during long practice sessions.
- Local regulations: Always check your local municipal or state knife regulations regarding blade length limits and carry restrictions, even when handling unsharpened practice tools.
- TAR Score9.4
TAR Score is a ranking system developed by TopAppliancesReviews.com. TAR score has no relationship or impact from any manufacturers or sales agent websites. Learn more
- BrandKTOJOY

- TAR Score9.4
TAR Score is a ranking system developed by TopAppliancesReviews.com. TAR score has no relationship or impact from any manufacturers or sales agent websites. Learn more
- BrandFox Chapel Publishing

- TAR Score9.4
TAR Score is a ranking system developed by TopAppliancesReviews.com. TAR score has no relationship or impact from any manufacturers or sales agent websites. Learn more
- BrandFox Chapel Publishing

- TAR Score9.2
TAR Score is a ranking system developed by TopAppliancesReviews.com. TAR score has no relationship or impact from any manufacturers or sales agent websites. Learn more
- BrandFox Chapel Publishing

- TAR Score9.2
TAR Score is a ranking system developed by TopAppliancesReviews.com. TAR score has no relationship or impact from any manufacturers or sales agent websites. Learn more
- BrandKrause Publications

- TAR Score9.2
TAR Score is a ranking system developed by TopAppliancesReviews.com. TAR score has no relationship or impact from any manufacturers or sales agent websites. Learn more
- BrandGriffin

- TAR Score9.0
TAR Score is a ranking system developed by TopAppliancesReviews.com. TAR score has no relationship or impact from any manufacturers or sales agent websites. Learn more
- BrandVudwson

- TAR Score8.4
TAR Score is a ranking system developed by TopAppliancesReviews.com. TAR score has no relationship or impact from any manufacturers or sales agent websites. Learn more
- BrandCLESDF

- TAR Score7.8
TAR Score is a ranking system developed by TopAppliancesReviews.com. TAR score has no relationship or impact from any manufacturers or sales agent websites. Learn more
- BrandBILYSKEP

- TAR Score5.8
TAR Score is a ranking system developed by TopAppliancesReviews.com. TAR score has no relationship or impact from any manufacturers or sales agent websites. Learn more
- BrandMajosta
Last update on 2026-10-03 / Affiliate links / Images, Product Titles, and Product Highlights from Amazon Product Advertising API
FAQs
Why do my popsicle sticks crack when making hinge holes?
Craft sticks are cut from dried birch wood with straight, tight grain lines. Forcing a thick pin or nail directly into the wood acts like a wedge that pushes the wood fibers apart until the stick splits. To prevent cracks, start with a tiny dent, spin a pushpin slowly between your fingers to scrape out the hole, and work halfway through from each side.
What kind of glue works best for a wooden butterfly knife?
Standard wood glue or white craft PVA glue works best because it soaks into the porous wood fibers and cures into a rigid bond. Avoid hot glue guns. Hot glue cools into thick, flexible beads that throw off handle alignment and clog the swinging hinge joints.
How can I make the wooden handles flip faster?
Smooth any friction points by sanding the flat sides of the blade base so it does not rub against the inner handle sticks. You can also rub a small amount of graphite pencil lead or candle wax onto the hinge pegs and blade cheeks to create a dry, slick surface that swings freely.
How do I stop the wooden handles from pinching my fingers?
Pinching happens when the stop bumpers are missing or glued too close to the hinges, letting the handles squeeze together too tightly when opened. Make sure your stop bumpers hold the handles slightly apart at the grip, and round all inner handle edges with fine sandpaper so no sharp wooden corners pinch your skin.


Top Rated Best Quality Range Hoods: 2026 Expert Picks

The 12 Best Small Solar Generators 2026

10 Best Quality Semi Automatic Washing Machine of 2026 For Leak-Free Laundry

11 Best Small Washer Machine of 2026 For Everyday Laundry

12 Best Vibration Pads For Washing Machine of 2026 To Stop Walking and Shaking

11 Best Selling Front Load Washing Machine of 2026 For Quiet Odor-Free Laundry

11 Best Washing Machine For King Size Bedding of 2026 To Prevent Cycle Errors

10 Best Small Front Loader Washing Machine of 2026 For Tight Closets






