
How to Fix GE Washer Not Draining Water Fast

How to Fix GE Washer Not Draining Water often turns into a frustrating late-night problem nobody plans for. One minute the laundry cycle sounds normal, then suddenly there's cloudy water sitting in the drum like a mini swamp. Wet clothes cling together, detergent residue sticks around, and that unpleasant musty smell starts creeping into the laundry room. A clogged drain pump, twisted hose, or blocked filter usually hides behind the mess, though figuring out the real cause can feel like chasing your tail.
Small warning signs tend to show up before the washer fully stops draining. Loud humming noises, slow spin cycles, or random pauses during draining usually hint that something's off inside the machine. Ignoring those signals can leave water trapped at the bottom, making laundry day drag on far longer than expected. Drain pump issues, stubborn lint buildup, and forgotten objects like socks or coins commonly create the kind of blockage that stops water from moving properly.
Plenty of homeowners panic and assume the washer is toast, but hold on a second because that isn't always true. Most drainage problems come from parts that are surprisingly accessible without tearing apart the entire appliance. A bent drain hose behind the washer can restrict water flow almost instantly, especially after the machine gets pushed too close to the wall. Cleaning out debris from the pump filter also makes a massive difference in many cases, even though it's one of the most overlooked maintenance tasks around the house.
How to Fix GE Washer Not Draining Water also depends on spotting the difference between electrical trouble and physical blockage. Sometimes the lid switch stops the washer from entering the drain cycle properly, while other times a failing pump motor creates a weak grinding sound before giving up entirely. Water draining too slowly can point toward partial clogs instead of complete pump failure, which changes the repair approach quite a bit. Paying attention to sounds, odors, and cycle behavior helps narrow things down before money gets wasted on unnecessary replacement parts.
Messy laundry piles, soaked towels, and delayed wash cycles can throw the whole household routine into chaos. Nobody wants to wring out heavy blankets by hand or deal with puddles spreading across the floor after opening the washer lid. Practical troubleshooting steps make the process less overwhelming and help restore normal washing performance without the stress spiral. Drainage troubleshooting, proper cleaning habits, and routine inspection can keep a GE washer running smoothly instead of turning every load into a headache waiting to happen.

WH03X30517 Washer Shift Actuator,WH01X27538 Drive Belt, WH05X24185 Clutch,WH01X24434 Spring -
View on Amazon- TAR Score10.0
TAR Score is a ranking system developed by TopAppliancesReviews.com. TAR score has no relationship or impact from any manufacturers or sales agent websites. Learn more
- BrandAUSTINE

- TAR Score10.0
TAR Score is a ranking system developed by TopAppliancesReviews.com. TAR score has no relationship or impact from any manufacturers or sales agent websites. Learn more
- BrandHAÜS PARTS

- TAR Score9.8
TAR Score is a ranking system developed by TopAppliancesReviews.com. TAR score has no relationship or impact from any manufacturers or sales agent websites. Learn more
- BrandANTDM

- TAR Score9.4
TAR Score is a ranking system developed by TopAppliancesReviews.com. TAR score has no relationship or impact from any manufacturers or sales agent websites. Learn more
- BrandFetechmate

- TAR Score9.4
TAR Score is a ranking system developed by TopAppliancesReviews.com. TAR score has no relationship or impact from any manufacturers or sales agent websites. Learn more
- BrandCusvivid

- TAR Score8.6
TAR Score is a ranking system developed by TopAppliancesReviews.com. TAR score has no relationship or impact from any manufacturers or sales agent websites. Learn more
- BrandParts Master

- TAR Score8.6
TAR Score is a ranking system developed by TopAppliancesReviews.com. TAR score has no relationship or impact from any manufacturers or sales agent websites. Learn more
- BrandJHBKing
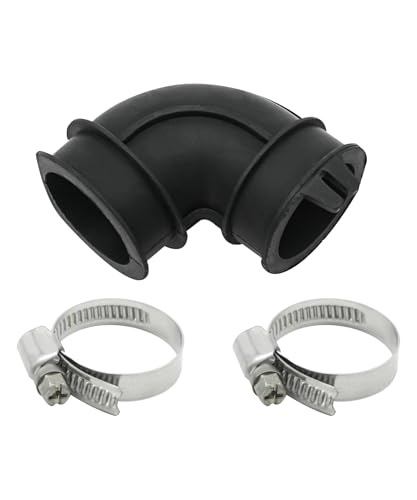
- TAR Score8.6
TAR Score is a ranking system developed by TopAppliancesReviews.com. TAR score has no relationship or impact from any manufacturers or sales agent websites. Learn more
- BrandAWTURBO

- TAR Score7.8
TAR Score is a ranking system developed by TopAppliancesReviews.com. TAR score has no relationship or impact from any manufacturers or sales agent websites. Learn more
- Brandupuuup
Last update on 2026-06-25 / Affiliate links / Images, Product Titles, and Product Highlights from Amazon Product Advertising API
How To Fix GE Washer Not Draining Water
A washer full of dirty water can wreck the whole laundry rhythm fast. Wet towels get heavier, socks smell sour, and the floor suddenly feels one wrong move away from a puddle. The good news is that how to fix ge washer not draining water usually starts with simple checks before any major repair talk makes sense. A blocked drain path, unbalanced load, or kinked hose can stop the machine from draining even when the washer itself still has plenty of life left.
Start With The Drain Cycle
A GE washer may look stuck, but the first move should be calm and practical. Set the machine to Drain & Spin and listen closely instead of guessing from across the room. GE notes that many washers may add water for a few seconds during this cycle, and that can be normal behavior, not a fresh problem. That little splash can fool people into thinking the washer is filling again, so patience matters here.
The sound tells a lot. A steady hum with no draining often points toward a clogged pump area or an object jammed near the impeller. A silent washer may hint at a lid switch, door lock, control issue, or power interruption. A weak trickle into the standpipe usually means the washer is trying, but water flow is being squeezed somewhere along the drain route.
Heavy items can also throw the cycle off. One soaked blanket, a pair of shoes, or a small load of towels may bunch up and stop the washer from spinning correctly. Shift the items around, add a few similar-weight pieces if needed, then run Drain & Spin again. That small reset can save a lot of unnecessary wrench work.
Power cycling is worth trying, but it shouldn't become the whole repair plan. Unplug the washer, wait a short moment, plug it back in, and restart the drain cycle. This can clear a temporary control hiccup, but it won't remove lint buildup, coins, or a twisted hose. If the same problem returns, the washer is asking for a closer look.
Check The Drain Hose First
The drain hose deserves attention before deeper parts come apart. A washer pushed too close to the wall can pinch the hose just enough to stop proper drainage. Pull the machine forward carefully and look for sharp bends, crushed spots, or tight loops behind the cabinet. A simple hose kink can make the washer act like it has a serious mechanical failure.
Height matters more than most people expect. GE states that many full-size washers pump up to about 8 feet from the floor, while compact or portable models may be limited to about 5 feet. A drain hose placed too high forces the pump to work harder than it should. That setup can leave water sitting in the tub even though the pump is still trying to do its job.
The standpipe or laundry sink can also be the hidden troublemaker. Remove the hose from the drain opening and pour water into the standpipe to see whether it flows freely. Slow backup points toward household plumbing, not necessarily the GE washer. That distinction matters because replacing washer parts won't fix a clogged wall drain.
Keep the hose inserted securely, but not shoved so far down that airflow gets blocked. A drain system needs proper air movement to avoid slow draining and odd siphoning problems. Look for lint clumps, small fabric pieces, and gritty residue around the hose end. For odor and detergent buildup after drainage problems, clean smarter between washes and reduce residue with enzyme-based laundry support; To break down stubborn washer grime, rely on best enzymatic booster washing machine during routine cleaning.
Clean The Pump Filter Area
The pump filter catches the kind of stuff pockets love to hide. Coins, hair ties, buttons, lint mats, and tiny clothing pieces can collect there until water barely moves. On many GE front-load models, the pump filter access door sits near the lower front area. Keep towels and a shallow pan ready because trapped water can spill fast.
Unplug the washer before touching the filter area. Turn the filter slowly, release water in stages, and avoid yanking it open like a jar of pickles. A sudden rush of water can soak the floor and make the repair feel worse than the original problem. Slow draining here often confirms a blocked filter or debris-packed pump chamber.
Once the filter comes out, check it closely instead of giving it a quick rinse and moving on. Slime, lint, pet hair, and detergent film can wrap around the filter screen and restrict flow. Wipe the filter housing too, since buildup often hides around the threads and rubber seal. A clean filter helps the pump move water without fighting through gritty residue.
Top-load models may not always have the same easy-access filter setup. Some clogs sit inside the pump hose or pump body, which means panels may need to come off. That job gets messier, so stop if the setup feels unsafe or unfamiliar. A washer full of water plus electrical parts is no place for guesswork.
Listen For Pump Trouble
The drain pump is the part doing the heavy lifting. It pushes dirty water out of the tub and into the drain hose, so a weak or jammed pump can leave clothes soaked after the cycle ends. A grinding sound can suggest something is caught near the impeller. A low hum with no water movement may point toward a pump that is energized but physically blocked.
Debris can stop the impeller from spinning even if the motor still has power. Small objects that slip past the tub can lodge inside the pump and create that awful buzz that makes the washer sound sick. Remove visible debris only after the washer is unplugged and drained as much as possible. Protecting the pump impeller from damage matters because cracked blades can turn a clog into a replacement job.
A failed pump often behaves differently from a clogged one. It may stay silent, overheat, or fail to push water even after the hose and filter are clean. That is the point where the repair shifts from basic cleaning to part testing. A multimeter check or technician visit makes sense if the washer keeps filling, washing, and then refusing to drain.
Budget plays a real role here. Some households would rather repair a sturdy GE washer, while others start comparing replacement machines if the unit is older and already showing multiple problems. For a separate laundry setup where manual water control matters more than automatic cycles, Compare practical wash options with best semi automatic washing machine under 12000 before spending heavily on repeated repairs. That choice won't fit every home, but it can make sense where simpler controls and lower repair complexity matter.
Rule Out Lid And Door Lock Problems
A washer may refuse to drain or spin if it thinks the lid or door is open. That safety feature prevents movement during operation, but a faulty switch can create a false signal. On top-load GE washers, the lid switch should click or respond when pressed. If the washer starts draining only when the switch is pushed a certain way, the assembly may be loose or failing.
Front-load models rely on a door lock mechanism that must engage properly before the machine moves into high-speed spin. A door that looks closed may still fail to lock if the latch is dirty, misaligned, or worn. Wipe the latch area and check for broken plastic pieces around the strike. A small crack can stop the washer from moving forward in the cycle.
Control panels can make this confusing. Flashing lights, paused cycles, or repeated clicking sounds may point toward a lock issue rather than a drainage clog. Run a drain cycle after confirming the lid or door is fully closed and latched. If the washer refuses to respond but has power, switch testing becomes more important than cleaning the hose again.
Don't slam the lid or force the door to make it work. That can damage the latch and turn a small repair into a bigger bill. Gentle pressure, careful inspection, and a proper replacement part beat rough handling every time. The goal is to restore the washer's safety signal, not bully it into draining once.
Watch For Smells And Residue
Standing water leaves more behind than wet clothes. It can create a stale smell inside the drum, especially if detergent, lint, and body oils have been sitting in warm water. A GE washer that drains slowly may also leave soap residue on clothes because dirty water doesn't exit cleanly. That residue can make towels feel stiff and workout clothes smell off even after washing.
Clean the rubber gasket, detergent drawer, and drum after the drainage issue is fixed. Trapped moisture around seals can feed mildew odors, especially in front-load machines. Use a washer cleaning cycle if the model has one, and leave the door slightly open after use so air can move through the drum. Small habits protect against musty smells and repeat buildup.
Pet households may notice laundry-room odor faster. Cat bedding, washable pads, and damp towels can leave strong smells if water sits too long in the washer. Laundry odor and room odor are separate problems, though they can pile on each other fast. For nearby odor control outside the washer itself, Upgrade the laundry area with best air purifier cat urine odor if pet smells linger after cleaning fabrics and surfaces.
Detergent amount also matters. Too much soap creates suds that can confuse draining and rinsing, especially in high-efficiency machines. Use the correct detergent type and measure it instead of free-pouring like a cooking show. Cleaner rinsing supports better drainage, fewer odors, and less buildup around the pump filter.
How To Fix GE Washer Not Draining Water Safely
Water sitting in the tub usually means the washer needs a careful, step-by-step check instead of a wild parts chase. A GE washer can stop draining because of hose placement, pump blockage, cycle interruption, or load imbalance. The trick is narrowing the problem without flooding the laundry room or making a small issue worse. How to fix ge washer not draining water gets much easier once each likely cause is checked in the right order.
Inspect The Standpipe And Drain Setup
The standpipe can quietly cause trouble even when the washer looks guilty. A clogged household drain may slow water so badly that the washer finishes the cycle with water still trapped inside. Watch the standpipe while the washer drains and look for water backing up, gurgling sounds, or overflow around the hose. Those signs point toward plumbing restriction, not always a bad washer pump.
The drain hose should sit securely in the standpipe without being jammed too deep. A hose shoved far down the pipe can mess with airflow and create slow drainage or siphoning issues. Keep the hose supported, but give it enough breathing room so water can move naturally. That small adjustment can stop repeated drain headaches without replacing anything.
Camper laundry setups and compact laundry corners need extra attention because space is tight and hose angles get awkward fast. A cramped setup can pinch the hose behind the machine, especially after moving the washer for cleaning. For small-space laundry planning outside a full-size GE setup, Compare smarter compact options with best mini washing machine before forcing a bulky machine into a tight corner. A good layout protects water flow, floor space, and everyday convenience.
Check the hose height too. If the drain exit sits too high, the pump may struggle to push water out with enough force. If it sits too low, water can leave the tub at the wrong time and disrupt the cycle. A correct drain setup gives the washer the best chance to finish with clean rinsing and proper spin performance.
Fix Load Problems Before Blaming Parts
A heavy, uneven load can make a GE washer act like the drain system has failed. Blankets, bath mats, jeans, and towels can bunch on one side and stop the washer from spinning fast enough. Without a strong spin, water stays trapped in fabric and makes the tub look poorly drained. Rearranging the load often solves what feels like a bigger drainage problem.
Balance matters more than stuffing in one more item to save time. Overloading blocks proper movement, strains the motor, and leaves clothes wetter than expected. A washer needs enough room for items to tumble, shift, and release water during the spin cycle. Keep loads realistic, especially with heavy cotton, bedding, and pet blankets.
Too little laundry can also confuse the spin cycle. One bulky item may never balance correctly by itself, so the washer pauses or slows down. Add a few similar-weight pieces, restart Drain & Spin, and listen for a smoother ramp-up. That simple fix can prevent unnecessary pump checks and service calls.
Detergent overload can create a second layer of trouble. Too many suds cushion the drum movement and may interfere with rinsing and draining. Use HE detergent if the machine requires it, then measure carefully instead of eyeballing the cap. Less foam often means better draining, cleaner clothes, and fewer weird cycle pauses.
Reset The Washer The Right Way
A reset can help if the washer control board gets stuck mid-cycle. Unplug the machine, wait briefly, then plug it back in and select Drain & Spin. This gives the control system a clean start without digging into mechanical parts first. A reset works best for temporary glitches, not clogs or failed pump motors.
Some GE washers respond to lid opening and closing patterns after power is restored. The exact reset behavior depends on the model, so avoid random button smashing. Pressing controls repeatedly can create more confusion if the washer is already paused or locked. A calm reset keeps troubleshooting clean and easier to track.
Pay attention to what happens after the reset. If the washer immediately starts draining, the issue may have been a cycle hiccup or load imbalance. If it hums without moving water, the pump path still needs attention. If it stays silent, inspect power supply, lid lock, and control response before assuming the pump is dead.
A reset should not become a weekly ritual. Repeated drain failures mean something physical or electrical needs real attention. Keep notes on sounds, error lights, and cycle behavior because those clues shorten the repair path. Clear patterns make GE washer troubleshooting far less frustrating.
Know When The Pump Needs Replacement
A clean hose and clear filter should let water leave the tub with steady force. If water still sits in the washer after those checks, the drain pump may be worn, jammed, or electrically weak. A failing pump can make buzzing, grinding, or strained humming sounds. Those noises often mean the motor is fighting something or losing strength.
Inspecting the pump area can reveal broken impeller fins or debris wrapped around moving parts. Hair, fabric threads, and tiny objects can lock the impeller in place. A damaged impeller may spin poorly even after the clog is removed. That weakness leaves water behind and makes the washer repeat the same slow-drain cycle.
Replacement makes sense when the pump receives power but cannot move water properly. A technician can test voltage, check the wiring harness, and confirm whether the pump is actually the problem. Guessing gets expensive fast because drain symptoms can overlap with switch, board, and hose issues. Solid diagnosis protects the budget and avoids swapping parts that were never broken.
Think about the washer’s age and repair history before buying parts. One pump replacement on an otherwise reliable machine may be reasonable. Multiple failures, rust, leaks, and control problems change the math. A practical repair decision weighs part cost, machine condition, and daily laundry needs.
Prevent Future Drainage Problems
Prevention starts with pockets. Coins, screws, hairpins, tissues, and tiny toy pieces can slide into the washer and head straight toward the drain path. Empty pockets before every load, especially work pants and kids’ clothes. That one habit protects the pump filter, drain hose, and impeller.
Monthly cleaning keeps buildup from turning into a clog. Run a washer cleaning cycle, wipe the gasket, and rinse detergent residue from the dispenser. Leave the lid or door open after laundry so trapped moisture can escape. Dryer, washer, and kitchen airflow problems can overlap in small homes, so Upgrade nearby ventilation with best affordable range hoods if cooking odors and humidity keep drifting into the laundry area.
Use mesh bags for small items that love sneaking into the drain system. Baby socks, washable pads, bra inserts, and pet items can travel farther than expected during a spin cycle. A bag keeps them contained while still letting water and detergent move through. That cheap habit can prevent pump jams and late-night cleanup drama.
Watch the first few minutes of a drain cycle after cleaning or moving the washer. A hose can shift, kink, or loosen without making much noise at first. Catching that early prevents water from backing up or pooling behind the machine. Consistent drainage depends on clear flow, balanced loads, and regular maintenance.
Avoid Mistakes That Make Draining Worse
Forcing the washer to keep running while it is full of water can stress the motor and pump. Stop the cycle if the machine sounds strained or smells hot. Unplug it before checking hoses, filters, or lower access panels. Safety beats speed every time, especially around standing water and electrical parts.
Do not pour drain cleaner into the washer tub or drain hose. Harsh chemicals can damage rubber seals, hoses, and pump components. They may also sit inside the machine if the water cannot drain, creating a bigger mess. Mechanical clearing is safer for washer-related blockages.
Skipping the simple checks wastes time and money. A kinked hose, blocked standpipe, or overloaded drum can mimic a failed pump. Start with the visible parts, then move toward internal components only when the easy fixes do not work. That order keeps troubleshooting grounded and prevents parts-swapping panic.
Keep the repair area dry as you work. Towels, a shallow pan, and slow filter opening make the job cleaner and safer. A washer that drains properly should leave clothes damp after spin, not dripping and heavy. If water keeps returning after every fix, the issue likely needs deeper pump testing, switch inspection, or professional diagnosis.


10 Best Quality Semi Automatic Washing Machine of 2026 For Leak-Free Laundry

11 Best Small Washer Machine of 2026 For Everyday Laundry

12 Best Vibration Pads For Washing Machine of 2026 To Stop Walking and Shaking

11 Best Selling Front Load Washing Machine of 2026 For Quiet Odor-Free Laundry

11 Best Washing Machine For King Size Bedding of 2026 To Prevent Cycle Errors

10 Best Small Front Loader Washing Machine of 2026 For Tight Closets

12 Best Side Load Washing Machine of 2026 For Low Vibration

11 Best Single Tub Washing Machine of 2026 For Apartments Without Hookups






