
How to Drain Water From a Broken Washer Fast

How to drain water from a broken washer turns into a stressful mess pretty quickly once the drum refuses to empty and dirty water starts sitting there like a swamp. One minute the cycle seems normal, then bam, the washer stops mid-spin and leaves gallons of water trapped inside. Sloshing clothes, musty smells, and the fear of leaking all over the laundry room can push anyone straight into panic mode. Still, draining the machine safely doesn't have to feel like wrestling a bear in a tight hallway.
Most drainage problems start with a clogged pump filter, a bent drain hose, or a washer that suddenly loses power halfway through a cycle. Water sitting too long inside the machine can create nasty odors, mildew buildup, and even damage internal parts if ignored. That's why acting quickly matters. A few careful steps, some old towels, and a shallow container usually make the process far more manageable than people expect.
Safety matters just as much as speed. Pulling hoses without disconnecting power can create unnecessary risks, especially around standing water. Slippery floors also become a headache fast, particularly in tight laundry spaces where movement already feels cramped. Keeping buckets nearby and draining slowly helps avoid the classic “water everywhere” disaster that catches so many people off guard.
Front-load and top-load washers often behave differently during a breakdown, which throws another wrench into the situation. Front-load machines usually trap water behind the door seal, while top-load models may leave water sitting deep inside the tub. Some machines hide the drain filter behind a tiny lower panel that’s easy to miss unless you know where to look. Others require lowering the drain hose manually to force gravity to do the heavy lifting.
How to drain water from a broken washer also depends on what caused the failure in the first place. A clogged filter might drain perfectly after cleaning debris out, but a damaged drain pump can keep the washer stuck until replacement parts arrive. Strange grinding sounds, humming without draining, or repeated error codes often point toward deeper mechanical trouble. Knowing the difference saves time and prevents unnecessary frustration.
Old towels become heroes during this process. Seriously, nobody regrets over-preparing once water starts pouring faster than expected. Low-profile pans, baking trays, and even large food containers can help catch water in narrow spaces where full buckets won't fit. Bit by bit, the washer empties safely without turning the laundry room into a miniature indoor pool.
Drain hose placement, pump access, and filter cleaning all play a major role in getting the machine emptied correctly. Some hoses clog with lint or small clothing items, while filters often collect coins, pet hair, and random debris that block water flow. Cleaning those areas carefully may even bring the washer back to life without expensive repairs. That little possibility alone makes the effort worthwhile.

- TAR Score9.0
TAR Score is a ranking system developed by TopAppliancesReviews.com. TAR score has no relationship or impact from any manufacturers or sales agent websites. Learn more
- BrandDrain King

- TAR Score8.8
TAR Score is a ranking system developed by TopAppliancesReviews.com. TAR score has no relationship or impact from any manufacturers or sales agent websites. Learn more
- BrandFlexiSnake
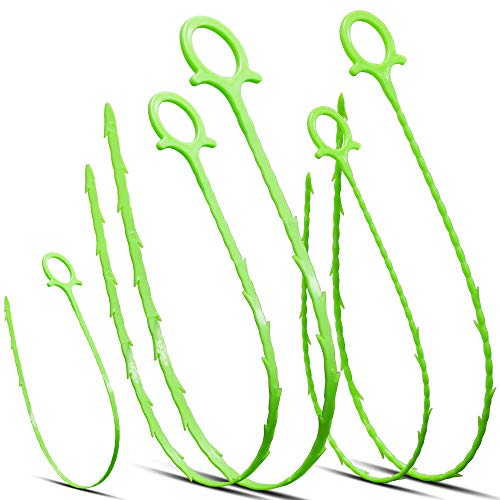
- TAR Score8.6
TAR Score is a ranking system developed by TopAppliancesReviews.com. TAR score has no relationship or impact from any manufacturers or sales agent websites. Learn more
- BrandMUSMU

- TAR Score8.4
TAR Score is a ranking system developed by TopAppliancesReviews.com. TAR score has no relationship or impact from any manufacturers or sales agent websites. Learn more
- BrandG Green Drain

- TAR Score8.4
TAR Score is a ranking system developed by TopAppliancesReviews.com. TAR score has no relationship or impact from any manufacturers or sales agent websites. Learn more
- BrandWZRAXJ
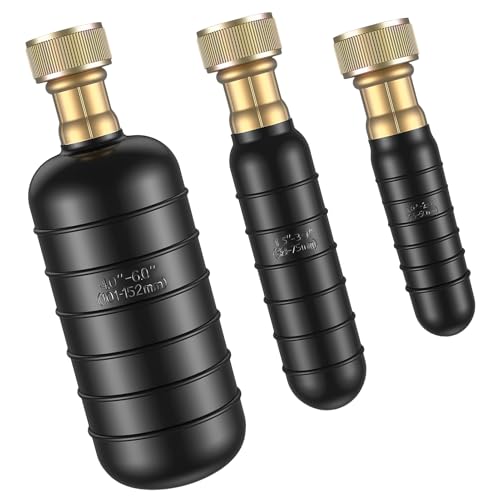
- TAR Score6.8
TAR Score is a ranking system developed by TopAppliancesReviews.com. TAR score has no relationship or impact from any manufacturers or sales agent websites. Learn more
- BrandRiomijun
Last update on 2026-06-25 / Affiliate links / Images, Product Titles, and Product Highlights from Amazon Product Advertising API
How To Drain Water From A Broken Washer
A washer that quits with water still inside can wreck the whole laundry rhythm fast. Wet clothes get heavy, the floor suddenly feels at risk, and that stale water smell doesn't take long to show up. The safer path is learning how to drain water from a broken washer without yanking hoses, forcing the lid, or turning a small mess into a bigger one. A calm setup, a few towels, and the right drain point can save the floor, the machine, and your patience.
Broken Washer Basics
Standing water usually means the washer stopped before the drain pump finished its job. That can happen from a clogged filter, a kinked hose, a failed pump, or a power interruption right before the spin cycle. The annoying part is that every washer hides its drain path a little differently. Still, the basic goal stays the same: release water slowly and keep control of where it goes.
Top-load washers often leave water sitting deep in the tub, so it may not look dangerous until the basket shifts and water sloshes around. Front-load machines can feel trickier because the door may stay locked while water is still pooled behind the glass. Forcing that door is asking for trouble. A better move is to find the drain hose, pump filter area, or emergency drain tube first.
Most washers hold more water than people expect, especially with soaked towels, jeans, or bedding inside. A wet load can act like a sponge, so even after the tub looks lower, more water may drip out as clothes settle. That’s why a shallow pan, towels, and a bucket make a solid team. Patience beats speed here, because fast draining can splash, overflow, or expose a clog too late.
A good repair habit says, “Control the water before chasing the problem.” That quote fits this job perfectly because the actual washer issue is easier to spot once the tub is empty. A blocked pump filter feels different from a dead pump, and a kinked hose is easier to notice after pressure drops. Safe draining comes before testing buttons, resetting cycles, or poking around inside the machine.
Safety Setup First
Power comes first, always. Unplug the washer before touching hoses, panels, or filter caps because water and electricity don’t play nice. Even if the washer looks dead, stored moisture around the base can create a risky situation. Keep your hands dry and move slowly, especially if the outlet sits behind the machine.
Floor prep makes the job less chaotic. Lay old towels around the washer base, slide a shallow tray near the drain access, and keep a bucket close enough to grab without stepping through water. A small mistake here can send dirty water under cabinets, trim, or flooring seams. Water control matters as much as draining speed.
Some washers sit in tight laundry closets, which makes movement awkward. Pulling the machine too hard can pinch the drain hose, loosen supply lines, or scratch flooring. Wiggle it gently only if you need more room, and avoid dragging it across soft vinyl or wood. Careful positioning helps prevent a second repair project.
A washer seal can trap grime after repeated wet loads and failed drain cycles. To reduce odor and black buildup after the water problem is handled, restore the rubber gasket with a dedicated mould remover washing machine seal solution that targets the damp seal area. This step doesn’t replace draining, but it helps clean up the mess left behind. Mildew control matters once standing water has sat too long.
Manual Drain Steps
Front-load washers often have a small access panel near the bottom front. Behind it, you may find an emergency drain tube, a pump filter cap, or both. Place a shallow pan under the tube before removing the plug because water can come out faster than expected. Let it drain in small rounds so the pan doesn’t overflow.
If there’s no emergency tube, the pump filter cap may be the only drain point. Turn it slowly, just enough to let water seep out, then tighten it again when the tray gets full. This stop-and-start method feels tedious, but it keeps dirty water from rushing across the floor. Slow draining is the difference between a controlled job and a soggy mess.
Top-load machines may drain through the main drain hose if gravity can help. Lower the hose into a bucket or floor drain, keeping the hose end below the water level inside the tub. If water flows, let it run until the bucket fills, then lift the hose to pause the flow. That simple up-and-down movement gives you control without needing tools.
Some clogs block the hose completely, so no water comes out even after lowering it. Don’t jam sharp objects into the hose because that can puncture the lining or push debris deeper. Massage the hose gently and check for bends behind the washer. Hose blockage often comes from lint, small socks, hair, or detergent sludge packed into one stubborn spot.
Compact laundry setups can make emergency draining more annoying because there’s less space for buckets and towels. For small apartments, cabins, or backup laundry areas, compare a portable washer dryer combo before replacing a bulky machine that barely fits the room. Smaller units still need drainage planning, but they can reduce the wrestling match in cramped spaces. Space limits should shape the next washer decision, not just the price tag.
Clogs And Pump Trouble
Pump filters catch the weirdest laundry leftovers. Coins, hair pins, buttons, lint clumps, pet hair, and tiny fabric pieces can jam the filter until water has nowhere to go. Once the washer is drained enough to open the filter safely, remove debris by hand and wipe the area clean. A gritty filter can make the pump hum, buzz, or stop mid-cycle.
A clogged hose acts differently from a failed pump. With a hose clog, the washer may try to drain, but water backs up or trickles slowly. With a weak pump, you might hear humming without real water movement. Sound clues help narrow the problem before parts get replaced for no good reason.
Bad odors after a drain failure can linger in the laundry room, especially if water sat inside the drum overnight. Damp lint, detergent residue, and rubber seals hold smells longer than expected. Improve the room air while cleanup is happening by placing a dyson air purifier nearby to reduce stale laundry-room odors in enclosed spaces. Odor control won’t fix the washer, but it can make the cleanup less miserable.
Watch for signs that draining alone won’t solve the issue. Repeated drain errors, grinding noises, burning smells, or water returning after a cycle reset can point to a damaged pump or blocked internal line. At that point, forcing more cycles may strain the motor. Mechanical trouble needs a calmer next step, usually inspection or replacement of the failed part.
Mess Control During The Job
Dirty washer water spreads farther than clean water because lint and soap residue make it slippery. Keep a dry towel path behind you so you don’t track moisture into the hallway or nearby room. A small plastic cup can help scoop water from a top-load tub before using the hose method. That extra step lightens the load and lowers the risk of a sudden slosh.
Heavy wet clothes should come out only after the water level drops enough to move them safely. Pulling soaked bedding from a full tub can dump water down the front of the washer. Lift items slowly and let them drip back into the drum before moving them to a sink or bathtub. Wet laundry weight can surprise your wrists, so don’t rush it.
Keep the drain area visible the whole time. If water turns dark, smells sour, or carries chunks of debris, pause and clean the tray before continuing. That mess may tell you the filter is packed or the hose has been holding old residue. Debris clues can point straight to the cause of the drain failure.
A shop towel, shallow roasting pan, and flashlight can make this job feel a lot less ridiculous. The flashlight helps you see the filter threads, drain tube plug, and any slow leaks near the base. The pan catches low water flow better than a tall bucket in tight spaces. Simple tools often beat fancy gadgets during washer emergencies.
How To Drain Water From A Broken Washer Safely
The worst part often comes after the water is finally out. The drum is lighter, sure, but now there’s a damp machine, soggy laundry, and a nagging question sitting in the room: what caused the mess in the first place? A smart follow-up keeps how to drain water from a broken washer from turning into the same headache next week. Slow checks, careful cleanup, and a few practical habits can protect the washer, the floor, and the next load of clothes.
Check The Drain Hose Path
The drain hose deserves a close look once the standing water is gone. A hose pushed too far into the standpipe can create siphoning trouble, while a tight bend behind the washer can choke the water flow. Pull the washer forward only enough to see the hose without straining the supply lines. Small bends matter because restricted water flow can make a normal cycle stall before the tub empties.
Look for crushed spots, lint buildup, or a hose end packed with residue. A washer that drains slowly may not be broken in a dramatic way at all. It may simply be fighting a clog that built up over months of detergent, pet hair, and fabric fuzz. That’s why hose inspection should happen before buying parts or assuming the pump has failed.
Height matters too. A drain hose sitting too low may let water escape at the wrong time, while one installed too high can make the pump work harder than it should. Most machines need the hose positioned within the range listed in the manual. Keeping that path clean and properly placed gives the washer a fair shot at draining without strain.
If the machine is older and keeps creating drainage drama, replacement may make more sense than another round of patchwork. Save money without gambling blindly by comparing a best second hand washing machine before dragging home the first cheap unit you see. A used washer still needs careful checking, especially around the pump, hoses, seals, and spin behavior. Second-hand value depends on condition, not just the price tag.
Clean The Filter And Tub Area
The pump filter can look innocent from the outside and still be packed with trouble. Coins, hair ties, small fabric scraps, and lint can block the filter enough to stop drainage completely. Remove debris slowly and keep a towel under the access point because leftover water may still spill out. A clean filter helps the pump move water instead of grinding against hidden junk.
After the filter is clear, wipe the filter housing and cap threads before closing everything back up. Grit on those threads can cause small leaks that show up later, usually at the worst possible time. Tighten the cap firmly, but don’t muscle it so hard that the plastic warps. A snug seal beats brute force every single time.
The drum needs attention too, especially if water sat inside overnight. Sour smells cling to damp fabric, rubber seals, and detergent film inside the tub. Run a cleaning cycle only after the washer can drain again, not while the system is still blocked. Odor cleanup works best after the drainage path is open.
Front-load washers need extra care around the door gasket. Peel the rubber fold back gently and check for trapped lint, coins, or slimy buildup. That pocket can hold moisture long after the tub looks dry. Seal maintenance reduces musty smells and helps prevent water from sitting in hidden areas.
Know What The Washer Is Telling You
Washer sounds can tell a pretty clear story if you slow down and listen. A low hum with no draining often points toward a jammed or weak pump. A gurgling sound may suggest a partial clog in the hose or standpipe. Silence after the drain cycle starts can point toward power, control board, lid switch, or door lock trouble.
Error codes can help, but they don’t always tell the whole story. A drain error may appear because the pump failed, but it can also appear because the hose is blocked or the filter is full. Treat the code like a clue, not a final answer. Good troubleshooting means checking the simple stuff before assuming the expensive stuff.
Watch how the washer behaves after a reset. If it drains once and then fails again, the problem may be intermittent or load-related. Heavy blankets, rugs, and bulky towels can throw off balance and slow the spin, leaving more water behind. Load balance matters because the washer often needs a proper spin before drainage feels complete.
Ventilation in the laundry area can also affect cleanup after a wet failure. Damp rooms hold odors longer, especially near kitchens, utility closets, or tight apartments where air barely moves. Clear cooking and laundry smells from nearby spaces by improving airflow around a frigidaire range hood if the washer sits close to the kitchen zone. Air movement won’t repair the washer, but it helps keep damp odors from settling into the room.
Prevent The Same Drain Problem
Prevention starts with better laundry habits, not fancy tools. Empty pockets before every wash because coins, screws, hair pins, and tiny toys are notorious for jamming filters. Use mesh bags for small socks, baby clothes, and delicate pieces that can sneak into the drain path. Small habits can save a pump from a ridiculous amount of abuse.
Detergent matters more than people think. Too much soap creates residue that clings to hoses, filters, and the inside of the tub. High-efficiency washers especially need the right detergent amount because extra suds can confuse sensors and slow drainage. Measured detergent keeps the machine cleaner and easier to drain.
Clean the filter on a schedule if your washer has one. Monthly checks make sense for homes with pets, heavy laundry loads, or lots of towels. A cleaner filter means the pump doesn’t have to fight through a wad of lint every cycle. Routine filter care can prevent that dreaded tub-full-of-water surprise.
Keep the washer level, too. A machine that rocks during spin can stop early, leaving clothes wetter than normal and water sitting in the tub. Adjust the feet until the washer feels stable from side to side and front to back. Stable spinning helps the drain cycle finish the way it should.
Decide Between Repair And Replacement
Repair makes sense if the washer is fairly new, the drum still spins smoothly, and the problem traces back to a clog, hose issue, or replaceable pump. A simple pump replacement can be cheaper than replacing the whole appliance. Still, parts and labor add up quickly if multiple issues appear at once. A calm cost check keeps emotion from steering the decision.
Replacement starts looking smarter when the washer has repeated drain failures, bearing noise, rust, leaks, or control problems. One drain issue is annoying. Three different failures in a short stretch is a pattern. Recurring breakdowns usually mean the washer is costing more time, water, and stress than it’s worth.
Age matters, but condition matters more. A lightly used older washer may outlast a neglected newer one, especially if the hoses, pump, and seals were cared for. Look for leaks under the machine, slow spin cycles, door lock issues, and musty smells that return after cleaning. Real condition tells the truth better than the model year alone.
Think about the laundry space before making a final call. Tight closets, weak flooring, poor ventilation, and awkward drain access can make even a good washer frustrating to maintain. A machine that fits the room, drains cleanly, and allows easy filter access will be easier to live with. Practical fit matters just as much as brand name or capacity.
Handle Wet Clothes Without Making A Bigger Mess
Soaked laundry can hold a shocking amount of water after a failed drain cycle. Lift items slowly and let them drip back into the drum before moving them anywhere else. Heavy pieces like blankets and jeans can strain your wrists if you yank them out too fast. A laundry basket lined with towels helps catch drips on the way to the sink or tub.
Don’t leave wet clothes sitting in the washer while you troubleshoot for hours. Mildew smells settle in fast, especially in warm laundry rooms. Move the clothes to a bathtub, rinse if needed, and wring smaller items by hand before drying. Fast fabric care keeps the laundry from smelling worse than the machine.
A second spin cycle may help only after the drain path is clear. Running spin while the pump is blocked can stress the machine and leave clothes just as soaked. Check the hose, filter, and drain behavior before trying another cycle. Forced spinning is not a shortcut if water has nowhere to go.
Use this moment to inspect what was inside the load. Tiny socks, loose bra wires, pet bedding, and fraying towels can all feed the clog cycle. Sorting risky items into mesh bags can prevent repeat filter jams. Load control gives the washer fewer chances to swallow something it shouldn’t.


10 Best Quality Semi Automatic Washing Machine of 2026 For Leak-Free Laundry

11 Best Small Washer Machine of 2026 For Everyday Laundry

12 Best Vibration Pads For Washing Machine of 2026 To Stop Walking and Shaking

11 Best Selling Front Load Washing Machine of 2026 For Quiet Odor-Free Laundry

11 Best Washing Machine For King Size Bedding of 2026 To Prevent Cycle Errors

10 Best Small Front Loader Washing Machine of 2026 For Tight Closets

12 Best Side Load Washing Machine of 2026 For Low Vibration

11 Best Single Tub Washing Machine of 2026 For Apartments Without Hookups






