
How To Drain LG Washer Front Or Top Load Fast

How to drain LG washer front or top load problems usually show up at the worst possible moment. One minute the laundry cycle sounds normal, then boom, the washer stops mid-spin with water sitting stubbornly inside the drum. Wet clothes feel heavier than a sack of bricks, the machine starts flashing confusing codes, and suddenly the whole laundry room smells damp and stale. Frustrating? Absolutely. But draining the washer properly can stop a small issue from turning into water damage or a burned-out pump.
LG washers handle drainage differently depending on whether the machine is front load or top load. Front-load models often hide the drain filter behind a lower access panel, while top-load machines may require checking the drain hose position or removing standing water manually. Small details matter here. A kinked hose, clogged lint trap, or blocked pump filter can stop water from moving out smoothly, even if the washer itself still powers on normally.
Standing water inside the washer creates more than just inconvenience. Musty odors settle into fabrics fast, especially after clothes sit overnight in a sealed drum. Mold buildup can also creep into rubber gaskets and hidden corners where moisture lingers. Nobody wants freshly washed towels smelling worse than before they went into the machine. Draining the washer the right way helps avoid that headache before it snowballs.
Some drainage issues happen after overloading the washer with blankets, rugs, or bulky comforters. Heavy loads strain the pump and slow water flow, leaving the machine unable to finish the cycle. Then there’s the classic forgotten coin or tiny sock jammed inside the filter housing. Weirdly enough, tiny objects create some of the biggest washer problems. A careful inspection often reveals the culprit faster than expected.
Drain hoses also deserve attention because improper placement can trigger repeated draining failures. If the hose sits too low, water may siphon out unexpectedly. If it’s shoved too deep into the standpipe, airflow gets restricted and drainage slows down. These little setup mistakes sneak past many people until water starts pooling around the machine or cycles stop halfway through.
Power interruptions can complicate things too. After storms or accidental unplugging, washers sometimes lock with water trapped inside. That situation feels stressful, especially with a full load waiting inside. Thankfully, most LG washers include manual drain options that let water flow safely before opening the door. Knowing where the emergency drain hose or filter access sits can save a ton of cleanup later.
How to drain LG washer front or top load methods don’t need fancy tools or advanced repair skills. Patience matters more than brute force. A few towels, a shallow container, and careful handling usually do the trick. Also, spotting early warning signs like slow draining, humming noises, or lingering odors can help prevent bigger mechanical repairs down the line.

- TAR Score9.6
TAR Score is a ranking system developed by TopAppliancesReviews.com. TAR score has no relationship or impact from any manufacturers or sales agent websites. Learn more
- BrandL Continue
- TAR Score9.2
TAR Score is a ranking system developed by TopAppliancesReviews.com. TAR score has no relationship or impact from any manufacturers or sales agent websites. Learn more
- BrandLG
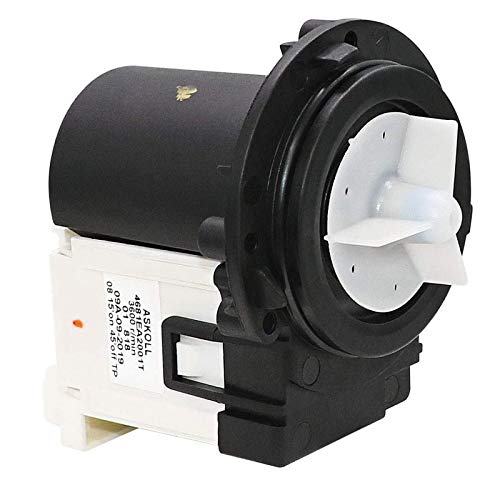
- TAR Score9.2
TAR Score is a ranking system developed by TopAppliancesReviews.com. TAR score has no relationship or impact from any manufacturers or sales agent websites. Learn more
- BrandBeaquicy

- TAR Score9.0
TAR Score is a ranking system developed by TopAppliancesReviews.com. TAR score has no relationship or impact from any manufacturers or sales agent websites. Learn more
- BrandDLHMBOQ
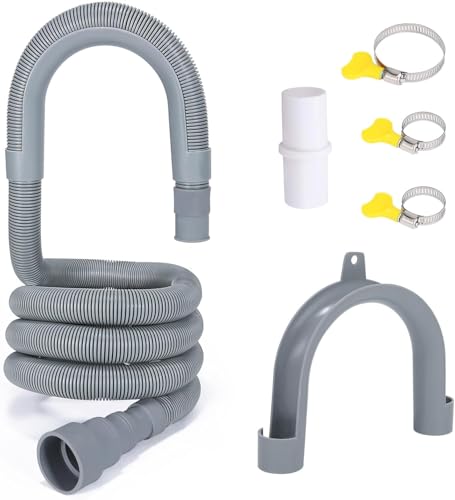
- TAR Score8.8
TAR Score is a ranking system developed by TopAppliancesReviews.com. TAR score has no relationship or impact from any manufacturers or sales agent websites. Learn more
- BrandPink Cross
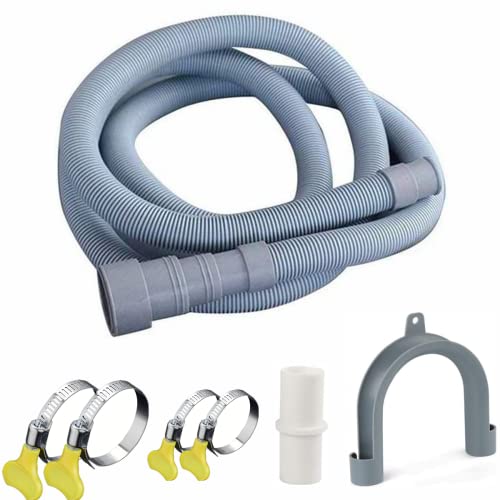
- TAR Score8.8
TAR Score is a ranking system developed by TopAppliancesReviews.com. TAR score has no relationship or impact from any manufacturers or sales agent websites. Learn more
- BrandElyfree

- TAR Score8.6
TAR Score is a ranking system developed by TopAppliancesReviews.com. TAR score has no relationship or impact from any manufacturers or sales agent websites. Learn more
- BrandJmlwlzx
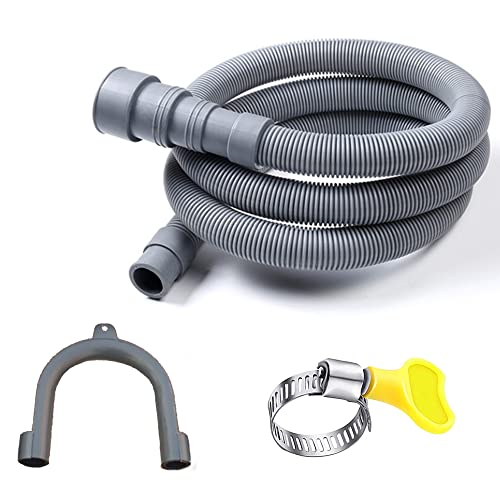
- TAR Score8.6
TAR Score is a ranking system developed by TopAppliancesReviews.com. TAR score has no relationship or impact from any manufacturers or sales agent websites. Learn more
- BrandHLMOptimo
Last update on 2026-06-03 / Affiliate links / Images, Product Titles, and Product Highlights from Amazon Product Advertising API
How To Drain LG Washer Front Or Top Load
Water sitting in the drum can turn a normal laundry day into a soggy little circus. The clothes are heavy, the door may stay locked, and the floor starts feeling like it’s one bad move away from a puddle. That’s where how to drain LG washer front or top load becomes more than a repair topic, because it’s really about stopping leaks, saving the load, and keeping the washer from straining harder than it should. A calm setup, a few towels, and a clear path to the drain point usually make the job far less dramatic.
Start With Safety And Water Control
Power comes first, no shortcuts. Unplug the washer before touching the drain hose, pump filter, or rear connections because standing water and electricity don’t belong in the same sentence. Even if the washer looks quiet, internal parts can still hold enough power to surprise you. A simple unplug saves a lot of grief and keeps the whole job grounded, literally and figuratively.
Floor prep matters more than people expect. Place thick towels around the washer, then slide a shallow pan or baking tray near the lowest drain point to catch the first rush of water. Front-load LG washers often drain slowly through a small emergency hose, while top-load LG washers may need water removed through the main drain hose or by hand. That first bit of water can come out faster than expected, so don’t wing it with one tiny towel and hope for the best.
The washer door should stay closed until the water level drops. A front-load door can spill a surprising amount if opened too soon, especially when the drum is filled past the lower seal. Door-lock patience prevents a messy wave across the laundry room. If the washer refuses to unlock, draining first usually helps the lock release once the machine senses less water inside.
Heavy soaked clothes can make the situation feel worse. Pulling them out too early can drip water across the floor, strain your back, and make the machine harder to inspect. Load weight is one reason drainage issues feel urgent, especially with towels, jeans, blankets, or pet bedding. Let the water level fall before moving laundry, and the whole process gets less clumsy.
Small laundry spaces need a little extra planning. A washer tucked in a closet or tight corner may leave barely enough room to reach the hose, which makes slow work smarter than fast tugging. For quieter routines and simpler controls in smaller homes, compare practical washer setups through best washing machine for retired couple before replacing a machine that only needs basic drain care. Access space can make the difference between a quick fix and a scratched-up floor.
Drain A Front-Load LG Washer Carefully
Most front-load LG washers hide the emergency drain area behind a small lower panel near the bottom front of the machine. Open that access panel gently, then look for a short drain hose and a round pump filter cap. Emergency draining usually starts with pulling the hose out just enough to aim it into a shallow container. Go slow here, because water may trickle at first, then suddenly pick up once the cap loosens.
The emergency hose cap should come off carefully, not with a yank. Hold the hose low, keep the container close, and empty the pan as needed before it overflows. Slow draining is normal if the hose is narrow or the washer has a lot of water trapped inside. It feels tedious, sure, but controlled draining beats mopping up a surprise lake behind the machine.
After the hose stops flowing, the pump filter usually needs attention. Twist the filter cap slowly with towels underneath because leftover water often hides in the housing. Clogged pump filters collect coins, hair pins, lint clumps, buttons, and tiny fabric scraps that sneak out of pockets. That junk can block drainage, make the pump hum, or leave the washer stuck before the spin cycle finishes.
Clean the filter without forcing it back into place. Rinse away lint, remove hard objects, and wipe the filter threads so the cap seals cleanly. Filter sealing matters because a crooked cap can drip after the next wash, and those slow leaks are sneaky little troublemakers. Once the filter sits flush, push the emergency hose back into its clip and close the access panel.
Front-load machines also hold moisture around the door gasket. After draining, wipe the rubber fold and check for socks, hair ties, pet fur, or small cloth pieces trapped near the bottom. Gasket debris can block water flow and leave a sour smell that clings to the drum. For larger households that wash bulky bedding more often, compare capacity and drainage-friendly layouts through best large front loader washing machine before blaming every issue on the pump.
The washer may need a short spin or drain cycle after manual draining. Plug the machine back in only after all caps and panels are secure, then choose a drain/spin cycle without adding detergent. Drain testing tells you whether the clog is gone or the pump still struggles. A clean cycle should move water out steadily without grinding, rattling, or stopping with the same error.
Drain A Top-Load LG Washer Without Flooding
Top-load LG washers usually don’t have the same front emergency drain hose found on many front-load models. The main drain hose at the back often becomes the easiest path for water removal. Top-load draining starts with unplugging the washer, pulling it forward carefully, and checking where the hose enters the standpipe or utility sink. Keep the hose end raised until you’re ready, because lowering it too soon can start water flow right away.
A bucket works better than a shallow tray for rear-hose draining. Lower the hose into the bucket gradually, then raise it again before the bucket fills. Gravity draining can move water quickly, especially if the tub is full, so keep your hands steady and don’t walk away mid-flow. Empty the bucket in stages until water stops coming from the hose.
Some top-load washers stop draining because the hose is kinked, crushed, or pushed too far into the standpipe. A hose jammed too deep can restrict airflow and create drainage weirdness that looks like a pump failure. Hose placement should allow water to flow freely without sealing the standpipe opening completely. That small air gap helps prevent siphoning and keeps the washer from draining at the wrong time.
If the hose won’t drain, the blockage may sit inside the hose or near the pump connection. Don’t ram a sharp object through it, because puncturing the hose creates a brand-new problem. Blockage removal should be gentle, using hand pressure, warm water, or careful hose removal if you’re comfortable with basic washer access. A wad of lint or a small clothing tag can stop flow more easily than most people think.
Manual scooping may be needed if the hose sits higher than the water level or the blockage won’t budge. Use a small plastic cup, transfer water into a bucket, and keep towels under the lid edge to catch drips. Manual water removal isn’t glamorous, but it keeps the machine lighter and safer to inspect. It also prevents soaked clothes from sitting too long and picking up that sour laundry smell.
Spot The Cause Before It Happens Again
Drainage trouble often starts before the washer fully stops. Slow spin cycles, gurgling, humming, or water left at the bottom of the drum all point toward restricted water flow. A washer that drains sometimes but not always may have a partial clog rather than a dead pump. Catching that early saves time, money, and one very annoying wet-load rescue mission.
Overloading is a sneaky culprit. Bulky comforters, thick towels, and rugs can trap water and throw off the machine’s balance, which may stop the spin cycle before water leaves completely. Load balance matters because the washer needs enough movement to extract water without shaking itself silly. Splitting heavy items into smaller loads often fixes repeat drainage headaches without touching a single part.
Detergent habits can also cause drainage drama. Too much soap creates extra suds, and those suds can confuse sensors or slow the pump’s ability to move water. HE detergent should be used in the right amount, especially in LG high-efficiency washers. More soap doesn’t mean cleaner clothes, and honestly, it often leaves behind residue that makes the washer smell worse.
Pockets deserve a quick check before every load. Coins, tissues, nails, hair clips, and tiny toy pieces can slip into the drain path and lodge in the filter or pump. Pocket debris is one of those boring little habits that pays off big time. A five-second pocket check can prevent a half-hour drain job later.
Laundry rooms with poor airflow can make wet-washer smells linger after a drainage issue. Damp towels, humid corners, and detergent residue create a stale pocket of air that sticks around. To reduce smoke odors and other trapped household smells near compact laundry areas, improve nearby air movement with best portable air purifier for smoke as a separate comfort upgrade. Air quality won’t fix a clogged washer, but it can make cleanup days feel less stale and stuffy.
A repeated drain error after cleaning the hose and filter may point to the pump, lid switch, pressure sensor, or wiring. That’s the point where guessing gets risky. Recurring drain failure deserves careful troubleshooting or professional service, especially if the pump hums without moving water or the machine trips mid-cycle. Fixing the real cause beats draining the washer by hand every other weekend.
Clean The Drain Filter Before It Turns Nasty
A drain filter can look harmless until it’s packed with lint, grit, hair, and mystery crumbs from old pockets. Filter buildup slows water movement, makes the pump work harder, and can leave the washer sitting there with a tub full of water. That little access point on many LG front-load washers deserves more attention than it gets. Skip it for too long, and the machine may start acting like the drain pump has given up.
Start with towels, a shallow container, and a patient hand. Turn the filter cap slowly because leftover water often hides behind it even after the emergency hose stops dripping. A sudden twist can send dirty water across the floor, and nobody needs that kind of surprise. Slow, steady movement keeps the mess controlled and gives you time to catch the water.
Hard water can make washer residue worse over time. Minerals may cling to detergent film, hoses, and hidden drain areas, especially in homes where towels feel stiff or soap never rinses cleanly. To reduce buildup around laundry equipment, compare a water softener washing machine setup that fits your home’s plumbing and washing habits. Cleaner water flow can support better rinsing, though it won’t remove an existing clog by itself.
After removing the filter, rinse it well and check inside the housing with a flashlight. Small objects like coins, bra wires, toothpicks, and hair clips can sit just beyond the cap where fingers barely reach. Don’t jab around with sharp tools because pump parts can crack or seals can tear. A careful wipe and gentle removal usually beat brute force.
Put the filter back firmly, but don’t over-tighten it like a jar lid in a panic. Thread alignment matters because a crooked filter cap can leak during the next wash. Wipe the surrounding area dry so any future drip is easier to spot. Then run a short drain or rinse cycle to confirm the washer moves water without rattling, buzzing, or stopping early.
Check The Drain Hose And Standpipe Setup
The drain hose may be the quiet troublemaker behind repeated washer drainage issues. A crushed hose behind the machine can stop water flow even if the pump is perfectly fine. Hose position matters because the washer needs a clear path from the tub to the standpipe or sink. Pull the machine forward gently and look for bends, pinch points, or heavy objects pressing against the hose.
A hose shoved too far into the standpipe can create airflow problems. The washer needs enough space around the hose opening to let water move without sealing the pipe like a cork. Air gap control helps prevent siphoning, slow draining, and odd cycle behavior. If the hose disappears deep into the pipe, adjust it carefully and secure it without blocking ventilation.
Height also matters. A drain hose that sits too low may let water leave the washer at the wrong time, while one placed too high can make the pump strain. Proper drain height depends on the washer design and installation guide, so guessing isn’t the best move. The goal is simple: water should leave during the drain cycle, not trickle away randomly or sit trapped inside.
Clogs inside the hose can feel sneaky because the outside may look normal. Lint, pet hair, softener residue, and small fabric scraps can collect near bends or hose ends. Restricted drainage often shows up as slow emptying, humming, or water returning after a partial drain. If the hose feels heavy or uneven, disconnecting and flushing it may reveal the blockage.
Outdoor laundry sheds, garages, and utility rooms can also bring power and airflow quirks into the picture. Separately, for homes exploring small off-grid power ideas away from the washer itself, a mini wind turbine may fit certain low-demand setups better than large appliances. Washer drainage still needs proper plumbing first, since pumps rely on stable power and a clear drain path.
Use The Right Cycle After Manual Draining
Manual draining solves the immediate mess, but the washer still needs a simple test afterward. Choose a drain and spin cycle with no extra detergent and no bulky laundry inside. Cycle testing shows whether the water path is clear or the machine is still fighting a blockage. A smooth drain should sound steady, not like a strained hum followed by silence.
Don’t rush to run a full load right away. A short test protects the washer from another heavy, waterlogged cycle and gives you a cleaner read on the problem. Empty-drum testing removes load balance from the equation, so you can focus on the pump, hose, filter, and control response. If the washer drains empty but struggles with blankets, the issue may be load size rather than a failing part.
Listen closely during the drain stage. A normal pump has a consistent working sound, while grinding, clicking, or buzzing can point toward debris or pump wear. Pump noise deserves attention because small items can damage the impeller if they keep spinning around inside. Stop the cycle if the noise sounds harsh or metallic instead of letting the machine push through it.
Error codes can help, but they don’t tell the whole story. A drain-related code may appear because water didn’t leave fast enough, not because the pump is automatically dead. Error-code context matters, especially after overloading, excess suds, or a kinked hose. Check the simple stuff first before assuming the most expensive part failed.
Once the test cycle finishes, inspect the floor, filter door, hose connections, and standpipe area. Leak checks catch loose caps and hose drips before the next real wash. Even a small wet spot deserves a second look because vibration can make tiny leaks worse. Dry surfaces make future problems easier to catch fast.
Prevent Drain Problems During Regular Laundry
Good washer habits aren’t fancy, but they save a lot of hassle. Keep loads balanced, leave enough room for clothes to move, and avoid packing towels or bedding until the drum looks stuffed. Balanced laundry loads help the washer spin properly, which makes draining easier and reduces strain on the pump. A washer that can’t spin well often can’t remove water well either.
Detergent amount can make or break drainage performance. Too much soap creates thick suds that cling to fabric, confuse sensors, and slow water removal. Low-suds HE detergent works best in LG high-efficiency washers because it rinses cleaner and leaves less residue behind. More detergent may feel safer, but it usually creates a sticky mess the washer has to fight later.
Keep pockets boring. That means no coins, nails, receipts, gum wrappers, hair clips, or tiny toys sneaking into the drum. Pocket checks sound like a nagging chore until one forgotten object blocks the pump filter. A quick shake before loading can prevent the classic washer-drain panic.
Leave the washer door or lid open after wet loads whenever the space allows. Moisture trapped inside the drum encourages odors, mildew, and residue along seals. Air drying helps the machine stay fresher between loads and makes small drainage problems easier to notice. A dry gasket also reveals lint, pet hair, and trapped fabric pieces more clearly.
Set a simple filter-check routine if the washer handles pet bedding, baby clothes, work uniforms, or sandy towels. Those loads carry more debris than regular shirts and socks. Routine maintenance doesn’t need to be dramatic, just consistent enough to stop buildup before water gets trapped. Clean parts drain better, and clean drainage keeps laundry day from turning into a mop-and-bucket situation.
Know When The Drain Pump Needs Help
A washer that still won’t drain after filter and hose cleaning may have a deeper issue. The pump could be jammed, weakened, or unable to move water under load. Drain pump failure often shows up as humming without flow, repeated stopping, or water staying put after every drain cycle. At that point, repeated manual draining only treats the symptom.
Burning smells, loud grinding, or electrical clicking should not be ignored. Those signs may point to a stuck impeller, failing motor, or wiring issue near the pump assembly. Electrical safety matters here, so unplug the washer and avoid poking around live components. A repair visit costs less than turning a drainage problem into a larger electrical headache.
Age and usage also affect the decision. A washer used daily for large family loads will wear parts faster than a machine used a few times a week. Repair value depends on the washer’s condition, past problems, and whether the drum, controls, and motor still behave normally. A single clogged filter is no big deal, but repeated pump strain tells a different story.
Professional help makes sense if the washer drains only after being tilted, reset, or unplugged repeatedly. Those workarounds may buy time, but they don’t fix the cause. Reliable drainage should happen during the cycle without babysitting the machine. If every load feels like a gamble, the washer needs a proper diagnosis.
Keep notes before calling for service. Write down error codes, sounds, load types, water level, and whether the drain hose or filter was already cleaned. Clear troubleshooting details help narrow the problem faster and may prevent unnecessary part swapping. The more specific the symptoms, the easier it is to separate a simple clog from a worn pump or sensor issue.


10 Best Quality Semi Automatic Washing Machine of 2026 For Leak-Free Laundry

11 Best Small Washer Machine of 2026 For Everyday Laundry

12 Best Vibration Pads For Washing Machine of 2026 To Stop Walking and Shaking

11 Best Selling Front Load Washing Machine of 2026 For Quiet Odor-Free Laundry

11 Best Washing Machine For King Size Bedding of 2026 To Prevent Cycle Errors

10 Best Small Front Loader Washing Machine of 2026 For Tight Closets

12 Best Side Load Washing Machine of 2026 For Low Vibration

11 Best Single Tub Washing Machine of 2026 For Apartments Without Hookups






