
How To Drain A Washer That Won’t Drain Properly Fast

How To Drain A Washer That Won’t Drain Properly turns into a real headache once that tub fills with murky water and refuses to budge. Wet clothes start smelling funky, the laundry room feels like a swamp, and suddenly a simple wash cycle spirals into an all-day annoyance. Plenty of people panic and assume the machine’s completely shot, but honestly, clogged filters, kinked hoses, or jammed pumps usually sit at the heart of the problem. A little patience and a few practical steps can often save both money and frustration.
Standing water inside a washer rarely shows up out of nowhere. Small warning signs usually creep in first. Slow draining cycles, odd humming noises, or leftover water around the drum often point toward a blockage building over time. Coins, lint, pet hair, and even tiny socks love sneaking into drain systems, creating stubborn clogs that choke water flow. Ignoring those signs tends to make things uglier later, especially once overflow or leaking enters the picture.
Drain hose issues also cause more trouble than people expect. A hose pushed too far into the wall drain can create siphoning problems, while sharp bends restrict water movement like a pinched garden hose. Some washers even stop mid-cycle because sensors detect drainage trouble before a flood starts. That safety feature sounds helpful until you’re standing ankle-deep in laundry stress wondering why the machine suddenly quit. Thankfully, checking the hose takes only a few minutes and often reveals the culprit fast.
Then there’s the drain pump. Yep, that little component works hard every single wash day. Hairpins, buttons, lint buildup, and random debris can jam the pump impeller, stopping water from leaving the drum properly. A washer may buzz loudly yet refuse to drain because the motor tries spinning against an obstruction. Cleaning the filter and inspecting the pump area carefully can restore normal operation without jumping straight into expensive repairs.
How To Drain A Washer That Won’t Drain Properly also depends on staying calm during the messy part. Towels, shallow pans, and a bucket become lifesavers once water starts pouring from the drain hose or filter opening. Rushing the process usually creates slippery floors and soggy chaos. Slow, controlled draining helps prevent damage around the laundry area while giving better visibility into what’s actually causing the issue.
Front-load and top-load washers behave differently too, which catches many people off guard. Front-load machines often hide drain filters behind lower access panels, while top-load models may require hose draining or manual bailing first. Knowing where your washer stores the filter or pump access point cuts down guesswork dramatically. Little details like this save time and prevent unnecessary dismantling.
Maintenance habits make a massive difference once the washer starts working again. Cleaning pockets before washing, avoiding excessive detergent, and flushing the drain filter regularly can reduce future clogs. Funny enough, tiny habits prevent huge messes later. Laundry feels routine until the washer suddenly refuses to cooperate, so keeping drainage components clean helps avoid another round of standing water drama.

- TAR Score10.0
TAR Score is a ranking system developed by TopAppliancesReviews.com. TAR score has no relationship or impact from any manufacturers or sales agent websites. Learn more
- BrandOcevia

- TAR Score8.8
TAR Score is a ranking system developed by TopAppliancesReviews.com. TAR score has no relationship or impact from any manufacturers or sales agent websites. Learn more
- BrandDrain King
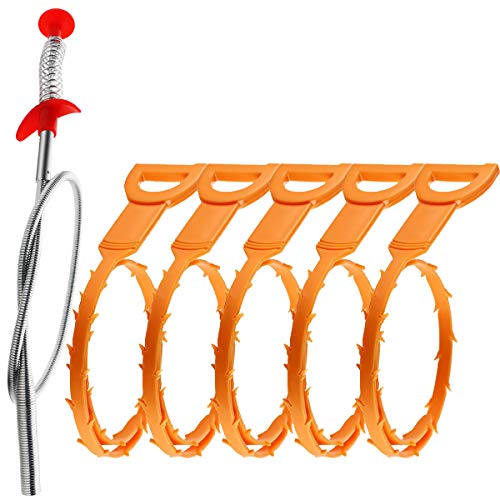
- TAR Score8.6
TAR Score is a ranking system developed by TopAppliancesReviews.com. TAR score has no relationship or impact from any manufacturers or sales agent websites. Learn more
- BrandOmont

- TAR Score8.6
TAR Score is a ranking system developed by TopAppliancesReviews.com. TAR score has no relationship or impact from any manufacturers or sales agent websites. Learn more
- BrandASDICOXB

- TAR Score8.6
TAR Score is a ranking system developed by TopAppliancesReviews.com. TAR score has no relationship or impact from any manufacturers or sales agent websites. Learn more
- BrandDrain King

- TAR Score8.4
TAR Score is a ranking system developed by TopAppliancesReviews.com. TAR score has no relationship or impact from any manufacturers or sales agent websites. Learn more
- BrandOcimcia

- TAR Score6.4
TAR Score is a ranking system developed by TopAppliancesReviews.com. TAR score has no relationship or impact from any manufacturers or sales agent websites. Learn more
- Brandgzpynsgaoh
Last update on 2026-06-25 / Affiliate links / Images, Product Titles, and Product Highlights from Amazon Product Advertising API
How To Drain A Washer That Won’t Drain Properly
A tub full of gray water can turn a normal laundry day into a slippery little nightmare. Wet towels sit heavy, the washer smells sour, and the floor suddenly feels one bad move away from a puddle. The good news is that how to drain a washer that won’t drain properly usually starts with simple checks, not panic-buying a new machine. A careful approach protects the laundry room floor, keeps the washer from taking extra damage, and helps you spot the real blockage before it gets worse.
Start With The Messy Reality
Standing washer water looks dramatic, but it often points to a basic drainage problem hiding in plain sight. A clogged hose, blocked filter, or jammed pump can stop water from moving even while the washer still powers on. That’s why the first move should be slowing down, grabbing towels, and making the area safe. Rushing usually turns a drain problem into a floor-cleaning marathon.
Unplugging the washer matters before anything else. Water and electricity don’t play nice, and a powered machine can still try to run while you’re handling hoses or panels. Keep a bucket, shallow pan, and old towels nearby because trapped water tends to come out faster than expected. Small prep work saves a surprising amount of cleanup later.
A washer that won’t drain may also lock the door, especially on front-load models. That lock protects against spills, but it can make the situation feel worse. Avoid forcing the door because a broken latch adds another repair to the pile. Let the manual drain process lower the water level first, then open the machine safely once the pressure is gone.
Smell is another clue worth noticing. Sour, swampy, or mildew-like odors often mean water has been sitting inside the washer longer than it should. After draining, clean the drum and gasket so the problem doesn’t leave behind a stink. For odor cleanup after the water is out, refresh the drum with a targeted option like washing machine cleaner bad smells to help cut that stale laundry-room funk.
Check The Drain Hose First
The drain hose is the simplest place to start because it sits outside the washer and causes plenty of headaches. A sharp bend can restrict water flow the same way a kinked garden hose slows water in the yard. Push the washer forward gently and inspect the hose from the back of the machine to the wall drain. A crushed, twisted, or stretched hose can make the washer act like the pump has failed.
Height also matters more than many people expect. A hose sitting too low may cause siphoning, while a hose shoved too far into the standpipe can create draining trouble. Most washers need the hose positioned securely without being jammed deep into the drain opening. That setup helps the washer drain system move water out without fighting air pressure or backflow.
Clogs can build inside the hose too. Lint, coins, pet hair, loose threads, and detergent residue can form a nasty plug over time. Disconnecting the hose carefully and draining it into a bucket can reveal whether water flows freely. Slow flow means the hose needs flushing, cleaning, or replacement before the washer can drain properly again.
Leaks around the hose connection tell their own story. A loose clamp or cracked hose can create damp spots behind the machine without making a big scene at first. That hidden moisture may feed mold around walls, baseboards, or flooring. If the laundry area already smells damp after a drain backup, reduce lingering moisture with a related support tool like air purifier for mould while fixing the water source.
Use The Manual Drain Filter
Many front-load washers have a manual drain filter tucked behind a small lower access panel. That little door looks harmless, but it can hold the answer to a washer full of water. Place towels under the panel and keep a shallow pan ready before opening anything. Water may trickle out slowly or rush out in waves, depending on how much is trapped inside.
The small drain tube, if your model has one, makes the job cleaner. Pull the tube out gently, remove the cap, and let water drain into a pan or bucket in controlled rounds. Empty the pan often so it doesn’t overflow and create another mess. This slower method keeps washer drainage manageable, especially in tight laundry closets.
After the water slows, twist out the filter carefully. Expect lint, hair, grit, coins, and mystery debris because washers collect odd stuff over time. Clean the filter under running water and wipe the filter housing with a cloth. A blocked filter can stop the washer from draining even if the pump itself still works.
Some top-load washers don’t offer an easy front filter, so the process may involve the drain hose instead. Bail out excess water from the tub first if needed, then lower the drain hose into a bucket. Gravity can help pull water out once the hose sits below the tub level. This step keeps manual draining safer and less chaotic before deeper inspection.
Listen For Pump Clues
The drain pump usually gives hints before it quits completely. A low hum with no water movement often means the pump is trying to work but something is blocking the impeller. A harsh grinding sound may point to coins, hairpins, or broken plastic caught inside the pump area. Silence, on the other hand, can suggest a power, control, or pump motor issue.
Don’t keep forcing drain cycles if the pump sounds strained. Running a blocked pump again and again can overheat the motor or damage internal parts. Clear the filter first, inspect the hose, then try a short drain or spin cycle only after obvious debris is removed. That order protects the pump assembly from extra stress.
Small objects cause big trouble here. A single coin can rattle around, block the impeller, and make the washer fail at the exact moment clothes are soaked. Hair ties, bra wires, buttons, and pocket junk are common offenders. Checking pockets sounds boring, sure, but it’s one of the easiest ways to prevent another washer won’t drain episode.
Replacement becomes more likely if the pump makes no sound after cleaning, receives power, and still refuses to move water. That’s the point where repair skill, model design, and part cost matter. A handy person may replace a pump, but some compact laundry setups make access cramped and annoying. For repeated failures or aging machines, compare a more practical laundry upgrade with best wash dryer machine before sinking too much into repairs.
Look At Load Size And Detergent
Overloading the washer can trigger drain trouble even without a hard clog. Heavy towels, bedding, or soaked jeans can trap water and throw the drum off balance. The machine may stop before draining fully because the spin cycle can’t stabilize the load. Pulling out a few items and running drain and spin again can sometimes solve the issue fast.
Too much detergent creates another sneaky problem. Excess suds confuse sensors, slow water movement, and leave residue that catches lint inside hoses and filters. High-efficiency washers need low-sudsing detergent measured carefully, not poured by guesswork. Less soap often means cleaner rinsing and fewer drainage blockages over time.
Fabric type changes the drainage feel too. Thick bath mats, fleece blankets, and pet bedding shed lint that builds up inside the system. Washing those items separately with a lighter load reduces strain on the pump and improves spin performance. The washer doesn’t have to wrestle a soggy brick of laundry before sending water out.
A practical rule helps here: leave enough room for laundry to tumble, not just fit. Packed clothes may look efficient, but they can block water movement and punish the motor. Smaller loads use a little more patience, but they protect the drain pump, bearings, and suspension. That tradeoff beats dragging dripping clothes into a bathtub because the washer gave up mid-cycle.
Reset Error Codes The Smart Way
Modern washers often show drain error codes before the problem becomes obvious. Codes vary by brand, but they commonly point toward slow draining, pump trouble, or water level sensor confusion. Write the code down before unplugging the machine because that clue may disappear after a reset. A saved code makes troubleshooting sharper and less like guessing in the dark.
Resetting can help after clearing a clog, but it shouldn’t be the first and only fix. Unplug the washer for a few minutes, plug it back in, then run a drain or spin cycle after checking the hose and filter. If water moves normally, the machine may return to regular operation. If the same drain warning comes back, the blockage or failed part probably still exists.
Door locks may also reset once the water level drops. Front-load washers usually keep the door locked until sensors confirm safe conditions. Give the machine a little time after draining instead of yanking on the handle. Breaking the latch turns a drainage issue into a door repair, and nobody needs that extra headache.
Repeated codes deserve more attention. A washer that drains once and fails again may have a partial clog, weak pump, blocked pressure hose, or control problem. Track what happened before each failure, including load type, detergent amount, and sounds during draining. Those details make the next move clearer and help avoid replacing the wrong washer part.
How To Drain A Washer That Won’t Drain Properly Safely
A washer that finally spits out the trapped water can feel like a win, but the job isn’t really done yet. The next step is figuring out why the backup happened, because how to drain a washer that won’t drain properly is only useful if the same mess doesn’t show up again next week. Slow draining, sour smells, and soggy clothes usually point toward habits, buildup, or hidden restrictions inside the machine. Fix the cause, not just the puddle, and the laundry room gets a whole lot less dramatic.
Clean The Washer After Draining
Once the water is out, washer cleaning should happen before another full load goes in. Dirty water leaves residue inside the drum, gasket, filter area, and drain path. That leftover film can smell rough, especially after towels or workout clothes have been sitting wet. A clean drum helps remove the musty layer that keeps making clothes smell off even after washing.
Front-load washers need extra attention around the rubber door gasket. Lint, hair, detergent sludge, and tiny fabric scraps often hide in the folds. Wipe the gasket slowly and check the lower edge where water tends to sit. That simple habit supports better drainage and keeps mildew from settling into the damp spots.
Top-load washers can trap grime below the wash plate or around the upper tub ring. Warm water, a cleaning cycle, and a careful wipe-down help loosen residue after a drain problem. Avoid dumping in random household cleaners because some can foam too much or damage rubber parts. The safest path is sticking with washer-safe products and regular maintenance.
Detergent choice matters here too. Semi-automatic machines can struggle with excess suds, especially if the drain path already has lint buildup. To reduce residue after heavy wash days, use the right soap style and compare detergent for semi automatic washing machine if your setup needs better rinse behavior. Less leftover foam means fewer sticky deposits inside the drain system.
Inspect The Standpipe And Sink Drain
The washer may not be the only guilty party. A clogged standpipe, laundry sink, or shared household drain can make a healthy washer look broken. If water backs up from the wall drain while the machine pumps, the blockage sits outside the washer. That’s a plumbing issue, not a pump issue, and treating it correctly saves a lot of wasted effort.
Watch the standpipe during a short drain cycle. Water should move down quickly without gurgling, overflowing, or bubbling back up. Slow movement suggests lint, soap residue, or debris has narrowed the pipe. A restricted drain line can cause repeat washer backups even after the hose and filter are spotless.
Laundry sinks can reveal the same trouble. If the washer drains into a sink and the sink fills faster than it empties, the sink drain needs attention. Strainers, trap bends, and old buildup can slow the flow enough to flood the basin. Cleaning that path gives the washer somewhere to send water without fighting pressure.
Call a plumber if the drain keeps backing up after basic clearing. Chemical drain cleaners can damage pipes, splash back, or react badly with standing water. A mechanical cleaning may be the safer route for stubborn blockages. Protecting the home drain system matters because repeated overflow can damage flooring, cabinets, and drywall.
Prevent Water From Coming Back
Backflow is sneaky because the washer can drain properly, then water returns later. A poorly positioned hose, clogged standpipe, or missing air gap can pull dirty water back into the tub. That creates wet clothes, strange odors, and confusion because the machine seemed fine at first. Correct hose placement protects the washer drain cycle from this annoying repeat problem.
The hose should sit securely without being sealed airtight into the standpipe. Air needs room to move so water can drain without creating suction problems. A hose shoved too deep can cause siphoning or slow drainage. A hose barely hanging on can jump loose and flood the floor, which is its own brand of chaos.
Check the hose height against the washer manual if drain trouble keeps returning. Most machines have a recommended range for proper water movement. Too low, and the washer may drain at the wrong time. Too high, and the pump has to work harder than it should, adding strain to an already tired drain pump.
Nearby moisture can also confuse the bigger picture. Laundry rooms with poor airflow hold damp smells long after the washer is fixed. Kitchen or utility-area ventilation sometimes plays a role in overall indoor moisture, and for separate airflow concerns, compare a practical option like broan allure range hood where cooking humidity and lingering odors need better control. Moisture management isn’t glamorous, but it keeps rooms from feeling stale.
Know When The Pump Needs Repair
A clean filter and clear hose should make a noticeable difference. If the washer still won’t drain, the pump motor may be weak, stuck, or dead. A pump can hum without moving water, especially after debris has stressed it for a while. That sound often means the machine is trying, but the part no longer has enough strength to push water out.
Burning smells, repeated error codes, and hot pump housing are warning signs. Stop running drain cycles if the washer sounds strained or smells electrical. Continuing to force it can turn a small repair into a bigger one. Safety comes first, especially around water, wiring, and motor parts.
Some pump repairs are fairly direct on machines with easy access panels. Other washers hide the pump behind tight panels, sharp brackets, or stacked laundry setups. A repair may still make sense if the washer is newer and the rest of the machine runs well. Older machines with repeated faults may not deserve another round of parts, labor, and frustration.
Ask for the exact pump cost before approving repair work. Labor, part price, and service fees can climb quickly, especially on compact or stacked models. Compare that number against the machine’s age, past problems, and daily laundry needs. A practical decision beats throwing money at a washer that keeps fighting back.
Build Better Laundry Habits
Drain problems often start with tiny habits that feel harmless. Overfilled loads, loose pocket items, and too much detergent slowly punish the washer. The machine may handle it for months, then suddenly stop mid-cycle with water sitting in the tub. Small changes make the drain system’s life easier.
Check pockets before every wash, even if it feels fussy. Coins, screws, tissues, and hair clips can travel into the filter or pump. One forgotten item can block the impeller and leave a load trapped in dirty water. That thirty-second pocket check protects the washer pump better than most people realize.
Use less detergent than the cap suggests if clothes still rinse clean. Many caps encourage overpouring, and extra soap leaves sticky residue behind. That residue catches lint, slows drainage, and feeds odor. Measured detergent keeps the wash cleaner and the drain path clearer.
Give bulky items room to move. Bedding, bath mats, and thick towels soak up water and strain the spin cycle. Wash them in smaller loads so water can escape evenly. The washer drains better when it isn’t wrestling a heavy, lopsided bundle.
Protect The Laundry Room Floor
A washer that won’t drain can damage more than clothes. Water sneaks under baseboards, vinyl seams, laminate edges, and storage cabinets. Once moisture gets trapped, odors and swelling can show up later. Fast cleanup protects the flooring and walls from hidden damage.
Keep a few old towels near the laundry area if drain trouble has happened before. A shallow pan and small bucket also make manual draining less stressful. This setup sounds basic, but it stops water from spreading while you work. Prepared tools turn a panic moment into a controlled fix.
Watch for soft spots or musty smells after a spill. Damp flooring can hide problems below the surface, especially in tight laundry closets. A fan and open door help dry the area faster. Good airflow supports mold prevention after any washer overflow.
Don’t push the washer tightly back against the wall after the repair. Leave enough space so the hose doesn’t kink again. Check behind the machine after the next full wash to confirm everything stays dry. That final look catches leaks before they become expensive surprises.
Test The Washer Before Trusting It Again
After cleaning and draining, run a small test cycle before loading the washer with a full basket. Use a few towels or no clothes, depending on the machine’s instructions. Watch the fill, agitate, drain, and spin stages closely. A successful test confirms the drainage problem is actually fixed, not just temporarily quiet.
Listen during the drain stage. Smooth water movement and normal pump sounds are good signs. Gurgling, buzzing, grinding, or repeated stopping means more checking is needed. The washer should move water out steadily without shaking like it’s about to walk across the room.
Check the drain hose and floor after the test cycle. Look for dripping at the hose clamp, water around the standpipe, and dampness under the washer. Even a tiny leak deserves attention because vibration can make it worse over time. Dry connections support safe washer operation during heavier loads.
Run one normal load only after the test looks clean. Keep that first load moderate instead of stuffing the drum to the brim. If the washer drains well, the repair likely solved the immediate issue. If water stays behind again, the next suspect is usually the pump, pressure system, or household drain line.


10 Best Quality Semi Automatic Washing Machine of 2026 For Leak-Free Laundry

11 Best Small Washer Machine of 2026 For Everyday Laundry

12 Best Vibration Pads For Washing Machine of 2026 To Stop Walking and Shaking

11 Best Selling Front Load Washing Machine of 2026 For Quiet Odor-Free Laundry

11 Best Washing Machine For King Size Bedding of 2026 To Prevent Cycle Errors

10 Best Small Front Loader Washing Machine of 2026 For Tight Closets

12 Best Side Load Washing Machine of 2026 For Low Vibration

11 Best Single Tub Washing Machine of 2026 For Apartments Without Hookups






