
How to Drain a Washer Before Moving It Safely

How to drain a washer before moving it sounds simple until dirty water starts pouring across the laundry room floor. One minute the machine looks ready to go, then suddenly the drain hose spits out leftover water like a garden hose with attitude. That mess catches plenty of people off guard, especially during a stressful move where every little delay feels twice as annoying. A few careful steps can prevent soaked towels, slippery floors, and that awful smell trapped inside a washer that sat too long with hidden moisture.
Most washing machines hold more leftover water than people expect. Even after the final spin cycle, water often lingers inside the drain pump, hoses, and lower drum area. That trapped moisture can leak into moving trucks, stain floors, or create mildew odors that hit hard the next time the washer gets plugged in. Proper draining helps avoid those headaches while also protecting sensitive internal parts from damage during transport.
Front-load and top-load machines each come with their own little quirks. Some models hide the drain filter behind a small lower panel, while others rely heavily on gravity draining through the hose. Pulling the washer away from the wall too fast can kink hoses or spill water unexpectedly. Slow, steady preparation matters more than brute force here, and honestly, rushing this step usually backfires.
Another thing people rarely think about is leftover detergent sludge. Washing machines quietly collect residue over time, especially near the drain system and rubber seals. During a move, that buildup can shift around and release unpleasant odors once the washer gets tilted or bumped around. Cleaning and draining the machine together creates a smoother setup once everything arrives at the new place.
Heavy appliances already make moving day chaotic enough. Nobody wants to wrestle a washer while water drips across hardwood floors or cardboard boxes start absorbing moisture nearby. A drained washer becomes lighter, cleaner, and much safer to handle. Even better, movers usually appreciate appliances that aren't secretly carrying hidden water weight inside the drum and hoses.
Cold weather creates another layer of trouble. Water trapped inside hoses or pumps can freeze during transport, especially during overnight moves or long-distance trips. Frozen moisture expands and may crack internal parts before the washer even reaches its new home. Removing excess water lowers that risk and helps the appliance stay in better shape for the long haul.
Small preparation steps often save the biggest headaches later. Towels, shallow pans, and patience usually matter more than fancy tools. Once the washer drains completely, disconnecting hoses and securing loose parts becomes far less stressful. That extra effort upfront keeps moving day from turning into a soggy circus halfway through loading the truck.
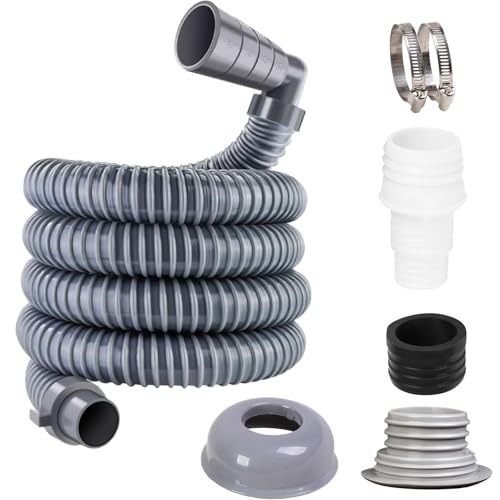
- TAR Score9.4
TAR Score is a ranking system developed by TopAppliancesReviews.com. TAR score has no relationship or impact from any manufacturers or sales agent websites. Learn more
- BrandAotuse

- TAR Score9.2
TAR Score is a ranking system developed by TopAppliancesReviews.com. TAR score has no relationship or impact from any manufacturers or sales agent websites. Learn more
- Brandla beauté intérieure

- TAR Score9.0
TAR Score is a ranking system developed by TopAppliancesReviews.com. TAR score has no relationship or impact from any manufacturers or sales agent websites. Learn more
- BrandMAREKINEKO
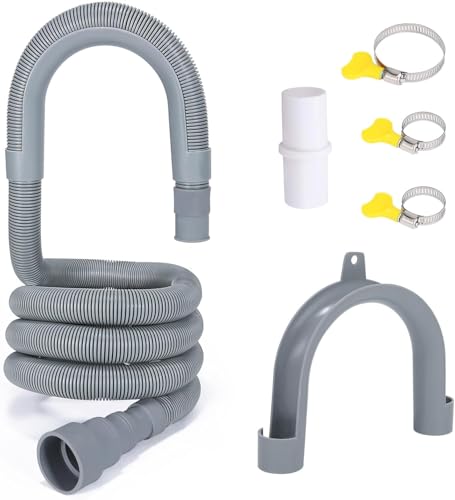
- TAR Score9.0
TAR Score is a ranking system developed by TopAppliancesReviews.com. TAR score has no relationship or impact from any manufacturers or sales agent websites. Learn more
- BrandPink Cross

- TAR Score9.0
TAR Score is a ranking system developed by TopAppliancesReviews.com. TAR score has no relationship or impact from any manufacturers or sales agent websites. Learn more
- BrandSDLDEER

- TAR Score8.6
TAR Score is a ranking system developed by TopAppliancesReviews.com. TAR score has no relationship or impact from any manufacturers or sales agent websites. Learn more
- BrandLYMGS

- TAR Score8.2
TAR Score is a ranking system developed by TopAppliancesReviews.com. TAR score has no relationship or impact from any manufacturers or sales agent websites. Learn more
- BrandHYDRO MASTER

- TAR Score8.0
TAR Score is a ranking system developed by TopAppliancesReviews.com. TAR score has no relationship or impact from any manufacturers or sales agent websites. Learn more
- BrandSolaradgy

- TAR Score7.6
TAR Score is a ranking system developed by TopAppliancesReviews.com. TAR score has no relationship or impact from any manufacturers or sales agent websites. Learn more
- BrandCalolin
Last update on 2026-06-25 / Affiliate links / Images, Product Titles, and Product Highlights from Amazon Product Advertising API
How To Drain A Washer Before Moving It
Water hiding inside a washer has a sneaky way of showing up at the worst possible moment. A machine can look empty, feel ready, and still carry leftover water in the pump, hose, filter, or lower tub. That’s why how to drain a washer before moving it matters before anyone starts dragging the appliance across tile, hardwood, carpet, or a rental hallway. A little prep keeps the move cleaner, safer, and a whole lot less dramatic.
Drain The Washer Before Trouble Starts
A washer doesn’t become move-ready just because the drum looks dry. The visible tub is only part of the story, and hidden water often sits low inside the machine after the final cycle ends. Tilt the washer too soon, and that trapped water may run straight into the floor, the moving blanket, or the truck. That’s the kind of mess that turns a simple appliance move into a mop-and-panic situation.
The biggest pain point is timing. Moving day already comes with boxes, cords, doorways, and people asking where the tape went. Adding a surprise leak from the drain hose creates avoidable stress, especially if the floor needs to stay clean for a landlord walkthrough. Draining first gives you control instead of letting the washer decide where the water goes.
There’s also the weight issue. Water is heavy, and even a small amount trapped inside the washer can make the machine feel clumsier during lifting. A drained washer is easier to tilt, slide, and secure, which helps protect backs, floors, and appliance parts. Nobody needs extra water sloshing around while trying to squeeze a bulky machine through a narrow laundry room door.
Odor is another quiet problem. Leftover water mixed with detergent residue can sour during transport, especially if the washer sits in a garage, truck, or storage unit. That stale smell can cling to rubber seals and hoses, making the first laundry day in the new place feel pretty unpleasant. Proper draining lowers that risk and helps the washer arrive cleaner.
Run A Final Spin And Drain Cycle
The easiest starting point is usually the washer’s own drain or spin setting. Running one final cycle helps push out as much water as the pump can remove on its own. This step won’t clear every drop, but it reduces the amount you’ll need to handle manually. Start with the machine’s built-in drain function before opening hoses or filters.
Use a short spin or drain-only cycle if the washer offers one. Skip detergent, fabric softener, and clothing because the goal is simply to clear water from the system. Listen for the pump sound near the end, then wait until the drum stops moving completely. A calm pause here matters because rushing around a recently spinning washer can create safety risks.
Some machines stop draining if the load is unbalanced or the lid lock acts up. That’s annoying, sure, but it’s not rare. If the washer refuses to drain through the normal setting, shut it off and unplug it before moving to manual steps. Power safety comes first because water and electricity don’t play nice.
After the cycle finishes, open the lid or door and check for visible water. A dry-looking drum is a good sign, but don’t assume the job is done. The drain hose, filter area, and pump housing may still hold trapped moisture. That’s where the slower, hands-on draining process earns its keep.
Unplug And Prepare The Work Area
Before touching hoses, unplug the washer from the wall outlet. This is not the step to half-do while balancing a laundry basket with one foot. Disconnecting power protects you from electrical hazards and keeps the machine from starting unexpectedly. It also gives you room to work without worrying about buttons getting bumped.
Clear the area around the washer before pulling anything loose. Move baskets, rugs, storage bins, and loose cords out of the way so you’re not stepping over clutter with wet hands. Keep old towels, a shallow pan, and a small bucket nearby. These simple items catch water before it spreads under the machine or creeps toward baseboards.
Slide the washer forward slowly if you need access to the back. Tugging hard can kink the drain hose, scrape the wall, or stress the water supply lines. A slow pull gives you time to spot snagged cords and stubborn hoses before damage happens. Controlled movement beats muscle-first chaos every single time.
Check the floor as you work. Tile can get slick fast, and laminate or hardwood can swell if water sits too long. Wipe spills right away instead of waiting until the end. Floor protection is part of draining the washer, not a cleanup bonus after things go sideways.
Separately, detergent residue can build up faster in machines that already struggle with draining or rinsing. To keep future loads cleaner after the move, compare options built for automatic machines through washing powder for fully automatic washing machine and match the detergent to the washer type instead of guessing.
Drain The Hose Without Flooding The Room
The drain hose usually holds more water than people expect. Place the hose end into a bucket or low container before lowering it. Gravity will do most of the work once the hose sits below the water level inside the washer. Keep the hose controlled so it doesn’t whip around and spray dirty water across the floor.
Lower the hose slowly and let the water flow in stages. If the bucket fills quickly, lift the hose higher to pause the flow, empty the bucket, then continue. This stop-and-go rhythm feels a bit fussy, but it prevents overflow. Patience saves towels, and towels are already busy enough on moving day.
Watch for lint, sludge, or small debris coming through the water. That stuff can hint at a clogged drain path or overdue cleaning. A little residue is common, especially in older machines, but thick gunk may mean the pump or hose needs attention before the washer gets reinstalled. Clear drainage helps the machine behave better in the new laundry space.
Some drain hoses are clipped high on the back of the washer. Remove the clip gently and keep the hose end raised until your container is ready. Dropping it too fast can start a sudden flow that’s harder to stop. Slow hose handling keeps the job tidy and protects the surrounding area.
Clear The Pump Filter On Front Loaders
Many front-load washers have a small access panel near the bottom front corner. Behind that panel, you may find a drain pump filter and sometimes a short emergency drain tube. This area often traps coins, lint, hair, buttons, and detergent sludge. Cleaning it before a move helps remove water and prevents funky smells later.
Put a towel flat on the floor before opening the panel. Set a shallow pan underneath the drain tube or filter cap because water can come out fast. Open the drain slowly, not all at once, and let the water collect in small amounts. Gradual draining matters because the filter area sits low and can hold a surprising amount.
After the water slows, twist the filter out carefully if your washer design allows it. Pull away lint, grit, and small objects, then wipe the inside of the opening with a damp cloth. Avoid forcing the filter because plastic threads can crack if they’re misaligned. A clean pump filter helps the washer drain more reliably after the move.
Reinstall the filter snugly once the area is clean. Don’t overtighten it, and don’t leave it loose either. A loose filter may leak the next time the washer runs, which is a lousy welcome gift in a new laundry room. Secure sealing keeps the machine ready for transport and later setup.
Disconnect Water Supply Lines Carefully
Drain work isn’t complete until the supply lines are handled. Turn off both hot and cold water valves before loosening the hoses. Even if the washer itself is drained, those lines can still hold pressurized water. Crack one loose too quickly, and you may get a sharp little burst right onto the wall or floor.
Use a towel around the hose connection as you loosen it. A small adjustable wrench can help, but don’t crush the fittings by squeezing too hard. Once the hose loosens, angle the end into a bucket and let leftover water run out. Gentle disconnecting protects the hose threads and reduces the chance of leaks later.
Labeling hot and cold hoses may sound unnecessary until you’re tired, sweaty, and setting up the washer in a new place. A small piece of tape can prevent mix-ups. Also inspect the rubber washers inside the hose ends because cracked or flattened washers can cause leaks after reconnecting. Fresh hose washers are cheap insurance if the old ones look worn.
Coil the hoses neatly and secure them to the washer or pack them in a labeled bag. Loose hoses can drag, snag, or drip inside the moving truck. Keeping them contained also makes setup easier once the appliance reaches the new laundry area. Organized parts save time when everyone’s already tired from unloading.
Small laundry spaces create their own headaches, especially in apartments, RVs, or temporary homes during a move. For tight setups where a full-size washer feels like overkill, explore portable clothes washing machine choices that fit smaller routines without demanding a full laundry room.
Remove Odor Before The Washer Gets Packed
Draining handles water, but odor needs its own attention. Wipe the drum, door gasket, lid edge, and detergent drawer after the water is out. Moisture loves hiding in rubber folds and plastic channels, where it can turn musty during transport. Dry contact surfaces make the washer much less likely to smell stale later.
Leave the door or lid open for a while before moving the machine if the schedule allows it. Air circulation helps dry the inside and reduces trapped humidity. This matters even more for front-load washers because the door seal can hold damp residue in its folds. Ventilation is simple, free, and surprisingly helpful.
Detergent drawers deserve a quick look too. Pull the drawer out if your model allows it, rinse away softened residue, and dry the compartment. Thick detergent buildup can smell sour after sitting closed in a warm truck or storage unit. Residue control keeps the washer fresher and protects the first load after setup.
Musty laundry rooms often point to more than one moisture source. A washer may be drained correctly, but damp walls, poor airflow, or stored wet fabrics can still leave the room smelling off. For stubborn odor around the home, reduce lingering damp smells with an air purifier for musty smell while also fixing the moisture source. Odor control works best when water removal and airflow work together.
Secure The Washer Before Lifting
Once the washer is drained and dry, secure loose parts before moving it. Tape the power cord to the back of the machine so nobody trips over it. Fasten hoses so they don’t drag behind the washer or knock into door frames. Loose parts can turn a careful move into a clumsy one fast.
Check whether your washer needs shipping bolts. Many front-load machines use transport bolts to lock the drum during a move, and skipping them can stress internal suspension parts. If the bolts are long gone, check the model manual or manufacturer guidance before hauling the machine far. Drum protection matters because internal damage may not show until the washer spins again.
Keep the washer upright as much as possible during transport. Tilting may be necessary through tight spaces, but laying the machine flat can shift water, stress components, or damage internal mounts. Use moving straps and a dolly instead of dragging the washer by the control panel or door opening. Upright moving protects both the appliance and the people carrying it.
Wrap the washer with a moving blanket once hoses and cords are secured. The blanket helps prevent dents, scratches, and bumps against walls or truck rails. It also absorbs tiny moisture traces that might still escape from hose ends. Careful packing keeps the washer cleaner and easier to reinstall later.
Check For Leftover Water Before Loading The Washer
A washer can look ready for the truck and still hide leftover water in places you can’t see. Tip the machine slightly forward, then backward, while keeping towels near the base. If you hear sloshing, pause before lifting because hidden moisture may still be trapped inside the pump housing or hose bend. That quick check helps prevent a wet trail across the floor right when everyone’s already juggling boxes.
Use a flashlight around the lower edge of the washer after draining. Small drips near the drain filter, hose connection, or rear outlet can point to a loose cap or leftover water pocket. Tighten anything that looks slightly off, but don’t crank plastic parts too hard. Careful inspection beats discovering a leak after the washer is strapped inside the moving truck.
Smell can also tell you something useful. A sour or swampy odor usually means detergent residue, standing water, or lint buildup is still hanging around. Wipe the gasket, detergent drawer, and lid area before transport, especially if the washer will sit unused for a few days. For machines that often smell after wash day, upgrade your cleaning routine with detergent for whirlpool washing machine so residue doesn’t keep piling up after the move.
Drying time matters more than people expect. Leave the lid or door open while the rest of the laundry area gets packed. Airflow helps remove dampness from seals and corners that towels can’t fully reach. A drier washer travels cleaner and is less likely to bring musty odors into the new space.
Protect Floors Walls And Doorways During The Move
Moving a washer gets awkward fast because the machine is heavy, boxy, and not exactly forgiving around tight corners. Lay down cardboard, old rugs, or moving mats before shifting it across finished floors. Even a drained washer can scrape tile, dent vinyl, or leave marks on wood if it gets dragged. Floor protection keeps a small appliance job from turning into a repair bill.
Measure doorways before lifting, especially in older homes or apartments with narrow laundry closets. A washer may clear the opening by less than an inch, and that tight fit can pinch fingers or chip trim. Remove nearby doors if needed rather than forcing the machine through at a bad angle. Slow positioning saves paint, walls, and patience.
Use a dolly with straps instead of relying only on arm strength. A washer’s weight sits low and uneven, so one bad tilt can surprise even strong movers. Keep the machine upright and balanced while rolling over thresholds or small steps. Stable movement protects the washer’s suspension and keeps people from getting hurt.
Watch the hose ends while moving through the house. Even after draining, a few stubborn drops can fall from uncapped hoses. Wrap hose ends in towels or small plastic bags, then secure them with tape or twist ties. Contained moisture keeps floors dry and prevents drips from landing on boxes, rugs, or stairs.
Keep The Drum Stable During Transport
The drum inside a washer is built to move during washing, but transport is a different story. Bumps, turns, and sudden stops can make the inner tub swing harder than it should. Front-load washers often need shipping bolts to hold the drum steady. Without them, internal springs, shocks, or mounts may take unnecessary stress before the washer ever gets plugged in again.
Look for the original transport bolts if you still have them. They’re often stored in a drawer, garage bin, or taped to the back of the washer after installation. If they’re missing, check the washer model before improvising because random bolts can damage the machine. Correct hardware matters more than forcing something that almost fits.
Top-load washers may not use the same bolt setup, but they still need careful handling. Keep the lid shut, avoid sharp tilts, and don’t pack heavy items on top of the machine. The agitator, balance ring, or inner basket can shift if the washer gets handled roughly. Gentle transport helps the machine settle properly once it reaches the new laundry area.
Use moving blankets around the cabinet, not inside the drum unless the manual allows it. Stuffing random items inside can put pressure on parts that weren’t meant to support weight during a ride. Secure the outside instead with straps and padding. External cushioning protects the finish without creating problems inside the washer.
Plan For Storage If Setup Is Delayed
A washer that sits in storage needs extra care because leftover moisture has more time to cause trouble. Keep the door or lid slightly open if the storage space is clean and safe from pests. Closed-up washers trap humidity, and that can lead to musty odors in the drum and seals. A little airflow goes a long way.
Choose a storage spot that stays dry and reasonably stable. Garages, sheds, and outdoor storage areas can expose the washer to temperature swings, dust, and moisture. If freezing weather is possible, even tiny water pockets can expand and damage internal parts. Dry storage protects hoses, pumps, seals, and electronic controls.
Cover the washer with a breathable cloth or moving blanket instead of sealing it tightly in plastic. Plastic can trap moisture against the cabinet and encourage mildew if the washer wasn’t completely dry. A breathable cover keeps dust off while still allowing air to move. Moisture control matters more than making the appliance look perfectly wrapped.
Store hoses and small parts in a labeled bag taped to the washer’s side or back. That sounds basic, but it prevents a frustrating hunt later when the machine is ready to reconnect. Keep caps, washers, clamps, and shipping bolts together. Organized accessories make reinstallation smoother and reduce the chance of buying replacement parts in a rush.
Reconnect The Washer Without Creating New Leaks
Reinstalling the washer deserves the same patience as draining it. Place the machine where it belongs, then check that it sits level before reconnecting hoses. A washer that leans can shake, walk, or drain poorly during the first cycle. Level placement protects the machine and keeps laundry day from sounding like a construction site.
Reconnect the hot and cold supply hoses to the correct valves. Tighten them by hand first, then use a wrench for a small extra turn if needed. Over-tightening can crush washers or damage threads, so don’t go full gorilla mode. Snug connections stop leaks without wrecking fittings.
Place the drain hose at the correct height for your setup. A hose shoved too low can siphon water out during a cycle, while a hose placed poorly can pop loose and flood the room. Secure it in the standpipe or sink area so it stays put once the washer starts draining. Drain hose position is a small detail with big consequences.
Run a short test cycle before trusting the washer with a full load. Watch the supply connections, drain hose, filter cap, and floor around the machine. A slow drip is easier to fix during a test than after towels and jeans are already soaking wet. Leak checking should happen before the laundry pile gets involved.
Handle Laundry Room Airflow After Setup
A freshly moved washer can still carry faint damp smells if the laundry area has poor ventilation. Open the room door, run a fan, or keep the washer lid cracked between loads. Moist air gets trapped easily in small closets and basement laundry corners. Good airflow helps the washer dry between cycles and keeps odors from settling in.
Pay attention to nearby appliances too. Heat, steam, and poor ventilation around utility spaces can make damp smells worse, especially in small homes or apartments. If the laundry area sits near a kitchen, compare ventilation upgrades like 24 inch range hoods to help manage air movement where cooking moisture and odors collect. Better ventilation supports a cleaner-smelling home overall.
Leave the detergent drawer slightly open after washing. That small habit helps water evaporate instead of pooling behind plastic compartments. Wipe the rubber gasket every few loads if you use a front-load washer. Routine drying prevents the same odor problems that often show up after moving a damp machine.
Use the first few wash cycles as a checkup period. Listen for unusual banging, watch for slow draining, and check for moisture around the base after each load. A move can loosen connections or shift parts just enough to create small issues. Early attention catches problems before they become expensive repairs.
Avoid Common Washer Moving Mistakes
Skipping the drain step is the classic mistake, and it usually shows up as water on the floor. People assume the final spin removed everything, but washers often hold water below the visible drum. That leftover water may not appear until the machine gets tilted. Manual draining closes the gap between “looks empty” and actually ready to move.
Another common slip is forgetting the drain filter. Front-load machines can hold water behind the lower access panel, and that area may also trap coins, lint, and hair. Ignoring it can lead to odors or leaks after transport. Filter cleaning is messy for a minute, but it prevents bigger headaches later.
Packing the washer too tightly in the truck can also cause problems. Heavy boxes pushed against hoses, knobs, or the door can crack plastic parts or bend fittings. Give the machine enough room, pad the sides, and keep weight off fragile areas. Smart loading protects the washer during every bump in the road.
Rushing the first setup cycle is the final trap. Plugging in the washer and tossing in a full load right away can hide leaks until the floor is already wet. Run a small rinse or quick cycle first and watch closely. A careful test run gives the washer a clean start in its new spot.


10 Best Quality Semi Automatic Washing Machine of 2026 For Leak-Free Laundry

11 Best Small Washer Machine of 2026 For Everyday Laundry

12 Best Vibration Pads For Washing Machine of 2026 To Stop Walking and Shaking

11 Best Selling Front Load Washing Machine of 2026 For Quiet Odor-Free Laundry

11 Best Washing Machine For King Size Bedding of 2026 To Prevent Cycle Errors

10 Best Small Front Loader Washing Machine of 2026 For Tight Closets

12 Best Side Load Washing Machine of 2026 For Low Vibration

11 Best Single Tub Washing Machine of 2026 For Apartments Without Hookups






