
How to Cut an Apple With a Knife Safely

A crisp apple wobbles across the cutting board just as a blade presses into the waxy skin. The safest way to steady the fruit is to cut it straight down through the center while resting upright on its base. Turning both halves cut-side down stops all rolling immediately, which lets you trim out the seed core cleanly right against the board.
A few practical details will change how you finish the cut. A broad multi-purpose knife offers the best control on a board, but a small paring knife works better if you prefer to peel the skin off first. Your final recipe matters as well, because thick wedges work best for dipping, while thin slices bake evenly in pies or crisps. Here is the simple method to cut clean slices safely every time without the fruit slipping.
Setting Up Your Board and Choosing the Right Knife
Cutting an apple seems simple until the fruit wobbles and the blade skids. Apples are round, firm, and covered in slick, waxy peel. When you push down on an unstable sphere, the blade wants to slip off the curve. Taking thirty seconds to prepare your workspace keeps the fruit still and your hands safe.
Start with the cutting board. A lightweight board often slides across smooth countertops. Place a damp paper towel, a wet cloth, or a thin silicone mat underneath the board. Press down to verify that it stays anchored. A board that cannot slip gives you the steady platform needed for clean downward cuts.
Next, select the right blade. Many people reach for a small handheld kitchen knife (paring knife) to tackle fruit. While that small blade works well for peeling skin, it makes dividing a firm apple difficult. A broad multi-purpose kitchen knife (chef knife) measuring six to eight inches is much safer on a board. The taller blade keeps your knuckles elevated, while the wider spine gives you a flat guide for steady downward control.
A blade of stainless steel (rust-resistant, easy-to-clean metal) handles juicy fruit without staining. If you prefer high-carbon steel (harder metal that stays sharp longer but requires dry wiping and light oiling to prevent rust spots), you will enjoy smooth cuts through crisp flesh, like the blades in a German high-carbon steel premium knife set. Look for a knife with full tang (one solid piece of blade steel extending all the way through the handle) so the blade does not flex under downward pressure.
Before touching the fruit, run through this quick workspace check:
- Board anchor: A damp paper towel rests underneath to stop wobbling.
- Blade sharpness: The edge parts the peel cleanly without crushing.
- Dry surface: The apple, board, and hands are dry so nothing slips.
- Clear space: No clutter sits within arm reach of your prep area.
- Scrap bowl: A bowl sits nearby to collect stems and tough seed cores.
The Flat-Cut Method to Stabilize and Core Your Apple
Cutting an apple while holding it in mid-air is a common mistake. Peeling or halving fruit toward your thumb might look familiar, but it invites accidental cuts. Hard fruit flesh requires steady pressure. When that pressure breaks through the bottom skin unexpectedly, an unsupported blade travels straight into your palm.
The safest way to cut any round fruit is to create a flat side immediately. Once a flat side rests against the cutting board, the fruit cannot roll, wobble, or slip under blade pressure.
Follow these steps to split and core your apple safely:
- Stand the apple upright on the board. Set the fruit down stem-side up. If the bottom is lumpy and makes the apple tip, do not fight it. Shave off a paper-thin slice from the bottom skin so it rests firmly on the board like a solid block.
- Grip the fruit with a claw grip. Form your non-knife hand into a gentle bear claw shape. Rest your curled fingertips on top of the apple, tucking your thumb and pinky safely behind your middle knuckles. Your knuckles act as a smooth bumper for the side of the blade, keeping fingertips away from the edge.
- Slice straight down through the center. Rest the middle of your knife blade next to the stem. Press straight down through the fruit in one smooth motion. If the apple is extra crisp, gently rock the blade from heel to tip rather than sawing. You now have two stable halves.
- Turn both halves flat side down immediately. This is the golden rule of kitchen safety. Whenever you cut round food in half, immediately drop the flat, cut faces onto the board. A flat surface cannot roll.
- Cut each half into quarters. Use your claw grip to hold one half steady. Slice straight down through the center skin to divide it into two quarters. Repeat with the second half.
- Remove the core on the cutting board. The core (tough center with seeds) contains woody pockets that are unpleasant to chew and create a choking risk for young kids. Rest the apple quarter on one flat side. Angle your knife blade at forty-five degrees under the seed pocket and slice downward. This removes the tough center cleanly without wasting fruit, keeping your fingers safely behind the edge.
Slicing, Dicing, and Keeping Apple Pieces Fresh
Once your apple is divided into clean, core-free quarters, you can cut them into snack wedges, thin baking slices, or salad cubes. For simple snack wedges, lay each quarter on one flat side and slice straight down along its length. Slicing each quarter in half gives you eight classic wedges. If you are packing lunchboxes or feeding toddlers, cut each quarter into three pieces for twelve slender slices that are easy for small hands to hold.
When preparing apples for baking, consistent thickness matters far more than shape. If you cut some slices thin and others thick, the thin pieces turn to mush in the oven while thick ones stay crunchy. Lay each quarter flat side down and cut uniform quarter-inch slices across the length. A slender, precise blade, such as one from a high-carbon Japanese chef knife set, glides through crisp fruit without splitting the edges.
If your recipe calls for diced fruit for oatmeal, chicken salad, or pies, use a three-step method. First, cut your quarter into thin, flat planks along its length. Next, stack two planks and slice them lengthwise into matchsticks. Finally, turn the matchsticks ninety degrees and cut across them to create neat cubes. Keep your claw grip firm so the loose pieces do not slide around.
Apple peel adds dietary fiber and color to fresh snacks and salads, but it turns tough in baked dishes and applesauce. If your recipe calls for skinless fruit, peel the whole apple with a vegetable peeler before making your first cut. Peeling a whole, round apple takes seconds and avoids the hassle of stripping skin from small, slippery wedges.
After cutting, exposed apple flesh quickly begins to turn brown. This browning happens because natural enzymes in the fruit react with oxygen in the air. While browned fruit is safe to eat, it looks unappealing. You can easily keep your slices bright and crisp using simple household methods.
The most reliable method is a quick salt-water soak. Dissolve one half-teaspoon of table salt into two cups of cool water and submerge your slices for five minutes. Drain and rinse them briefly under cold water. The salt deactivates the browning enzyme, while the rinse removes any salty taste, keeping the slices fresh and pale for hours.
A mild citrus bath works just as well. Stir one tablespoon of lemon juice into one cup of cold water and soak your slices for three minutes. The natural citric acid stops discoloration while adding a light, pleasant tang that complements sweeter apples like Gala or Fuji.
To skip water baths, limit air contact directly. Place slices into an airtight container or a sealed bag, pressing out excess air before closing. If packing a whole sliced apple for lunch, reassemble the wedges around the core shape and wrap a clean rubber band around the fruit. Keeping the cut sides pressed together blocks out oxygen until lunchtime.
What to Look for in Dedicated Slicers and Knives
While a standard kitchen knife handles any apple with ease, specialized tools help if you prep fruit daily. Busy families and home cooks processing big batches for baking or canning often turn to dedicated slicers to save time.
Push-down apple slicers offer a popular shortcut. These circular tools feature radial stainless steel blades connected to a center coring ring. With one downward push through the stem end, the tool cores the apple and divides it into eight, twelve, or sixteen even wedges in a single motion.
When shopping for a push-down slicer, check the opening width and frame strength. Large apples can measure four inches across, so narrow slicers can jam halfway through the fruit. Look for wide models with reinforced blade welds that will not bend under arm pressure, along with cushioned handles that protect your palms.
Wavy crinkle cutters are another helpful option, especially for parents with toddlers. These handheld tools feature a ridged stainless steel blade that cuts fruits and vegetables with wavy zigzag edges. The ridges give toddlers a secure grip on slippery fruit and hold dips like peanut butter or yogurt much better than smooth slices.
For everyday cutting without extra gadgets, your regular kitchen knife remains the most versatile choice. When choosing a multi-purpose knife for fruit prep, look for a blade that balances firmness with a slender slicing edge. Thick blades act like wedges that split crisp apples with a loud crack, leaving ragged edges. A sharp blade with a comfortable handle that fits your palm securely gives you effortless control from the first slice to the last.

- TAR Score9.4
TAR Score is a ranking system developed by TopAppliancesReviews.com. TAR score has no relationship or impact from any manufacturers or sales agent websites. Learn more
- BrandJoie

- TAR Score9.4
TAR Score is a ranking system developed by TopAppliancesReviews.com. TAR score has no relationship or impact from any manufacturers or sales agent websites. Learn more
- BrandKitchenAid

- TAR Score9.2
TAR Score is a ranking system developed by TopAppliancesReviews.com. TAR score has no relationship or impact from any manufacturers or sales agent websites. Learn more
- BrandLIIGEMI

- TAR Score9.2
TAR Score is a ranking system developed by TopAppliancesReviews.com. TAR score has no relationship or impact from any manufacturers or sales agent websites. Learn more
- BrandProgressive

- TAR Score9.0
TAR Score is a ranking system developed by TopAppliancesReviews.com. TAR score has no relationship or impact from any manufacturers or sales agent websites. Learn more
- BrandSCHVUBENR

- TAR Score9.0
TAR Score is a ranking system developed by TopAppliancesReviews.com. TAR score has no relationship or impact from any manufacturers or sales agent websites. Learn more
- BrandKNS ESSENTIALS

- TAR Score8.8
TAR Score is a ranking system developed by TopAppliancesReviews.com. TAR score has no relationship or impact from any manufacturers or sales agent websites. Learn more
- BrandChef Craft
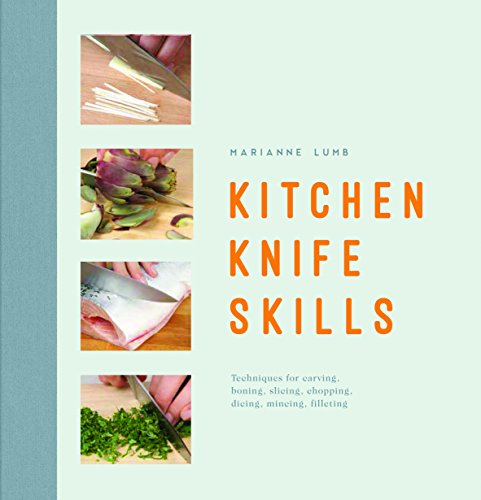
- TAR Score8.8
TAR Score is a ranking system developed by TopAppliancesReviews.com. TAR score has no relationship or impact from any manufacturers or sales agent websites. Learn more
- BrandChartwell Books

- TAR Score8.4
TAR Score is a ranking system developed by TopAppliancesReviews.com. TAR score has no relationship or impact from any manufacturers or sales agent websites. Learn more
- BrandKH866
Last update on 2026-10-03 / Affiliate links / Images, Product Titles, and Product Highlights from Amazon Product Advertising API
FAQs
Should you wash an apple before or after cutting it?
Always wash your apple before cutting into it. Running water and gentle hand friction remove dust, dirt, and surface bacteria from the peel. If you cut an unwashed apple, the knife blade pushes surface bacteria from the skin straight into the clean, edible flesh inside.
Why does a knife sometimes get stuck halfway through an apple?
A knife gets stuck when the blade is too thick or dull to shear through dense fruit flesh cleanly. As the blade presses down, the firm apple pinches the sides of the metal, creating friction that halts the cut. If your knife binds, do not force it down; gently pull the blade backward and rock it slightly to complete the cut.
Can you cut an apple safely if you do not have a cutting board?
Cutting an apple without a stable board increases the risk of slipping, but you can manage it safely in a pinch. Place the fruit on a clean, flat surface covered with a folded cloth napkin or silicone trivet to keep it from rolling. Never try to slice an apple in mid-air toward your hand, because a sudden breakthrough can cut your palm.


Top Rated Best Quality Range Hoods: 2026 Expert Picks

The 12 Best Small Solar Generators 2026

10 Best Quality Semi Automatic Washing Machine of 2026 For Leak-Free Laundry

11 Best Small Washer Machine of 2026 For Everyday Laundry

12 Best Vibration Pads For Washing Machine of 2026 To Stop Walking and Shaking

11 Best Selling Front Load Washing Machine of 2026 For Quiet Odor-Free Laundry

11 Best Washing Machine For King Size Bedding of 2026 To Prevent Cycle Errors

10 Best Small Front Loader Washing Machine of 2026 For Tight Closets






