
How to Clean a Washing Machine Drain Hose Without a Mess

A sour, swampy smell drifts from behind the washer just as the cycle finishes, leaving grey water draining at a crawl. The best fix is to unhook the line and flush the slimy buildup with hot water into a bucket, or run an empty hot cycle with a cleaner tablet if the hose stays locked in place. That clears rotting lint and old soap before trapped water backs up onto the baseboards.
How you tackle the job depends on your laundry setup. Some plastic pipes pull straight out of a wall standpipe (the open drain pipe in the wall), while others stay secured with a tight metal clamp. A solid plug of pet hair and lint requires a long wire brush, whereas sour detergent film dissolves with heat alone. A few simple precautions keep the dirty water fully contained while you work.
What tools do you need before touching the hose?
Pulling a washing machine away from the wall without the right gear almost always leads to gray, smelly water soaking into your baseboards or flooring. That trapped puddle inside the line holds hair, dissolved lint, and stagnant detergent residue. Gathering a few simple household supplies beforehand keeps the job completely clean and protects your room from hidden water damage.
Set these items within arm's reach before you shift the appliance:
- A shallow pan or rimmed baking sheet: This slides flat against the floor beneath the machine outlet to catch water the moment the pipe slips free.
- Old bath towels or shop rags: Lay at least three or four towels directly on the floor around the rear legs to soak up accidental drips.
- A standard 5-gallon utility bucket: You will use this to empty the line, transport dirty parts, and soak the tubing in cleaning solution.
- Slip-joint pliers or a flathead screwdriver: These loosen the hose clamp (the metal ring holding the pipe tight to the machine body).
- A long, flexible wire pipe brush: A brush with soft nylon bristles reaches through the internal curves without puncturing the material.
- Cleaning agents: Keep pipe-cleaning deodorizer tablets on hand, or a mix of baking soda and white distilled vinegar.
- Rubber cleaning gloves: Laundry line sludge contains concentrated bacteria, mold spores, and sticky body oils.
Before you touch any plumbing connections, disconnect the power cord from the standard 120-volt 3-prong grounded wall outlet. Water and live electricity create severe shock hazards. Next, look at the wall behind the machine and shut off both the hot and cold water shutoff valves by turning them clockwise until snug. This prevents an accidental burst if an inlet hose gets bumped while you work.
How do you clean the hose without removing it?
You do not always need to pull the plumbing apart to clear out foul odors or sluggish drainage. If your line is built directly into the rear cabinet or secured in a tight laundry closet where you cannot reach the fittings, a chemical flush using the washer's own cycle works remarkably well. This method breaks down the greasy film of fabric softener and soap scum that coats the internal plastic walls.
- Clear out the wash basket: Make sure the stainless steel clothes tub is completely empty so loose fabrics do not absorb the cleaning solution.
- Add your cleaning agent: Place one washing machine cleaner tablet directly on the bottom of the clothes tub. If you do not have tablets, pour two cups of distilled white vinegar directly into the drum and sprinkle half a cup of baking soda across the bottom plate.
- Select the hottest cycle available: Choose the dedicated Tub Clean setting, a Sanitize cycle, or a normal heavy-duty cycle adjusted to the highest water temperature. Hot water softens congealed animal fats and oils found in standard detergents.
- Start the wash and pause before the final drain: Let the machine fill, agitate, and dissolve the cleaner. If your control panel allows manual pausing, pause the machine once the soapy water starts pumping out into the line. Let that hot, active mixture sit inside the tubing for roughly 15 to 20 minutes to dissolve built-up scum.
- Finish the cycle and run a clear rinse: Resume the cycle so the built-in drain pump pushes the loosened muck out into the open wall drain pipe (standpipe). Run one more empty warm wash cycle with plain water to wash away any lingering chemical smell and dissolved flakes.
Listen closely while the machine pumps out. A steady, rapid rush of water into your drain confirms that the passage is clear. If the pump groans or the water trickles out slowly, a dense physical mat of lint or pet hair is lodged inside the line, which means you will need to detach the line for manual scrubbing.
How do you take off and soak the hose?
When soap flushes fail to restore normal drainage, taking the tubing off allows you to inspect the inside and remove stubborn blockages. Taking off the line requires patience so you do not snap brittle plastic fittings or spill dirty water behind the machine.
- Create rear working space: Walk the washer forward an inch at a time. Leave at least 4 to 6 inches of rear clearance so you do not pinch, stretch, or kink the hot and cold water supply hoses connected to the wall.
- Lift the discharge end first: Pull the hooked end of the tubing up out of the standpipe (the open wall drain pipe) or utility sink rim. Immediately point the open curved neck toward the ceiling so gravity keeps the dirty water inside the tube. Lower that curved end straight down into your 5-gallon bucket.
- Position the shallow pan: Slide your shallow pan directly beneath the lower rear corner of the washer where the flexible tubing joins the machine stub.
- Loosen the hose clamp: Use your pliers to squeeze the tabs of the hose clamp (the metal ring holding the pipe tight), or use your screwdriver to loosen the tension screw. Slide the metal ring three or four inches up the body of the pipe away from the joint.
- Break the seal gently: Grip the rubber cuff where it meets the machine outlet. Twist it gently back and forth to break the grip of old mineral scale. Do not jerk or pry sideways with tools, as the plastic outlet neck on the pump housing can crack under sudden pressure.
- Drain the standing water: Pull the cuff off the stub and immediately guide the open end down into your shallow pan. Let every drop of trapped water drain out. Pour the pan into your bucket as it fills.
- Soak the entire line: Carry the detached tubing to a utility sink or bathtub. Submerge the tubing in hot water mixed with two cups of white distilled vinegar, or dissolve a pipe-cleaning tablet into the soak water. Allow the tubing to soak for 30 to 45 minutes to loosen the stubborn bio-film clinging to the plastic.
- Rinse thoroughly: Direct a strong stream of warm water from a faucet or garden hose through one end until the water running out the opposite side comes out completely clear.
Before putting the line back on, check the rubber cuff for dry rot, deep cracks, or permanent stretching. If the rubber feels hard or shows splits, replace the entire assembly rather than reinstalling damaged plastic that could burst under discharge pressure later.
How do you scrub lint out of the ribs?
Most modern washing machine drain lines use corrugated plastic rather than smooth rubber. The accordion-style ribs make the pipe flexible so it bends around corners without folding shut or kinking. But those same internal ridges create hundreds of tiny ledges that trap pet fur, loose threads, hairpins, and sticky detergent gel.
Water alone rarely removes an accumulation of hair packed into these ridges. You need light mechanical contact to free the debris:
Insert a long, flexible nylon wire brush into one end of the soaked line. Push the brush forward using short, scrubbing strokes while twisting the handle clockwise. As the soft bristles scrape across the ridges, they snag hair clumps and loosen greasy soap crusts. Pull the brush out periodically to peel off hair mats, rinse the bristles in your bucket, and feed it back in.
Work from both ends of the tube toward the center. If you encounter a hard obstruction that the brush cannot push past, never force a stiff metal coat hanger or an aggressive metal plumbing snake down the line. The thin plastic skin between the ribs tears easily under sharp metal points, resulting in pinhole leaks that ruin floors. Instead, pour hot tap water mixed with dish soap through the line to lubricate the blockage, then continue using gentle pressure with your flexible nylon brush.
Once the brush travels freely through the entire length, hold one end up toward a bright overhead light or sunny window. Peer through the tube. You should see an open, uniform circle of light with no dark shadows or heavy mats clinging to the internal ribs.
What if the drain hose is still blocked?
If you thoroughly clean the pipe, reinstall it, and the washer still displays a drainage error code or leaves your laundry soaking wet, the clog is likely sitting inside the machine's internal drainage system rather than the external tubing.
The primary spot to check is the drain pump filter (the small lint and coin trap). Most front load machines feature an access door on the lower front panel. Behind this door, you will find a small pull-out drain tube and a round screw-in filter plug. Place a shallow tray and an old towel on the floor, pull the small plug to drain the front reservoir, and unscrew the main filter cap counterclockwise. You will often find baby socks, coins, bra underwires, and dense hair balls choking the pump intake.
Reach a finger into the pump housing after pulling the filter out and feel the small plastic fan blades (the impeller). Verify that the blades turn freely without being jammed by small gravel or stray screws. If the blades are frozen or wobble loosely on their shaft, the pump motor may have failed and will require a replacement part.
If both the filter trap and the external tubing are spotless, but water gushes out of the top of the open wall drain pipe (standpipe) during the pump-out cycle, the restriction is in your home's main plumbing stack. Tree roots, grease in the household drain lines, or a blocked roof vent pipe will prevent water from flowing downward fast enough to match the washer's high-speed pump. In that situation, stop using the appliance and call a licensed plumber to clear your household drain lines.
What machine features make drain hose cleaning easier?
When maintaining an older machine becomes a chore, or if frequent clogs make laundry difficult, looking at appliance design helps prevent future headaches. Certain machine configurations make hose maintenance straightforward, while others require extensive disassembly just to check a simple line.
If you are deciding between machine formats, understanding whether to choose a front load or top load washer helps explain how different tub designs push water into the drainage system. Front loaders use high-speed pumps to expel small volumes of water, meaning heavy detergent sludge concentrates faster if you fail to use low-suds HE (High Efficiency) detergent. Top-load units, especially models with a center agitator post that twists clothes through the water, discharge larger volumes of water per cycle, which naturally helps flush lines clear of loose fibers.
Some owners look into washers with a specialized soak cycle to loosen heavy grime before cycles run, which helps keep greasy residues from sticking to the hose walls later. Regardless of which style you prefer, verify that any new washer includes an easily accessible, front-facing cleanout trap and an automated high-temperature drum sanitizing cycle. Machines that feature smooth quick-connect drainage fittings save hours of effort compared to units with internal, glued lines hidden behind structural steel panels.
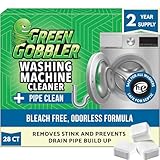
- TAR Score7.9
TAR Score is a ranking system developed by TopAppliancesReviews.com. TAR score has no relationship or impact from any manufacturers or sales agent websites. Learn more
- BrandGreen Gobbler
Last update on 2026-10-30 / Affiliate links / Images, Product Titles, and Product Highlights from Amazon Product Advertising API
FAQs
Can you use chemical drain openers in a washer hose?
Never pour caustic chemical drain openers containing sodium hydroxide or sulfuric acid into your washing machine or its drain line. These aggressive chemicals produce intense heat as they react with water, which easily melts, softens, or deforms thin plastic hoses. They also dissolve the vital rubber seals inside your machine's drain pump, causing severe internal leaks.
How often should you clean the washer drain pipe?
Most households should perform an internal cleaner tablet flush every three to six months to prevent odors from spreading into clean clothes. If you regularly wash muddy work clothing, heavily shed pet blankets, or use liquid fabric softeners, inspect and clean the line every two months. Homes using well water should also check the fittings twice a year for mineral scale buildup.
Why does dirty water back up during the spin cycle?
Dirty water backing up out of the standpipe usually means the drain hose is shoved too far down the wall pipe, or the wall pipe diameter is too narrow for the pump's discharge volume. If the hose reaches more than six to eight inches into the wall pipe, it can create a siphoning effect that pulls dirty drain water right back into the wash basket. Ensure there is an air gap around the pipe so air flows freely as water discharges.
Can you clean the hose with straight bleach?
Do not use concentrated, straight household bleach to clean flexible plastic drain tubing. Pure bleach dries out the flexible plasticizers in the hose wall, making the ribs brittle and prone to cracking under high-pressure discharge cycles. Always dilute bleach with plenty of warm water, and never mix bleach with vinegar or ammonia-based cleaners, as doing so creates hazardous airborne gases.


10 Best Washing Machine For King Size Comforter of 2026 For Bulky Bedding

11 Best Semi Automatic Washing Machine Under 10000 of 2026 For Apartments and RVs

9 Best Compact Refrigerator For Beer Bottles of 2026 For Upright Bottle Fit

10 Best Quality Semi Automatic Washing Machine of 2026 For Leak-Free Laundry

11 Best Small Washer Machine of 2026 For Everyday Laundry

12 Best Vibration Pads For Washing Machine of 2026 To Stop Walking and Shaking

11 Best Selling Front Load Washing Machine of 2026 For Quiet Odor-Free Laundry

11 Best Washing Machine For King Size Bedding of 2026 To Prevent Cycle Errors





