
How To Clean Washer Drain Outlet Safely Without Mess

How To Clean Washer Drain Outlet Safely sounds simple at first glance, yet plenty of people end up staring at standing water, funky smells, or mysterious gurgling noises that just won’t quit. Laundry areas collect moisture fast, and once lint, detergent residue, and grime settle deep inside the outlet, the whole setup can start acting up. That stale odor drifting through the room? Yeah, that’s usually the first warning sign. Ignoring it only makes the cleanup nastier later.
Small maintenance habits often get pushed aside because the drain outlet sits out of sight. Still, the buildup happening inside that pipe can quietly reduce water flow over time. Slow draining water may not seem urgent right away, but eventually the washer struggles to empty properly, leaving clothing damp and the floor vulnerable to messy overflows. A safer cleaning routine helps avoid harsh chemical mistakes that can damage pipes or create irritating fumes indoors.
Plenty of households rely too heavily on aggressive drain cleaners, hoping for a quick fix. Unfortunately, those products can eat away at older plumbing and sometimes loosen grime without fully removing it. That leftover sludge usually creeps right back. A more balanced cleaning approach focuses on safe removal of lint, soap scum, and hidden debris while protecting both the washer system and surrounding plumbing connections.
Another thing people don’t expect? Drain outlet problems often start with tiny habits. Overusing detergent, washing pet blankets, or skipping periodic rinses gradually creates sticky residue inside the drain line. Once that buildup traps lint and dirt, airflow and drainage both suffer. Suddenly the laundry room smells musty even after freshly washed loads. Frustrating, honestly.
Proper washer drain outlet cleaning also helps reduce moisture problems around the laundry area. Excess standing water can encourage mildew growth behind the machine or near the wall connection. Those damp spots become difficult to clean once they spread. Keeping the outlet clear supports smoother drainage and lowers the chance of hidden moisture damage sneaking into flooring or drywall.
Some drain systems clog faster than others depending on washer type, household routines, and pipe layout. Older homes especially tend to deal with narrow pipes that trap lint more easily. Regular maintenance keeps those small restrictions from snowballing into stubborn blockages that require expensive repairs. Nobody enjoys dragging out buckets and towels because a washer suddenly refused to drain halfway through a cycle.
Safe drain outlet cleaning methods focus on practical steps that reduce risk while improving long-term performance. Gentle cleaning tools, warm water flushing, and careful inspection usually work far better than rushing through the process with strong chemicals. A cleaner drain outlet supports fresher laundry, steadier drainage, and fewer unpleasant surprises during busy wash days. Frankly, that peace of mind alone makes the effort worthwhile.
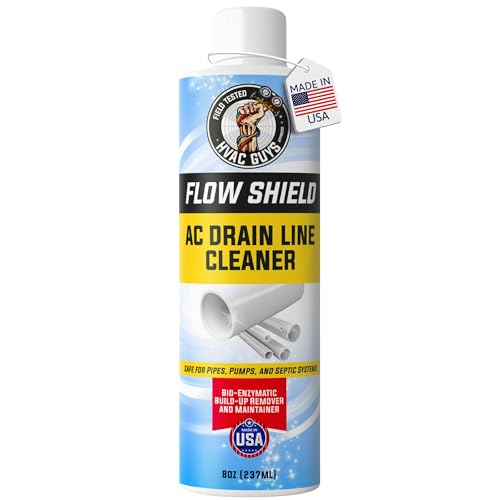
- TAR Score9.6
TAR Score is a ranking system developed by TopAppliancesReviews.com. TAR score has no relationship or impact from any manufacturers or sales agent websites. Learn more
- BrandHVAC Guys

- TAR Score9.4
TAR Score is a ranking system developed by TopAppliancesReviews.com. TAR score has no relationship or impact from any manufacturers or sales agent websites. Learn more
- BrandHVAC Guys

- TAR Score9.2
TAR Score is a ranking system developed by TopAppliancesReviews.com. TAR score has no relationship or impact from any manufacturers or sales agent websites. Learn more
- BrandHVAC Guys

- TAR Score9.0
TAR Score is a ranking system developed by TopAppliancesReviews.com. TAR score has no relationship or impact from any manufacturers or sales agent websites. Learn more
- BrandTrue Fresh

- TAR Score8.8
TAR Score is a ranking system developed by TopAppliancesReviews.com. TAR score has no relationship or impact from any manufacturers or sales agent websites. Learn more
- Brandecocstm

- TAR Score8.6
TAR Score is a ranking system developed by TopAppliancesReviews.com. TAR score has no relationship or impact from any manufacturers or sales agent websites. Learn more
- BrandBioda

- TAR Score8.6
TAR Score is a ranking system developed by TopAppliancesReviews.com. TAR score has no relationship or impact from any manufacturers or sales agent websites. Learn more
- BrandSPESHALU

- TAR Score8.6
TAR Score is a ranking system developed by TopAppliancesReviews.com. TAR score has no relationship or impact from any manufacturers or sales agent websites. Learn more
- BrandTHE FRYOILSAVER COMPANY
Last update on 2026-07-13 / Affiliate links / Images, Product Titles, and Product Highlights from Amazon Product Advertising API
How To Clean Washer Drain Outlet Safely
A slow-draining washer has a way of turning a normal laundry day into a sloppy little mess. Water hangs around longer than it should, the room starts smelling sour, and suddenly the drain outlet becomes the main suspect. The safest way to handle how to clean washer drain outlet safely starts with patience, not panic, because rushed cleaning can splash dirty water, loosen the wrong connection, or push debris deeper into the pipe. A careful routine protects the washer drain outlet, the surrounding floor, and the plumbing behind the wall.
Safe Washer Drain Cleaning
Start with the simple stuff before grabbing tools. Turn off the washer, unplug it, and give the machine a little breathing room so you can reach the outlet without bending the hose too sharply. That one step matters because a kinked hose can crack, leak, or send dirty water where it doesn’t belong. Power safety and water control should come first, even if the clog looks small.
Keep towels, a shallow tray, and a small bucket nearby before moving the drain hose. Washer drain outlets often hold leftover water, and yep, it can smell pretty rough. Catching that water early prevents a slippery floor and keeps grime from spreading around the laundry area. Clean setup makes the whole job calmer and way less gross.
Protect your hands with gloves because drain buildup can include lint, detergent sludge, hair, pet fur, and old fabric fibers. That mixture gets sticky over time, especially in homes that run frequent loads or use too much detergent. The goal isn’t to attack the outlet like a clogged kitchen sink. Gentle removal keeps the pipe safer and helps avoid pushing debris farther down.
A flashlight helps more than most people expect. Shine it into the outlet opening and around the hose end before poking anything inside. Visible lint clumps, soap scum, or dark residue usually point to the main trouble spot. Early inspection saves time because you’re cleaning the real blockage instead of guessing.
Spot Drain Trouble Early
Slow draining usually shows up before a full blockage. The washer may finish a cycle, but water leaves the drum slower than usual or makes a hollow gurgling sound near the drain outlet. That sound often means air and water are fighting through a narrowed path. Slow flow is a warning, not just an annoying laundry room soundtrack.
Musty odors are another clue. A drain outlet that smells like damp towels or sour water may have residue clinging inside the pipe. Detergent and fabric softener can leave a film that traps lint, and once that film sits in a moist space, odors settle in fast. Odor control starts with removing buildup instead of masking it with fragrance.
Watch for water backing up around the standpipe or wall outlet during the drain cycle. Even a small overflow can soak baseboards, flooring seams, or drywall edges if it happens repeatedly. That’s where a simple cleaning job can turn into a repair bill. Overflow prevention matters because water damage rarely announces itself politely.
Some signs come from the clothes, too. Loads that finish wetter than normal may point to a drainage restriction, especially if the washer spins but still leaves heavy, damp fabric behind. Towels and blankets make this easier to notice because they hold water like nobody’s business. Better drainage supports cleaner cycles and less drying time.
Choose Gentle Cleaning Tools
A plastic drain brush is usually safer than a metal tool for light buildup near the outlet opening. Metal picks can scratch pipe interiors, snag hose material, or chip older fittings if used too aggressively. The goal is to loosen residue, not carve through the drain like a maniac. Soft cleaning tools reduce the chance of accidental damage.
A wet-dry vacuum can help pull out loose lint and standing water near the opening if the clog sits close enough. Use a towel around the hose connection to improve suction and limit splashing. This method works best for shallow debris, not deep plumbing blockages. Controlled suction is useful because it removes grime instead of shoving it farther inside.
Warm water can soften detergent residue, but boiling water is a bad bet for many laundry drain setups. Some plastic pipes and hose parts don’t appreciate extreme heat, and older seals may weaken faster than expected. Warm flushing gives residue a nudge without stressing the system. Moderate heat keeps the cleaning safer and more practical.
Skip the harsh chemical cocktail unless a plumber specifically recommends it for your setup. Strong drain cleaners can create fumes, damage older plumbing, and sometimes leave partially loosened sludge behind. For routine care, a safer washer maintenance plan pairs well with mild cleaning habits, and to reduce residue between drain cleanings, rely on liquid for washing machine auto maintenance that supports cleaner internal wash cycles. Pipe-friendly cleaning beats a quick burn-and-hope approach.
Clean The Outlet Without Flooding
Pull the washer away from the wall slowly, not with one big yank. Drain hoses can be shorter than expected, and tugging too hard may loosen the hose clamp or stress the wall connection. Keep the hose upright until your bucket is ready. Slow movement helps prevent surprise spills and cracked fittings.
Remove the drain hose from the outlet only after placing towels beneath the connection. A little leftover water may come out right away, especially after a recent wash cycle. Let it drain into the bucket before inspecting the hose end and outlet opening. Water containment keeps the job from turning into mop duty.
Use your gloved fingers or a soft brush to remove lint and visible sludge from the outlet rim. Don’t force a brush deep into the pipe if it meets firm resistance. A hard stop may mean the clog sits deeper than a basic cleaning can safely reach. No-force cleaning protects the plumbing and keeps a small problem from becoming a bigger one.
Flush the outlet gently with warm water if the drain appears open enough to accept it. Pour slowly and watch for backup, gurgling, or rising water. If water rises quickly, stop right there and avoid adding more liquid. Slow flushing gives you feedback before the laundry room floor gets involved.
Handle The Drain Hose Carefully
The drain hose can carry just as much grime as the outlet itself. Detergent film, lint, and small fibers often cling inside the hose bends where water slows down. Disconnecting and rinsing it can help, but only if you can reattach it securely afterward. Hose cleanliness and tight reconnection both matter.
Check the hose for kinks, cracks, soft spots, or crushed sections. A hose that looks flattened behind the washer may restrict water flow even if the outlet is clean. That can make the washer drain poorly and trick you into thinking the pipe is clogged. Hose shape affects drainage more than people usually expect.
Portable machines need extra attention because their hoses may sit in sinks, tubs, or temporary drain points. Poor hose placement can splash water, shift during draining, or send lint into an outlet that wasn’t meant for repeated laundry flow. For small spaces where drainage setup matters, compare portable wash machine options that match the drain access you actually have. Stable hose placement keeps laundry day from getting messy.
Reinsert the drain hose to the proper depth after cleaning. Too shallow, and it can pop out during a drain cycle. Too deep, and it may create siphoning or poor airflow depending on the setup. Correct hose depth helps the washer drain steadily without surprise backups.
Reduce Odors After Cleaning
Odors often linger after the visible gunk is gone. That happens because residue can sit along the hose walls, outlet rim, and nearby damp surfaces. Wipe the outside of the hose, wall plate, and floor area with a mild cleaner after the drain work is finished. Surface cleanup helps keep the smell from creeping back.
Run a hot wash cycle with no clothes after reconnecting everything, as long as your washer manual allows it. This helps move leftover residue through the system and clears loose debris from the hose. Don’t overload the machine right after cleaning because heavy water discharge can reveal weak connections fast. Test cycles are safer than jumping straight into bulky bedding.
Ventilation also plays a bigger role than most laundry rooms get credit for. Moisture trapped behind a washer can feed mildew smells, especially in small rooms with poor airflow. Open a door, run a fan, or improve air movement after cleaning. For stale laundry spaces that hold damp smells, improve room freshness with a smart air purifier that helps manage lingering odors around enclosed areas. Air movement supports a cleaner-smelling space.
Keep an eye on the first few loads after cleaning. Listen for gurgling, check the floor around the outlet, and sniff for returning odor after the washer drains. Small clues tell you whether the outlet is truly clear or only partly improved. Post-cleaning checks catch trouble before it turns into another wet mess.
Flush The Drain Outlet The Right Way
Warm flushing works best after visible lint and sludge are already removed. Pouring water too soon can push soft debris deeper, and that’s where clogs become stubborn little monsters. Use a slow pour, pause often, and watch how the outlet reacts before adding more water. Controlled flushing gives you a safer read on the drain instead of guessing and hoping for the best.
A clean funnel can help guide water into the outlet without splashing the wall or floor. Keep towels under the connection because old detergent film can loosen suddenly and create a dirty trickle. If the water drains smoothly, the outlet is likely clearing well. Steady water movement is the signal you want, not bubbling, rising water, or that hollow glug-glug sound.
Skip boiling water, especially with plastic standpipes or older fittings. Extreme heat may soften seals, stress pipe joints, or make a small leak show up later. Warm water is usually enough to loosen soap residue without beating up the plumbing. Gentle temperature control keeps the cleaning process safer for both the washer and the drain outlet.
After flushing, wipe around the opening and check for dampness behind the washer. A tiny drip can hide under the hose or near the wall plate, then turn into mildew trouble over time. Dry surfaces make it easier to spot leaks during the next cycle. Dry inspection is boring, sure, but it saves headaches.
Clear Detergent Film And Mineral Buildup
Detergent film is sneaky because it doesn’t always look like a clog at first. It coats the hose and outlet slowly, then traps lint and dirt until water has less room to move. Too much detergent makes the problem worse, even in modern high-efficiency machines. Soap residue control is one of the biggest steps in keeping the drain outlet clear.
Hard water can add another layer of trouble. Mineral deposits may collect inside the washer and around drainage paths, especially if the machine runs frequent loads. That buildup can make odors stronger and slow down drainage over time. For machine-specific buildup care, refresh the washer system with descaler for lg washing machine so residue doesn’t keep feeding the same drain problems.
Use a mild cleaning routine instead of chasing every smell with more product. Too many cleaners can leave fresh residue, and that defeats the whole point. Run maintenance cycles only as recommended by the washer manual, then give the drain outlet time to dry. Balanced cleaning keeps the system fresher without overloading it with extra chemicals.
Check the detergent drawer and washer gasket while you’re already working near the machine. Grime from those spots can wash into the drain again and restart the cycle. A cleaner washer sends less sludge toward the outlet during every load. Whole-machine maintenance makes drain cleaning last longer.
Prevent Backups During Heavy Loads
Bulky loads put more pressure on drainage because towels, blankets, and pet bedding release a lot of water at once. If the drain outlet is partly restricted, that surge can overwhelm the standpipe fast. One heavy cycle may reveal a clog that lighter loads hid for weeks. Load size control helps protect the drain from sudden backup.
Leave enough space in the washer so water can move freely during rinse and spin cycles. Overpacked loads hold more dirty water and shed extra lint into the system. That lint doesn’t vanish. It travels straight toward the hose and outlet, where it can stick to old soap film. Lint reduction starts before the drain ever sees trouble.
Pet blankets deserve special treatment because fur collects in thick mats once it hits wet residue. Shake them outside first, then wash smaller batches instead of stuffing the drum full. A mesh laundry bag can help catch loose hair from small washable items. Pet hair control keeps the outlet from turning into a lint trap.
Watch the drain during the first heavy load after cleaning. Stand nearby during the drain cycle and look for splashing, rising water, or hose movement. If the outlet handles that load cleanly, regular laundry should be much less risky. Real-cycle testing gives better proof than a quick peek with a flashlight.
Keep The Laundry Area Dry And Fresh
Moisture around the washer can make even a clean drain outlet smell dirty. Water trapped behind the machine, under the hose, or near the baseboard creates the kind of damp pocket mildew loves. Dry the floor after cleaning and leave the area open for airflow. Moisture control helps stop odors from bouncing right back.
Small laundry closets need extra attention because airflow is usually weak. Keep the door open after wash cycles when possible, especially after cleaning the drain outlet. A fan can help dry hidden corners faster, and that matters in humid homes. Air circulation supports a fresher washer area without relying on heavy fragrance.
Household ventilation plays into cleaning comfort too. Drain work can release sour smells, and nearby rooms may hold odors longer than expected. Separately, if kitchen air also struggles with grease, steam, and heavy cooking smells, improve home airflow with heavy duty range hoods built for stronger ventilation demands. Better ventilation makes messy maintenance jobs feel less overwhelming indoors.
Don’t shove the washer tight against the wall after cleaning. Leave enough space so the hose curves naturally without crushing or rubbing against sharp edges. A little breathing room also makes future inspections quicker. Proper spacing helps protect the hose, outlet, and wall connection.
Know When Cleaning Is Not Enough
Some drain problems sit deeper than the outlet opening. If warm flushing backs up quickly after debris removal, the blockage may be inside the standpipe or main drain line. Forcing tools deeper can scratch pipes or wedge the clog tighter. Deep blockage warning means it’s time to slow down and avoid risky moves.
Repeated overflow after cleaning points to a bigger issue. The washer may be draining faster than the plumbing can handle, or the pipe may already be narrowed by years of buildup. That problem needs more than surface cleaning. Recurring backup deserves proper inspection before water damages flooring or drywall.
Sewer-like smells are another red flag. A sour laundry odor is common with detergent sludge, but a strong sewer odor may point to a trap or venting issue. That kind of smell should not be ignored or covered with air freshener. Drain odor diagnosis keeps the repair focused on the real cause.
Call a plumber if water rises from the outlet, nearby drains gurgle together, or cleaning only helps for a few days. Those signs suggest the restriction may be beyond the washer area. Basic maintenance is useful, but it has limits. Professional help protects the home when the drain system needs more than a safe DIY cleaning.
Build A Safer Cleaning Routine
A monthly check keeps the drain outlet from becoming a mystery problem. Look behind the washer, inspect the hose curve, and sniff for damp odors before they get loud. Small checks take only a few minutes and can stop buildup before it hardens. Routine inspection is the easiest way to avoid surprise laundry room drama.
Use less detergent if loads feel slimy, smell musty, or leave residue in the drum. More soap doesn’t mean cleaner clothes, and extra suds can feed drain buildup. Follow the washer label and adjust for load size instead of pouring by habit. Correct detergent use protects both laundry and plumbing.
Clean lint-heavy items with a little strategy. Shake rugs, pet bedding, and work clothes before washing, then avoid mixing them with delicate fabrics that shed fibers. The drain outlet has an easier job when fewer solids enter the water flow. Pre-wash lint control keeps the outlet clearer between deep cleanings.
After each drain cleaning, run one test cycle and check the floor with a dry paper towel near the hose connection. Paper catches tiny leaks your eyes may miss. Tighten only what needs tightening, because overdoing clamps can damage hose material. Leak checking turns safe cleaning into dependable maintenance.
Avoid Common Drain Cleaning Mistakes
Harsh chemicals feel tempting because they promise speed. The trouble is, they can create fumes, irritate skin, and damage older pipes if used carelessly. They may also loosen sludge without fully removing it, leaving the drain ready to clog again. Chemical caution keeps a simple cleanup from becoming a plumbing headache.
Never push a rigid object deep into the outlet without knowing what’s inside. Wire hangers, screwdrivers, and sharp tools can puncture hoses or scrape pipe walls. A soft brush or suction method is safer for basic debris near the opening. Tool choice makes a real difference in preventing accidental damage.
Don’t ignore the hose position after cleaning. A hose shoved too far into the standpipe can affect airflow, while a loose hose can jump during draining. Both problems can create water messes even after the outlet is clean. Secure hose placement keeps water moving where it belongs.
Skipping the final test cycle is another classic mistake. Everything may look fine while the washer is off, but leaks and backups usually show up during draining. Run a short cycle, stay nearby, and watch the outlet area closely. Final testing confirms the drain is ready for regular use.


10 Best Quality Semi Automatic Washing Machine of 2026 For Leak-Free Laundry

11 Best Small Washer Machine of 2026 For Everyday Laundry

12 Best Vibration Pads For Washing Machine of 2026 To Stop Walking and Shaking

11 Best Selling Front Load Washing Machine of 2026 For Quiet Odor-Free Laundry

11 Best Washing Machine For King Size Bedding of 2026 To Prevent Cycle Errors

10 Best Small Front Loader Washing Machine of 2026 For Tight Closets

12 Best Side Load Washing Machine of 2026 For Low Vibration

11 Best Single Tub Washing Machine of 2026 For Apartments Without Hookups






