
How To Clean Washer Drain Hose Connection Point Right

How To Clean Washer Drain Hose Connection Point sounds simple at first glance, but wow, that hidden area can turn into a messy little nightmare faster than most people expect. Soap residue, lint, moisture, and greasy buildup love to collect where the hose connects to the drain. Then the warning signs start creeping in. Funky smells drift through the laundry room, water drains slower than usual, or puddles suddenly appear near the machine. Ignore it long enough, and the whole area starts feeling damp, musty, and frustrating to deal with.
Most people focus on wiping down the washer drum or tossing in a cleaning tablet, yet the drain hose connection point quietly collects grime behind the scenes. That hidden corner rarely gets attention until something smells off or the washer starts acting up. Thick sludge can cling around the hose opening, especially in homes where heavy laundry loads pile up week after week. Pet hair, detergent residue, and softener buildup often create a sticky mess that doesn't rinse away on its own.
Cleaning the connection point properly helps improve water flow, reduces unpleasant odors, and prevents clogs from creeping deeper into the drain system. A quick surface wipe won't cut it either. The grime usually hides around the inner rim, underneath the hose edge, and inside the surrounding drain opening. Getting into those overlooked areas makes a huge difference, especially if the laundry room already feels humid or stale.
Another thing people don't always realize? Small leaks around the hose connection can slowly damage flooring, nearby walls, or cabinets. That's where regular maintenance pays off big time. A clean and secure washer drain hose connection helps the appliance run smoother while reducing the chances of surprise plumbing headaches later on. Nobody wants to pause laundry halfway through because dirty water suddenly backs up across the floor.
Strong cleaning habits also make laundry spaces feel fresher overall. Lingering mildew smells can cling to towels, workout clothes, and bedding even after washing. Once buildup starts collecting around the connection point, odors tend to spread fast. Keeping that area clean helps maintain a more sanitary environment while making the washer feel less like a hidden science experiment tucked in the corner.
Some connection points clean up easily with warm water and a brush, while others need deeper scrubbing to loosen hardened residue. Flexible cleaning tools, proper drying, and occasional inspections go a long way toward preventing recurring issues. A little effort now saves plenty of irritation later, especially when laundry already feels like enough of a chore on busy weeks.

- TAR Score10.0
TAR Score is a ranking system developed by TopAppliancesReviews.com. TAR score has no relationship or impact from any manufacturers or sales agent websites. Learn more
- BrandAlovexiong

- TAR Score10.0
TAR Score is a ranking system developed by TopAppliancesReviews.com. TAR score has no relationship or impact from any manufacturers or sales agent websites. Learn more
- BrandZM
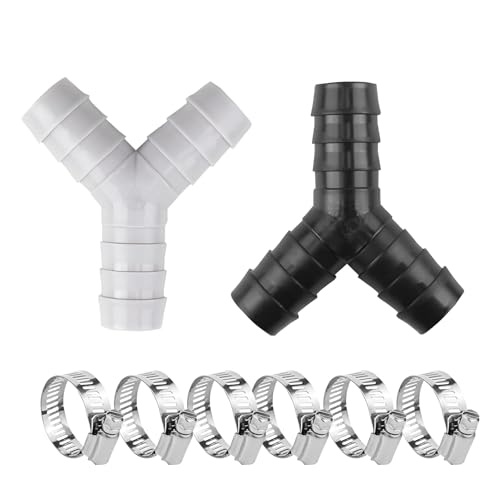
- TAR Score10.0
TAR Score is a ranking system developed by TopAppliancesReviews.com. TAR score has no relationship or impact from any manufacturers or sales agent websites. Learn more
- BrandSAMIQU

- TAR Score9.4
TAR Score is a ranking system developed by TopAppliancesReviews.com. TAR score has no relationship or impact from any manufacturers or sales agent websites. Learn more
- BrandIffitya

- TAR Score9.2
TAR Score is a ranking system developed by TopAppliancesReviews.com. TAR score has no relationship or impact from any manufacturers or sales agent websites. Learn more
- BrandLiaogo

- TAR Score8.8
TAR Score is a ranking system developed by TopAppliancesReviews.com. TAR score has no relationship or impact from any manufacturers or sales agent websites. Learn more
- Brandlasenersm
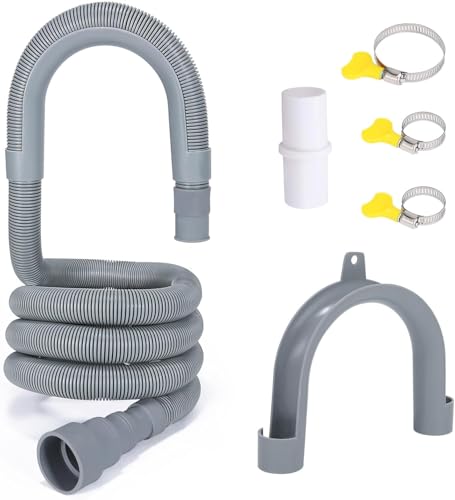
- TAR Score8.8
TAR Score is a ranking system developed by TopAppliancesReviews.com. TAR score has no relationship or impact from any manufacturers or sales agent websites. Learn more
- BrandPink Cross

- TAR Score8.6
TAR Score is a ranking system developed by TopAppliancesReviews.com. TAR score has no relationship or impact from any manufacturers or sales agent websites. Learn more
- BrandJHBKing
Last update on 2026-07-14 / Affiliate links / Images, Product Titles, and Product Highlights from Amazon Product Advertising API
How To Clean Washer Drain Hose Connection Point
A sour laundry room smell can sneak up fast, especially after a few heavy loads of towels, pet blankets, or muddy clothes. The washer may still run, the drum may look clean, and yet the corner behind the machine starts giving off that damp, stale funk nobody wants near fresh laundry. That is where how to clean washer drain hose connection point becomes more than a small chore. A grimy connection point can trap lint, detergent residue, and standing moisture, then turn a normal wash day into a slow-draining, nose-wrinkling hassle.
Drain Hose Connection Basics
The washer drain hose connection point is the spot where the drain hose meets the standpipe, utility sink, wall drain, or laundry drain outlet. It looks boring, sure, but it handles every dirty gallon of water leaving the machine. That water carries soap film, fabric fibers, hair, soil, and body oils. Over time, those leftovers cling to the hose end and the drain opening like gunk around a kitchen sink stopper.
A clean drum does not always mean a clean drainage path. The connection point often sits behind the washer where nobody looks until something smells off or water starts acting weird. That hidden spot can collect sludge around the rim, especially if the hose is shoved too far into the drain pipe. Poor airflow around the connection can make the buildup smell worse.
The first clue is usually slow draining. The washer may finish its cycle, but water may linger longer than usual or make a faint gurgling sound near the wall. Another sign is a damp odor that shows up even after cleaning the washer tub. Once that smell settles around the hose connection, wiping the outside of the machine will not solve the real problem.
Cleaning this area helps protect more than the washer. A clogged or poorly sealed connection can cause minor leaks, splashback, and drain backups. Those small problems can damage flooring, baseboards, or nearby cabinets if they go unnoticed. A few careful minutes behind the washer can save a whole lot of “well, that’s not good” later.
Safety Before Pulling The Washer
Start with safety, because a washer is heavy and the space behind it is usually cramped. Unplug the machine before reaching around hoses or metal edges. Turn off the water supply valves if the washer needs to move far from the wall. Keep the floor dry so your feet do not slide while you work.
Pulling a washer out too quickly can kink hoses or stress the drain line. Move it slowly, a few inches at a time, and check behind it as you go. A helper makes this easier, especially with stacked units or machines wedged into tight laundry closets. Protect the floor with a towel, cardboard, or a thin moving mat to reduce scratches and scuffs.
Have a bucket or shallow pan ready before removing the drain hose from the connection point. Leftover water may spill from the hose, even if the washer looks empty. That water can smell pretty rough, so gloves are not just for looks here. A few old towels nearby help catch drips before they spread under the appliance.
Good lighting matters more than people expect. A small flashlight lets you inspect the hose end, clamp area, drain opening, and wall plate. Grime often hides around the underside of the hose where shadows make it easy to miss. Seeing the mess clearly keeps the cleaning job from turning into guesswork.
Tools That Make Cleaning Easier
A basic cleaning kit can handle most washer drain hose connection messes. Gather rubber gloves, old towels, a bucket, a flashlight, a small brush, and warm water. A bottle brush or flexible drain brush works well for the hose end and the first few inches of the drain opening. Skip harsh moves that could crack plastic fittings or loosen plumbing joints.
Mild dish soap can help break down greasy detergent film. White vinegar can loosen mineral haze and stale odors around the connection area, although it should not be treated like magic. Baking soda can help scrub surface grime, but it should not be packed into the drain opening. The goal is controlled cleaning, not creating a fizzy clog deeper in the pipe.
A small nylon brush gives better control than a big scrub brush. The bristles can reach around ridges, hose ribs, and clamp grooves without chewing up the plastic. Cotton swabs can help around tight edges, especially near the hose lip. For stubborn gunk, let warm soapy water sit on the area briefly before scrubbing again.
Detergent habits also affect how quickly this area gets dirty. Too much soap leaves more residue in the drainage path, especially in high-efficiency machines that use less water. To reduce future buildup, compare formulas made for machine type and soil level, then choose carefully through best detergent for top loading washing machine if your laundry setup uses a top loader. The right detergent amount supports cleaner draining and less sticky residue.
How To Remove The Hose Without A Mess
Place the bucket under the drain hose connection point before loosening anything. Even a small amount of trapped water can spread fast across the laundry room floor. If the hose is held by a clamp, loosen it gently and keep one hand on the hose. Sudden pulls can splash dirty water or knock loose grime into places you cannot reach.
Slide the hose out slowly and keep the open end pointed upward as much as possible. Then lower it into the bucket to drain the remaining water. That simple move keeps the mess contained instead of turning the floor into a swampy surprise. Watch for black sludge, gray film, lint clumps, or sour-smelling water.
Look at how far the hose was inserted into the drain. A hose pushed too deeply can reduce airflow and create siphoning or drainage issues. A hose barely sitting in place can pop loose during a drain cycle. Proper placement helps prevent backsplash, odor, and loose-hose leaks.
Check the hose itself for cracks, soft spots, or crushed areas. A clean connection point cannot fix a damaged hose. If the hose feels brittle or has visible splits, replacement is usually smarter than patching it. A weak hose can leak again right after the area is cleaned, which is a headache nobody needs.
Scrubbing The Connection Point
Start by wiping the outside of the connection with a damp towel. This removes dust and loose lint before deeper cleaning begins. Then scrub around the hose opening, drain rim, and clamp area with warm soapy water. Work slowly, because built-up residue can hide in small ridges and seams.
Use the bottle brush inside the hose end, but do not force it too far if the hose bends sharply. Gentle twisting breaks up residue without damaging the hose wall. Rinse the brush often so you are not smearing the same grime back around. The hose end should feel smoother and smell cleaner once the detergent film and lint buildup are gone.
Clean the drain opening carefully, especially the first inch or two where sludge tends to gather. A flexible brush can remove grime from the inner edge without pushing debris deeper. If you pull out large clumps, stop and remove them by hand with gloves instead of shoving them down. That keeps a small cleanup from becoming a deeper drain clog.
Some laundry routines create more residue than others. Small delicate loads, hand-wash cycles, and gentle fabrics often use mild detergents that still leave film if overpoured. For laundry that needs extra care, explore washing machine for hand washables to match fabric care with better water movement. Better cycle matching can reduce leftover suds and fabric debris entering the drain hose.
Odor Control Around The Drain Area
Odor usually comes from moisture trapped with organic residue. Lint, hair, detergent, and softener film can sit around the connection point and feed that stale smell. A clean scrub removes the source instead of masking it with fragrance. Air fresheners may hide the odor for a day, but the stink comes back if the gunk stays put.
After scrubbing, wipe the area with a clean damp cloth, then dry it thoroughly. Drying matters because damp plastic and dark corners invite mildew smells. Leave the area open for a little while before pushing the washer back. Airflow helps the connection point stay fresher after cleaning.
Check the laundry room itself if odors linger. Poor ventilation can make the washer area smell worse, especially in small apartments, basements, or closets. Moist air hangs around hoses, wall drains, and nearby shelving. For tight spaces with stale air, compare odor and dust control support through air purifier for dorm room if the laundry area shares air with a compact living space.
A clean drain connection should not smell sour after drying. If the odor remains strong, the issue may sit deeper in the standpipe or plumbing trap. That does not mean the cleaning failed. It means the visible washer drain hose connection point was only part of the odor path.
Checking For Leaks After Reassembly
Reattach the hose firmly without jamming it too far into the drain. The connection should feel stable, with enough support to prevent shaking during drain cycles. Tighten the clamp if your setup uses one, but avoid crushing the hose. A secure fit helps prevent splashback and slow leaks.
Run a short rinse or drain cycle while watching the connection point. Keep towels nearby and use a flashlight to check the underside of the hose. Small leaks can be sneaky, especially if water follows the hose before dripping. Catching them right away saves the floor from hidden moisture damage.
Listen for odd sounds during draining. A healthy drain should move water without loud gurgling, repeated surging, or water backing up around the hose. Occasional drain noise can be normal, but messy bubbling near the standpipe deserves attention. Sound often reveals airflow problems or partial blockages.
Push the washer back only after the area stays dry during the test. Leave enough space so the hose does not kink against the wall. A kinked hose slows drainage and can make the washer work harder during spin and drain cycles. Proper hose positioning keeps water flow steady and predictable.
How To Clean Washer Drain Hose Connection Point
Small drainage problems can snowball quietly, especially after the connection point has been scrubbed but the washer still smells a little off. That is the moment to look beyond surface grime and pay attention to airflow, hose position, trapped lint, and leftover moisture. A clean hose end helps, but the whole drain path needs room to breathe. Keeping how to clean washer drain hose connection point practical means checking the setup after cleaning, not just wiping it down and hoping for the best.
Preventing Buildup From Coming Back
Residue returns faster when detergent, fabric softener, and lint keep feeding the same damp spot. Use the recommended detergent amount instead of guessing with a heavy pour. Too much soap leaves sticky film inside the hose and around the drain opening. That film grabs lint like a magnet, then the connection point starts smelling stale again.
Run occasional hot water cycles if your fabrics and washer allow it. Warm water helps rinse away soap scum and greasy buildup before it hardens near the hose connection. Cold cycles are useful for many loads, but they do not always break down oily residue as well. Balance matters, especially in homes with workout clothes, towels, pet bedding, or muddy garden clothes.
Skip pouring random chemicals into the connection point just because the drain smells bad. Some products can be too harsh for hoses, seals, or older plumbing. For deeper blockage concerns, compare a safer match through best drain opener before dumping anything into the drain path. A smart cleaner supports clog removal without turning a small problem into damaged plumbing.
Leave a little space behind the washer so the drain hose does not press hard against the wall. A pinched hose slows water flow and traps dirty moisture. That cramped bend can also make buildup collect in one stubborn area. Better hose positioning gives water, lint, and suds a cleaner path out.
Spotting Deeper Drain Problems
A freshly cleaned connection point should drain without splashback, loud bubbling, or water pooling near the wall. If those problems keep showing up, the clog may sit deeper in the standpipe or household drain. The washer connection is only the first stop in the line. A deeper issue can make the clean hose end look guilty even after you did the job right.
Watch how water behaves during the drain cycle. Fast rising water in the standpipe points to a restriction below the visible opening. Gurgling can mean the drain needs better airflow or has a partial clog. Slow draining paired with sewer-like odor may signal a problem beyond normal laundry residue.
Do not keep running full loads if water backs up around the hose. Heavy loads push more water through the drain in a short burst. That pressure can overflow a sluggish standpipe and soak the floor. Pause the laundry routine until the drainage issue is checked properly.
A plumber may be needed if the drain repeatedly backs up after cleaning. That is not overreacting. Hidden clogs can sit far below the washer connection, especially in older homes or laundry rooms with long drain runs. Fixing the real blockage protects the washer, flooring, and nearby walls.
Handling Odors In Small Laundry Spaces
Small laundry closets trap smells faster than open utility rooms. Moisture hangs around the washer, the hose, and the wall drain with nowhere easy to go. That makes the drain hose connection point more likely to develop a musty edge. A clean connection helps, but poor ventilation can bring the smell back.
Keep the washer door or lid open after loads when possible. That simple habit lets moisture escape instead of sitting inside the machine and drain area. Wipe visible damp spots near the hose after heavy loads. Dry surfaces make it harder for mildew and sour odors to settle in.
Check nearby walls, shelves, and baseboards for damp dust. Laundry rooms often collect lint in corners, and lint holds moisture surprisingly well. Once damp lint mixes with detergent residue, the smell can linger even after the hose connection is clean. A quick wipe around the area supports better odor control.
Kitchen-adjacent laundry setups can be trickier because cooking moisture and laundry humidity share the same air. Better ventilation in nearby spaces can reduce stale indoor air, and a separate upgrade such as insert range hoods may help kitchens move steam and odors out more effectively. Cleaner surrounding air makes the laundry corner feel less stuffy, especially in compact homes.
Maintenance Habits That Actually Stick
Set a simple cleaning rhythm instead of waiting for a bad smell. Monthly visual checks are enough for many homes, while busy households may need quicker inspections. Look for lint rings, dark residue, wet spots, and hose movement. These small clues tell you whether the connection point needs attention.
Keep a towel and small brush near the laundry area. That tiny bit of convenience makes cleaning less annoying. Nobody wants to hunt for supplies after noticing grime behind the washer. Easy access turns washer drain hose maintenance into a five-minute habit instead of a weekend project.
Use less fabric softener if the connection point gets sticky fast. Softener can leave a waxy film that clings to hoses and drain openings. Dryer sheets may be a better fit for some laundry routines, though they have their own tradeoffs. Reducing buildup at the source keeps the drain connection cleaner for longer.
Check the hose after moving the washer for cleaning, flooring work, or appliance repairs. A hose can shift out of place without looking obvious from the front. Make sure it sits securely, drains smoothly, and does not rub against sharp edges. Good positioning protects against leaks, kinks, and surprise backups.
Common Mistakes That Make Things Worse
Shoving the drain hose too far into the standpipe is a common mistake. It may feel more secure, but it can block airflow and create drainage problems. The hose needs a stable fit without disappearing deep into the pipe. Proper placement helps prevent siphoning, odor, and splashback.
Another mistake is using too much force with brushes or tools. Plastic hose ends, rubber seals, and older fittings can crack if treated roughly. Scrub firmly enough to remove grime, but do not attack the parts like a rusted grill grate. Gentle, repeated cleaning protects the hose connection while still removing buildup.
Masking odor with fragrance is a dead end. Scented beads, sprays, and strong detergents may cover the smell briefly, but they do not remove the sludge causing it. Worse, extra scent products can add more residue to the drain path. A cleaner connection point beats perfumed buildup every single time.
Ignoring small leaks is the most expensive mistake. A few drops after each drain cycle can soak flooring slowly and quietly. By the time the damage looks obvious, the area may already smell musty or feel soft underfoot. Catching minor moisture early keeps the repair simple.
Knowing When To Replace The Hose
A clean hose is not always a healthy hose. Cracks, bulges, brittle plastic, or soft collapsed spots mean the hose may be near the end of its useful life. Cleaning cannot fix worn material. Replacing a weak hose protects against leaks and sudden drain failures.
Smell can also point to replacement. If the hose still smells sour after thorough cleaning and drying, residue may be trapped deep in the corrugations. Some older hoses hold odor no matter how much scrubbing they get. At that point, a new hose may save more time than another round of deep cleaning.
Match the replacement hose to the washer and drain setup. A hose that is too short can pull loose, while an overly long hose can sag and hold dirty water. The right length supports smooth drainage without awkward bends. Clean routing helps reduce standing water and lint buildup.
Inspect the clamp or hose guide during replacement. A worn clamp may not hold tightly after being removed and reinstalled several times. A weak guide can let the hose wiggle during heavy drain cycles. Secure hardware keeps the washer drain hose connection point stable after cleaning.
Keeping The Laundry Area Cleaner Long Term
A cleaner connection point works best with a cleaner laundry routine. Shake out muddy clothes, pet blankets, and lint-heavy towels before washing. That small step reduces debris entering the drain line. Less debris means less sludge around the hose connection.
Use mesh bags for small items that shed fibers or collect hair. Socks, cleaning cloths, and delicate pieces can release surprising amounts of lint. Mesh bags help contain loose material before it reaches the drain. This habit supports better water flow and fewer clogs.
Keep the area behind the washer accessible. Laundry rooms often become storage zones for baskets, bottles, and random household odds and ends. Clutter makes inspection harder and hides early warning signs. Clear space makes it easier to spot leaks, odor, and hose movement before they turn ugly.
Clean the connection point before seasonal humidity spikes if your home gets damp in warmer months. Humid air makes mildew smells stronger and slows drying around the hose area. A pre-season scrub helps the washer drain area stay fresher through heavy laundry weeks. That steady upkeep keeps how to clean washer drain hose connection point from becoming an emergency chore.


10 Best Quality Semi Automatic Washing Machine of 2026 For Leak-Free Laundry

11 Best Small Washer Machine of 2026 For Everyday Laundry

12 Best Vibration Pads For Washing Machine of 2026 To Stop Walking and Shaking

11 Best Selling Front Load Washing Machine of 2026 For Quiet Odor-Free Laundry

11 Best Washing Machine For King Size Bedding of 2026 To Prevent Cycle Errors

10 Best Small Front Loader Washing Machine of 2026 For Tight Closets

12 Best Side Load Washing Machine of 2026 For Low Vibration

11 Best Single Tub Washing Machine of 2026 For Apartments Without Hookups






