
How to Clean a Front Load Washer Gasket and Remove Mold

Most people assume running an empty hot wash will clear out sour smells, but water alone cannot flush the grime trapped inside the rubber folds. The real fix is to pull back the door seal, clear out hidden debris, and scrub the rubber clean with a targeted cleaner before wiping the ring dry.
How you tackle the job depends on how deep the problem goes. Fresh, slippery slime wipes off quickly, but dark mold spots embedded in the rubber require a longer soaking step to lift. Safety also guides your choice of cleaner, since everyday household solutions like bleach and vinegar must never be combined. As long as the rubber is still flexible without rips or leaks, you can restore it completely. Here is how to clear the buildup step by step.
The Short Version
- Peel back the thick rubber door seal folds to remove trapped hair, coins, and slimy sludge by hand.
- Scrub the rubber folds thoroughly using warm water and liquid chlorine bleach, white vinegar, or a specialized cleaning gel, but never mix chemicals together.
- Soak stubborn, embedded black mold stains for several hours using bleach-damped rags or a thick cleaning gel that clings to vertical rubber surfaces.
- Keep the washer door cracked open between laundry days and wipe the bottom fold dry with a towel to prevent moisture and mildew from coming back.
Why Front-Load Door Seals Trap Water and Turn Black
Front-load washers clean clothes with very little water by tumbling them through a horizontal stainless steel clothes tub. To prevent gallons of wash water from spilling onto your floor, manufacturers seal the front opening with a thick, flexible rubber door seal. When you shut the washer door, it presses firmly against this rubber ring to create an airtight and watertight barrier.
That watertight seal keeps water inside during the wash cycle, but it also traps moisture after the cycle ends. Unlike top-load machines that vent damp air naturally through a loose top lid, a closed front-load door seals in heat and humidity. Water droplets cling to the rubber surfaces and drain toward the lowest point of the ring. Small drain slits at the bottom of the rubber are supposed to channel this water away, but they frequently plug up with lint, pet fur, and loose threads. When those drain slits clog, a puddle of standing water sits trapped in the folds for days.
Every load of laundry adds soap residue and organic matter to that puddle. Dirt, dead skin cells, and body oils wash out of fabrics and mix with excess detergent. Traditional laundry soaps create high suds that do not rinse away easily. Even low-suds HE (High Efficiency) detergent leaves a slick film behind when you use too much. Liquid fabric softeners make the problem worse by coating the rubber in animal fats and petroleum distillates. This combination of standing water, darkness, warmth, and soap scum creates an ideal feeding ground for black mold and smelly mildew spores.
Safe Cleaning Supplies and What Never to Mix
Before grabbing cleaning bottles from under the sink, understand that mixing certain household cleaners can be dangerous to your health. Combining liquid chlorine bleach with distilled white vinegar or any other acid creates toxic chlorine gas. Inhaling chlorine gas causes severe irritation to your eyes, throat, and lungs. If you choose to clean with bleach, use only water with it. If you prefer vinegar, do not use bleach in the same cleaning session.
Here are the safest and most effective cleaning supplies for treating washer rubber:
- Liquid chlorine bleach: The most dependable option for sanitizing mold and lightning dark stains. Mix one cup of bleach with one gallon of warm water, or use it neat on stubborn spots if your manual permits.
- Distilled white vinegar: A gentle, natural acid that dissolves hard water mineral deposits and light soap scum. It is ideal for routine maintenance if you prefer to avoid harsh fumes.
- Baking soda: A mild, powdery abrasive that scrubs away slimy buildup without scratching or gouging delicate rubber parts.
- Thick mold cleaning gels: Commercial cleaning gels designed for appliances cling directly to vertical surfaces without dripping, giving active ingredients hours to break down deep stains.
- Soft cleaning tools: Use microfiber towels and an old soft-bristled toothbrush to reach deep into narrow rubber folds. Never use steel wool, wire brushes, or sharp metal scrapers, which easily puncture the rubber and cause permanent leaks.
Step-by-Step Rubber Door Seal Cleaning
Regular maintenance removes slimy buildup and stops foul odors before mold digs deep into the rubber. Follow these steps to restore your seal:
- Disconnect power and put on gloves. Unplug the washer power cord from the standard 120-volt 3-prong grounded wall outlet to prevent any accidental starts. Slip on rubber gloves to protect your hands from grime, mold spores, and strong cleaning liquids.
- Peel back the rubber folds and clear solid debris. Pull the outer lip of the rubber door seal toward you to expose the hidden inner groove. Reach completely around the perimeter. Pull out trapped coins, hair clips, buttons, clumps of pet hair, and wet lint, then throw them into the trash.
- Clear the small drain slits. Locate the small drain slits at the very bottom center of the rubber ring. Inspect them for plugged lint or slimy sludge. Use a cotton swab or your gloved pinky finger to clear these openings so future wash water can drain into the pump system naturally.
- Wipe down the rubber with your cleaning solution. Dip a microfiber cloth into your mixture of warm water and liquid bleach (or warm water and mild soap). Hold the rubber fold open with one hand and firmly wipe down all interior surfaces with the other. Wipe the inner drum rim, the outer rubber flap, and the hidden channel behind the front lip.
- Scrub tight crevices with a soft toothbrush. Dip an old soft-bristled toothbrush into the cleaning solution. Work the bristles into the narrow seams, around the drain slits, and along the back edge where the rubber meets the stainless steel clothes tub. Scrub gently to lift stubborn slime without tearing the seal.
- Rinse and dry completely. Wet a clean microfiber cloth with plain tap water and wipe away all remaining soap, loosened sludge, and bleach residue. Follow up with a dry cotton towel, soaking up every drop of moisture from the bottom fold.
Tackling Stubborn, Set-In Mold Stains
If you inherited a neglected washer or let buildup sit for months, wiping the surface may leave ugly black spots behind. Synthetic door seals are made from porous rubber compounds. When black mold lives on damp rubber for an extended period, its microscopic roots grow beneath the surface. The slime layer wipes away, but the dark melanin pigment remains trapped inside the rubber pores.
Removing these deep stains requires extended contact time rather than aggressive scrubbing:
- Dry the rubber completely. Use a clean towel to dry the stained sections of the rubber seal. Cleaning agents cannot cling or soak into the rubber pores if a film of water is sitting on the surface.
- Apply a clinging compress or heavy gel. For a bleach compress, soak several white cotton shop towels or thick paper towels in pure liquid chlorine bleach. Press the soaked towels directly against the stained areas inside the rubber folds, packing them tightly so the fabric stays glued against the rubber. If you prefer a mold remover gel, squeeze a generous bead along the stained grooves; the gel is formulated to hold onto vertical walls without running down the drain.
- Let the treatment soak for several hours. Leave the bleach-soaked rags or thick gel undisturbed for five to eight hours, or overnight for severe stains. This gives the chemical agents enough time to oxidize and dissolve the embedded organic pigments deep inside the rubber.
- Remove the treatment and scrub. Pull out the rags and discard them in the trash. Take an old soft-bristled toothbrush and scrub the treated spots. The dark stains should lift away or show significant lightening. Wipe the entire area clean with a damp rag.
- Run an empty hot maintenance cycle. After treating the rubber, run a self-clean cycle or an empty heavy-duty cycle on the hottest water setting. Add an eco-friendly washing machine cleaner tablet to the empty inner wash basket. This flushes chemical residue from internal hoses and breaks down grime clinging to the hidden outer wash tub.
Simple Daily Habits to Keep the Rubber Dry and Fresh
Preventing mold is far easier than soaking and scrubbing embedded stains. Making a few minor adjustments to your daily laundry routine keeps the seal fresh and extends the working life of the rubber:
- Leave the door cracked open after every load. Never slam the washer door shut when a cycle finishes. Leaving the door open two to three inches allows air to circulate, drying out the drum and rubber seal before mold spores can germinate.
- Dry the bottom fold with a dedicated towel. Keep an inexpensive hand towel on top of your washer. After unloading your final load of clothes for the day, swipe the towel through the bottom fold of the rubber door seal to soak up any remaining puddle.
- Measure your low-suds HE detergent carefully. More soap does not equal cleaner clothes. Excess soap creates thick suds that do not rinse away, leaving a gummy film that feeds mildew. Standard laundry loads only require one to two tablespoons of liquid detergent.
- Ditch liquid fabric softeners. Liquid softeners leave a greasy chemical film on internal drums and rubber parts. Replace liquid softener with half a cup of distilled white vinegar in your dispenser drawer, or use wool dryer balls inside the clothes dryer to soften fabrics naturally.
- Run a monthly sanitizing wash. Run an empty cleaning cycle once every month using hot water and a dedicated washing machine cleaner tablet. Regular sanitizing washes wash away fresh slime from internal hoses. When you frequently wash heavy loads, a reliable front-load washing machine for bulky laundry stays fresh much longer when maintained with a monthly hot clean.
When to Replace the Seal Instead of Cleaning It
Cleaning restores most smelly or stained gaskets, but rubber inevitably degrades over time. Harsh chemical use, mechanical friction from clothes, and age cause rubber to lose its elasticity. Look for these warning signs to determine if you need to replace the door seal rather than clean it:
- Visible cuts, rips, or punctures. Sharp items like loose nails, unzipped metal zippers, or bra underwires can slice into the rubber folds during a high-speed spin. Even a hairline tear will leak water into the machine cabinet or onto your floor during wash cycles.
- Persistent puddles under the door. If you notice clean water dripping down the front panel of the washer while the machine runs, check the seal alignment. If the drain slits are clear and the glass is clean, the rubber has likely warped and can no longer seal against the door.
- Brittle, peeling, or cracking rubber. Touch the rubber all the way around the rim. If the material feels rock-hard, shows surface cracks like an old tire, or sheds black rubber crumbs onto your fingers, it has reached the end of its useful life.
- Severe mold rot that stains clean clothes. When mold is ignored for years, it can degrade the physical structure of the rubber, causing it to rot and soften. If black gunk continues to rub off onto clean white clothes despite repeated overnight bleach treatments, replacement is your best choice.
Replacing a rubber door seal requires taking off the front cabinet panel and removing metal spring tension clamps. If you are comfortable working with basic hand tools and following appliance repair diagrams, you can complete the repair yourself. Otherwise, contact a licensed appliance repair technician to install a replacement seal designed specifically for your model.
What to Look for in a Washing Machine to Prevent Mold
If you are shopping for a new washer or tired of constantly cleaning front-load rubber folds, certain appliance design features make mold prevention much simpler. Newer front loaders often incorporate antimicrobial chemical treatments directly into the rubber door seal during manufacturing. This built-in protection inhibits the growth of odor-causing bacteria and mildew across the entire life of the seal.
Look for machines equipped with dedicated drum-venting systems. These appliances use an internal fan that pulls fresh air through the door seal and exhausts humid air out the drain line after a wash cycle finishes, drying the rubber without requiring you to leave the door wide open. You can also look for magnetic door latches that prop the door slightly open without letting it swing freely into your walkway.
Pay attention to the physical shape of the rubber door seal itself. Models with steep, angled rubber folds and oversized drainage channels let water run out rapidly, preventing the standing puddles that breed mold. If you want to bypass rubber door seal maintenance completely, a high-efficiency top-load washing machine relies on a top lid rather than a watertight rubber gasket, making standing water around the door a non-issue.
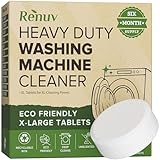
- TAR Score9.0
TAR Score is a ranking system developed by TopAppliancesReviews.com. TAR score has no relationship or impact from any manufacturers or sales agent websites. Learn more
- BrandRenuv
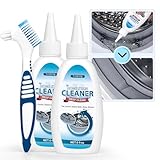
- TAR Score8.8
TAR Score is a ranking system developed by TopAppliancesReviews.com. TAR score has no relationship or impact from any manufacturers or sales agent websites. Learn more
- BrandLeopong

- TAR Score8.2
TAR Score is a ranking system developed by TopAppliancesReviews.com. TAR score has no relationship or impact from any manufacturers or sales agent websites. Learn more
- BrandACTIVE

- TAR Score8.2
TAR Score is a ranking system developed by TopAppliancesReviews.com. TAR score has no relationship or impact from any manufacturers or sales agent websites. Learn more
- BrandHORSEFISH TOOL

- TAR Score8.2
TAR Score is a ranking system developed by TopAppliancesReviews.com. TAR score has no relationship or impact from any manufacturers or sales agent websites. Learn more
- BrandSugelary
Last update on 2026-09-30 / Affiliate links / Images, Product Titles, and Product Highlights from Amazon Product Advertising API
FAQs
Can I use bleach and vinegar together to clean my washer seal?
No, you must never mix liquid chlorine bleach and vinegar together. Mixing chlorine bleach with any acid produces hazardous chlorine gas, which causes respiratory damage and severe eye irritation. Stick to one cleaner per session, and rinse the rubber thoroughly before ever switching products.
How often should I clean the rubber door seal on a front loader?
You should wipe down the rubber folds and check for trapped debris once a week, or at least every few weeks depending on how many loads you run. Drying the bottom fold with a towel after your last load of the day takes only ten seconds and stops mold from starting in the first place.
Why does my washer seal still smell like mildew after scrubbing it?
A lingering odor usually means grime and mold are hiding in areas you cannot see from the doorway. Mold frequently grows behind the rubber lip, inside the detergent dispenser drawer, and on the outer surface of the stainless steel wash tub. Running a hot self-clean cycle with an active cleaning tablet will flush out that hidden sludge.
Can I clean the rubber door seal with rubbing alcohol?
Rubbing alcohol kills surface mold spores, but it evaporates too quickly to lift deep, set-in black stains. It can also dry out synthetic rubber over time if used repeatedly in high concentrations. A mild bleach solution, vinegar, or dedicated cleaning gel provides better stain removal without drying out the seal.


10 Best Quality Semi Automatic Washing Machine of 2026 For Leak-Free Laundry

11 Best Small Washer Machine of 2026 For Everyday Laundry

12 Best Vibration Pads For Washing Machine of 2026 To Stop Walking and Shaking

11 Best Selling Front Load Washing Machine of 2026 For Quiet Odor-Free Laundry

11 Best Washing Machine For King Size Bedding of 2026 To Prevent Cycle Errors

10 Best Small Front Loader Washing Machine of 2026 For Tight Closets

12 Best Side Load Washing Machine of 2026 For Low Vibration

11 Best Single Tub Washing Machine of 2026 For Apartments Without Hookups






