
How to Clean and Drain Washer Pump Filter Right

How to clean and drain washer pump filter sounds simple at first, yet plenty of people end up staring at a puddle on the floor wondering what went wrong. That little filter tucked behind the washer panel quietly collects lint, coins, pet hair, buttons, and all sorts of grimy buildup. Then one day the washer suddenly drains slowly, leaves clothes soaking wet, or throws out a weird musty smell that just won't quit. Ignoring it usually turns a small maintenance job into a frustrating cleanup nobody asked for.
Dirty pump filters often create problems that sneak up slowly. Water may sit at the bottom of the drum after a cycle, strange rattling noises might appear, or the machine could stop mid-wash like it's throwing a tantrum. A clogged filter also forces the drain pump to work harder than it should, which can wear parts down faster over time. Keeping the filter clean helps protect the washer's performance while cutting down on unpleasant odors and surprise drainage headaches.
Plenty of homeowners put this task off because it feels messy or intimidating. Honestly, the hidden placement of the filter doesn't help either. Some washers tuck it behind a tiny access door near the floor, while others make you crouch awkwardly with towels scattered everywhere trying to catch leftover water. Still, once the process becomes familiar, the entire routine feels much less stressful and a whole lot more manageable.
Proper draining matters just as much as cleaning the filter itself. Opening the filter too quickly can send trapped water rushing across the floor in seconds. Slow draining with a shallow pan, old towels, or a small hose keeps things under control and prevents that awful moment where dirty washer water spreads across the laundry room. Little preparation tricks like these save time, reduce cleanup, and make the job feel far less chaotic.
Regular maintenance also improves the overall laundry experience in ways people notice immediately. Clothes come out cleaner, spin cycles run more smoothly, and the washer doesn't struggle with leftover water after every load. That lingering damp smell inside the drum often fades too. A clean filter may seem minor, but it quietly supports nearly every part of the washer's drainage system.
How to clean and drain washer pump filter becomes much easier once the warning signs are recognized early. Slow draining, standing water, funky odors, and loud pump noises usually point toward buildup inside the filter housing. Taking a few minutes every couple of months can prevent expensive repairs and keep laundry day running without unnecessary interruptions. Sometimes the smallest maintenance habits make the biggest difference around the house.

- TAR Score9.4
TAR Score is a ranking system developed by TopAppliancesReviews.com. TAR score has no relationship or impact from any manufacturers or sales agent websites. Learn more
- BrandILHAN GLOBAL TRADE

- TAR Score9.6
TAR Score is a ranking system developed by TopAppliancesReviews.com. TAR score has no relationship or impact from any manufacturers or sales agent websites. Learn more
- BrandTide

- TAR Score9.2
TAR Score is a ranking system developed by TopAppliancesReviews.com. TAR score has no relationship or impact from any manufacturers or sales agent websites. Learn more
- BrandTOVEN-RV

- TAR Score9.6
TAR Score is a ranking system developed by TopAppliancesReviews.com. TAR score has no relationship or impact from any manufacturers or sales agent websites. Learn more
- BrandTide

- TAR Score9.6
TAR Score is a ranking system developed by TopAppliancesReviews.com. TAR score has no relationship or impact from any manufacturers or sales agent websites. Learn more
- BrandTide

- TAR Score9.6
TAR Score is a ranking system developed by TopAppliancesReviews.com. TAR score has no relationship or impact from any manufacturers or sales agent websites. Learn more
- BrandTide

- TAR Score9.6
TAR Score is a ranking system developed by TopAppliancesReviews.com. TAR score has no relationship or impact from any manufacturers or sales agent websites. Learn more
- BrandTide

- TAR Score9.6
TAR Score is a ranking system developed by TopAppliancesReviews.com. TAR score has no relationship or impact from any manufacturers or sales agent websites. Learn more
- BrandTide

- TAR Score9.6
TAR Score is a ranking system developed by TopAppliancesReviews.com. TAR score has no relationship or impact from any manufacturers or sales agent websites. Learn more
- Brandall

- TAR Score9.6
TAR Score is a ranking system developed by TopAppliancesReviews.com. TAR score has no relationship or impact from any manufacturers or sales agent websites. Learn more
- BrandGain

- TAR Score9.4
TAR Score is a ranking system developed by TopAppliancesReviews.com. TAR score has no relationship or impact from any manufacturers or sales agent websites. Learn more
- BrandACTIVE
- TAR Score9.4
TAR Score is a ranking system developed by TopAppliancesReviews.com. TAR score has no relationship or impact from any manufacturers or sales agent websites. Learn more
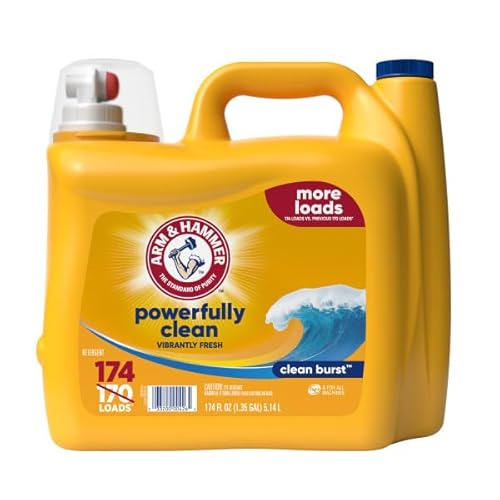
- BrandArm & Hammer
Last update on 2026-06-25 / Affiliate links / Images, Product Titles, and Product Highlights from Amazon Product Advertising API
How To Clean And Drain Washer Pump Filter
A washer that stops draining can turn a normal laundry day into a soggy little headache. Clothes come out heavy, the drum smells stale, and that low humming sound near the bottom of the machine feels like bad news knocking. The real trouble is often smaller than it seems, because how to clean and drain washer pump filter usually starts with removing lint, coins, hair, and sludge from one cramped filter area. A calm setup, a few towels, and slow draining can keep the mess from taking over the laundry room.
Washer Pump Filter Basics
The pump filter catches the junk that should never reach the drain pump. That means lint, loose threads, pet hair, tiny stones, bra wires, pocket coins, and the random button that escaped during a spin cycle. Over time, that debris packs together and blocks the flow of water. The washer may still run, but it starts acting tired, noisy, and stubborn.
A clogged filter often shows up as standing water in the drum or clothes that feel soaked after the final spin. Sometimes the washer pauses mid-cycle because it can’t push water out fast enough. Other times, the drain pump hums like it’s trying hard but getting nowhere. That sound is a clue, not just background noise.
Most front-load washers place the filter behind a small lower access panel. Some models use a short drain hose beside the filter cap, while others make the filter opening handle both draining and debris removal. The location may feel awkward, especially near the floor, but the job is usually more about patience than skill. Rushing is what turns a simple cleaning into a puddle circus.
The big tradeoff is simple. Cleaning the filter takes a little crouching, a shallow pan, and a few grimy minutes. Skipping it can lead to slow drainage, sour smells, poor spin results, and extra strain on the pump. That’s a lousy deal for a task that can prevent a lot of laundry-day drama.
Signs The Filter Needs Cleaning
Slow draining is the most obvious red flag. Water that lingers at the bottom of the drum after a cycle usually means the washer can’t move water freely. A blocked pump filter is one of the first places worth checking because it’s designed to trap debris before it damages the pump. That small filter can become a traffic jam for dirty water.
Bad smells tell another story. Damp lint, soap residue, and hair sitting inside the filter housing create a stale odor that detergent can’t fully hide. The smell may get worse after the washer sits closed for a while. Cleaning the filter helps remove the gunk that keeps feeding that musty laundry room smell.
Noise near the bottom of the washer deserves attention too. A rattling sound may come from coins or small objects bouncing around the filter area. A low hum can mean the pump is struggling against a blockage. These noises don’t always mean a broken machine, but they do point toward drain system stress.
Error codes can also appear when the washer fails to drain within its expected cycle time. Different brands label those codes differently, so the manual matters here. Still, the pattern is familiar: wet clothes, standing water, and a washer that refuses to finish cleanly. Clear the filter before assuming the pump itself has failed.
For a steadier setup during messy laundry maintenance, Upgrade the washer base with a front load washing machine stand so the lower filter area is easier to reach without kneeling awkwardly on a cold floor.
Prep The Area Before Opening
Preparation saves the floor. Before touching the filter cap, unplug the washer and give the drum time to stop fully. If the washer recently ran a hot cycle, wait until the water cools because trapped water can still sit behind the filter. Safety beats speed every single time with washer drain maintenance.
Grab old towels, a shallow tray, and a small bowl before opening anything. A baking sheet with raised edges can work in a pinch if the filter sits close to the floor. Keep a plastic bag nearby for lint clumps, coins, and whatever mystery debris shows up. The goal is controlled draining, not a surprise flood.
Remove the lower access cover gently. Some panels pop open with a small tab, while others need a flat tool or a careful pull. Don’t force the plastic because older panels can snap if handled roughly. A little patience keeps the cover intact and makes the next cleaning less annoying.
The drain hose, if present, should be used before loosening the filter cap. Pull it out slowly, remove the plug, and let water trickle into the shallow pan. Empty the pan often rather than trying to catch everything at once. This small step prevents the classic dirty water spill that makes people dread the job.
Drain Water Without Making A Mess
Slow movement matters most during the draining step. If there’s no small hose, turn the filter cap just enough to let water seep out slowly. Tighten it again when the tray gets full, empty the tray, then repeat the process. That stop-and-go rhythm feels fussy, but it keeps washer water from racing across the floor.
Low-profile containers are handy because many washer filters sit barely above the floor. A shallow pan slides under the opening better than a deep bowl. Towels should sit around the access area, not just underneath it, because water can run sideways along the machine frame. This setup catches the sneaky drips that cause floor damage over time.
Some water may smell awful, especially if the filter hasn’t been cleaned in months. That odor usually comes from trapped lint, detergent residue, and stagnant moisture. Don’t panic if the first flow looks cloudy or carries bits of grime. That mess is exactly why filter cleaning helps the washer drain better.
After the water slows down, unscrew the cap completely and pull the filter out carefully. Debris may sit inside the filter basket or just behind it in the housing. Wipe the opening with a damp cloth and look for anything wrapped around the pump area. Avoid poking deep into the machine with sharp tools because pump parts can be damaged by rough handling.
Homes with tight laundry rooms often struggle with damp odors after washer maintenance. Separately, Clear stale air near a utility shelf with a usb air purifier if the space has poor airflow and no nearby window.
Clean The Filter The Right Way
Rinse the filter under warm running water and scrub away sludge with an old toothbrush. Pay attention to grooves, mesh areas, and the rubber seal because grime hides in those spots. A quick splash isn’t enough if lint has packed into the corners. The cleaner the filter gets, the easier drain water can move through the system.
Check the filter for cracks, worn seals, or warped plastic before reinstalling it. A damaged seal can cause slow leaks even after a careful cleaning. If the cap feels loose or the rubber gasket looks brittle, replacement may be safer than forcing it back in. Small leaks around the filter area can turn into hidden moisture problems under the washer.
Clean the filter housing before putting the filter back. A damp cloth can remove soap film, lint paste, and grit from the opening. If you see a coin or hairpin lodged inside, remove it gently with your fingers or blunt tweezers. The point is to clear the path without scratching or stressing the drain pump housing.
Reinstall the filter by threading it in straight and tightening it firmly by hand. Don’t crank it too hard because plastic threads can strip. After closing the cap, pour a small amount of water into the drum or run a short rinse cycle while watching the filter area. A dry access panel after testing means the seal is doing its job.
Prevent Future Drain Trouble
Empty pockets before every wash, even if that sounds painfully basic. Coins, screws, hair clips, and tissues are common filter blockers because they sneak through laundry loads unnoticed. A quick pocket check takes seconds and saves the pump from chewing on hard objects. That tiny habit protects washer drainage better than most people expect.
Use the right amount of detergent for the load and washer type. Too much soap creates residue that mixes with lint and forms a sticky film inside the filter area. High-efficiency washers especially dislike heavy detergent habits. Cleaner dosing helps reduce soap buildup and keeps the drain system from getting gummy.
Pet hair needs extra attention. Shake blankets, dog beds, and fuzzy clothes outside before loading them into the washer. A laundry mesh bag can help contain small items that shed fibers or release loose threads. Less loose debris in the drum means less junk trapped in the pump filter.
A monthly filter check is practical for busy homes, especially with pets, heavy laundry loads, or frequent towel washing. Lighter laundry routines may stretch longer, but waiting until the washer stops draining is a rough way to manage maintenance. Pair the filter check with wiping the door gasket and leaving the washer door cracked after use. That simple rhythm supports fresher laundry, smoother draining, and fewer ugly surprises near the bottom panel.
For machine upgrades that reduce everyday laundry frustration, Compare features in a lg washing machine front load guide before replacing a washer that keeps having drainage or spin-cycle problems.
Fix Drain Problems After Filter Cleaning
A freshly cleaned filter should make the washer feel less stubborn, but sometimes the machine still drains slowly or leaves clothes wetter than expected. That’s the moment to look beyond the filter and check the drain hose, pump area, and everyday laundry habits. How to clean and drain washer pump filter works best when the entire drainage path stays clear, not just the front filter basket.
Check The Drain Hose Path
The drain hose can cause trouble even after the pump filter looks spotless. A kink behind the washer slows water flow and makes the pump work harder than it should. Keep the hose curved gently, not pinched flat against the wall. A clean filter won’t help much if the water exit path is squeezed shut.
Look for lint clumps or soft buildup inside the hose if draining still feels weak. Older hoses can also sag, crack, or collect grime in low spots where dirty water sits. For a worn or badly bent hose, replace it with a washing machine drain hose that fits the washer outlet and drain setup properly. That small upgrade can reduce slow draining, leaks, and pump strain.
The standpipe height matters too. A hose pushed too far down the drain can create siphoning, while a loose hose may splash during draining. Keep the hose secure without sealing the opening completely, because the drain needs airflow. This balance helps protect the washer from backflow and messy overflow.
After adjusting the hose, run a rinse and spin cycle with no clothes inside. Watch the hose and lower washer area for leaks, drips, or odd pulsing. A steady drain sound usually means water is moving as it should. A gurgle, backup, or sudden spill points to a drain line issue that needs more attention.
Handle Odors After Filter Cleaning
A clean filter can reduce smells, but it may not erase them right away. Moisture hides in the door gasket, detergent drawer, drain hose, and drum seams. Wipe the rubber seal carefully, especially the folds where hair and lint gather. That hidden grime feeds the musty washer smell people notice on towels and workout clothes.
Run a hot cleaning cycle after the filter is reinstalled and leak-tested. Use a washer cleaner or the cleaning method recommended by the appliance manual. Avoid dumping random harsh chemicals into the drum, because strong cleaners can damage rubber parts over time. A controlled cleaning cycle helps remove soap residue without creating new problems.
Leave the washer door slightly open after laundry loads. That tiny habit lets trapped moisture escape instead of sitting inside the drum. Pull the detergent drawer out a little too, especially in humid homes where mildew grows fast. Better airflow supports a fresher drum and reduces the sour smell that clings to clean clothes.
Laundry rooms near kitchens or tight utility areas can trap odors from more than one source. If cooking moisture and washer humidity share the same air, ventilation starts to matter. For kitchen-adjacent spaces, improve air movement with ceiling mounted range hoods so steam and lingering smells don’t settle into nearby laundry corners. Cleaner air helps the washer area feel less damp and stale.
Know What Not To Force
A stuck filter cap can be tempting to twist with pliers, but that’s risky. Plastic caps can crack, strip, or break off inside the housing. If the cap won’t move, press inward gently while turning, then stop if it feels like it may snap. Saving the filter threads matters more than winning a wrestling match with the washer.
Never reach deep into the pump area with a screwdriver or knife. Sharp tools can scratch seals, damage impeller blades, or push debris farther inside. Use fingers, a cloth, or blunt tweezers only where you can see clearly. Gentle cleaning protects the drain pump from accidental damage.
Don’t keep restarting drain cycles if the washer only hums and refuses to empty. Repeated attempts can heat the pump and make a small blockage worse. Stop the cycle, unplug the washer, and drain manually before trying again. That slower approach gives the motor a break and keeps the mess controlled.
Leaks after reinstalling the filter usually mean the cap is cross-threaded, the seal is dirty, or the gasket has worn out. Remove the filter, wipe the seal area, and reinstall it straight. If water still seeps out, the cap or seal may need replacement. Ignoring a small drip can lead to floor damage under the machine.
Build A Practical Cleaning Routine
A pump filter doesn’t need daily attention, but it shouldn’t be forgotten for a year either. Busy households, pet bedding, baby clothes, and towel-heavy loads create more lint and hair than lighter laundry routines. Check the filter more often if the washer handles muddy clothes or thick fabrics. The right schedule depends on laundry volume, not guesswork.
Pair filter cleaning with simple washer habits. Empty pockets, shake out pet blankets, use mesh bags for tiny garments, and measure detergent instead of eyeballing it. These steps reduce the junk that reaches the filter in the first place. Prevention keeps washer drainage smoother between cleanings.
Keep a small maintenance kit near the washer. Old towels, a shallow tray, gloves, and a toothbrush make the job quicker and less annoying. Nobody wants to hunt for supplies while dirty water is already dripping. A prepared setup turns filter cleaning into a quick routine instead of a household event.
Write the cleaning date on a small note or set a phone reminder if the washer gets heavy use. That may sound fussy, but it helps catch buildup before the machine starts complaining. Routine care protects spin performance, drainage speed, and odor control. A little consistency saves the drain pump from unnecessary stress.
Spot Bigger Washer Problems
A clean filter and clear hose should improve drainage quickly. If the washer still leaves standing water, the problem may sit deeper in the drain pump, control board, lid lock, or home plumbing line. Listen for the pump during drain mode. A silent machine may point to an electrical or pump failure, not just a clog.
A pump that hums but doesn’t move water may have a jammed impeller. Small debris can slip past the filter and block the moving parts. If the impeller won’t spin freely or makes a grinding noise, stop running drain cycles. Forcing it can turn a repairable issue into a failed pump.
Water backing up from the wall drain suggests a plumbing issue instead of a washer issue. The machine may drain correctly, but the household drain line can’t accept the water fast enough. Watch the standpipe during a drain cycle to see if water rises or spills out. That clue separates washer trouble from a clogged home drain.
Call for appliance service if leaks continue, error codes return, or the pump sounds rough after cleaning. DIY cleaning handles lint, coins, hair, and light debris well, but broken parts need proper repair. Pushing past obvious warning signs can cost more later. A careful stop at the right moment protects the washer, the floor, and the next load waiting in the basket.


10 Best Quality Semi Automatic Washing Machine of 2026 For Leak-Free Laundry

11 Best Small Washer Machine of 2026 For Everyday Laundry

12 Best Vibration Pads For Washing Machine of 2026 To Stop Walking and Shaking

11 Best Selling Front Load Washing Machine of 2026 For Quiet Odor-Free Laundry

11 Best Washing Machine For King Size Bedding of 2026 To Prevent Cycle Errors

10 Best Small Front Loader Washing Machine of 2026 For Tight Closets

12 Best Side Load Washing Machine of 2026 For Low Vibration

11 Best Single Tub Washing Machine of 2026 For Apartments Without Hookups






