
How To Check Washer Drain Hose Without The Guesswork

How To Check Washer Drain Hose problems usually creep in quietly. One day the washer drains a little slower, then suddenly there’s standing water sitting in the drum like it owns the place. Odd smells, strange gurgling noises, or water backing up near the laundry area often point straight toward a hidden blockage or a twisted hose tucked behind the machine. Small issues tend to snowball fast, and honestly, nobody wants to deal with soaked floors or another expensive repair visit.
Pinched hoses are more common than most people expect. Moving the washer a few inches during cleaning, sliding storage bins nearby, or pushing the appliance too close to the wall can squeeze the drain line without anyone noticing. That restricted water flow forces the washer pump to work harder, which may lead to noisy draining cycles or incomplete rinses. Drain flow matters more than people realize because even a minor kink can throw the whole washing process off balance.
Lint buildup creates another headache that sneaks up over time. Tiny fibers from towels, pet blankets, and thicker fabrics slowly collect inside the hose walls until water struggles to pass through properly. Soap residue joins the mess, then things get ugly fast. A washer that smells musty or leaves clothing feeling damp after spinning often signals a partially clogged drain hose somewhere in the system.
Checking the hose doesn’t require fancy tools or technical know-how. A flashlight, a towel, and a little patience usually do the trick. Pulling the washer away from the wall carefully helps expose sharp bends or flattened sections that block water movement. Visible damage, cracks, or bulging spots deserve attention immediately because weak hoses can split open without much warning.
Water draining too slowly into the standpipe also points toward a possible blockage farther inside the hose. Some clogs sit near the hose opening, while others hide deeper where lint and debris collect over months of heavy washing. Running water through the detached hose often reveals whether the flow stays smooth or slows to a frustrating trickle. That simple test can save hours of guesswork.
Strange noises during draining cycles shouldn’t be brushed aside either. Loud humming, bubbling sounds, or repeated stopping and restarting often mean the washer pump is struggling against restricted drainage. Consistent water movement keeps the appliance running efficiently and reduces stress on internal components. Ignoring those warning signs can shorten the lifespan of parts that aren’t exactly cheap to replace.
Regular inspections help prevent those unpleasant “uh-oh” moments in the laundry room. A quick hose check every few months can catch small bends, buildup, or wear before they become full-blown disasters. Laundry appliances work hard behind the scenes every single week, so giving the drain hose a little attention now and then simply makes sense. Besides, dealing with a clean-flowing washer beats scrambling for towels during a late-night leak any day of the week.

- TAR Score9.2
TAR Score is a ranking system developed by TopAppliancesReviews.com. TAR score has no relationship or impact from any manufacturers or sales agent websites. Learn more
- BrandMAREKINEKO

- TAR Score9.0
TAR Score is a ranking system developed by TopAppliancesReviews.com. TAR score has no relationship or impact from any manufacturers or sales agent websites. Learn more
- BrandDLHMBOQ
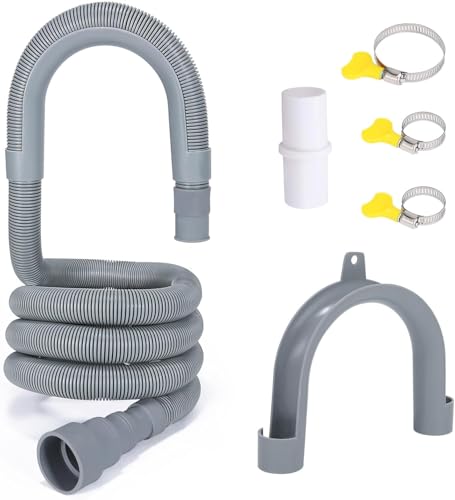
- TAR Score8.8
TAR Score is a ranking system developed by TopAppliancesReviews.com. TAR score has no relationship or impact from any manufacturers or sales agent websites. Learn more
- BrandPink Cross

- TAR Score8.6
TAR Score is a ranking system developed by TopAppliancesReviews.com. TAR score has no relationship or impact from any manufacturers or sales agent websites. Learn more
- BrandElyfree
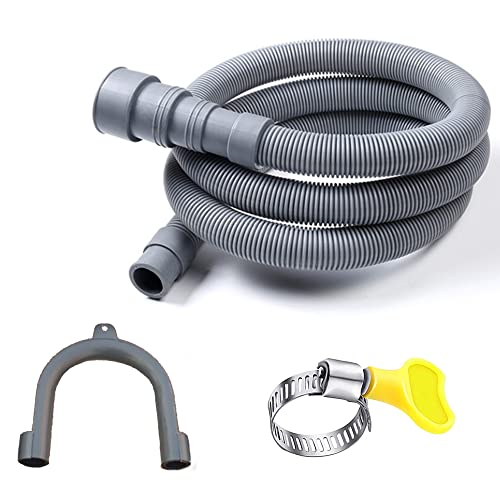
- TAR Score8.6
TAR Score is a ranking system developed by TopAppliancesReviews.com. TAR score has no relationship or impact from any manufacturers or sales agent websites. Learn more
- BrandHLMOptimo
Last update on 2026-07-09 / Affiliate links / Images, Product Titles, and Product Highlights from Amazon Product Advertising API
How To Check Washer Drain Hose For Kinks Or Blockages
A washer that drains slowly can turn one simple load into a soggy guessing game. Water sits in the drum, clothes feel heavier than they should, and that little humming sound starts to feel like bad news. That’s where how to check washer drain hose for kinks or blockages becomes more than a maintenance chore. It’s a practical way to protect your floor, reduce washer strain, and stop small drainage problems before they turn into a full-blown laundry room mess.
Washer Drain Hose Basics
The washer drain hose has one plain job: move used water out of the machine without slowing it down. That sounds simple, but the hose sits in a rough little corner of the home. It gets bent behind the washer, bumped during cleaning, squeezed against the wall, and sometimes packed around storage baskets or detergent bottles. Once the hose loses its open shape, drain flow takes the hit first.
A good drain hose path should look relaxed, not crushed or twisted like a garden hose someone stepped on. The hose needs enough space to curve gently from the washer to the standpipe or laundry sink. Sharp bends create pressure points where water slows down, lint settles, and soap residue starts building a stubborn little dam. That’s why hose position matters just as much as hose condition.
Most washer drain issues don’t show up with one dramatic warning. They start with clues that are easy to shrug off, like a slightly longer drain cycle or damp clothes after spinning. Then the washer may gurgle, pause, or leave water behind at the bottom of the drum. Those signs often point to restricted drainage, especially if the appliance still powers on and runs normally.
Think of the hose as a narrow exit lane for dirty water, lint, and detergent residue. Anything that narrows that lane creates a traffic jam. A kink slows water on the outside, while a clog blocks it from the inside. Either way, checking the drain hose gives you a clear starting point before blaming the pump, control board, or some expensive mystery part.
Signs The Hose May Be Blocked
Slow draining is usually the first red flag. The washer may finish the cycle, but the water takes too long to leave, and the spin cycle may not wring clothes properly. Heavy towels and blankets make the problem more obvious because they hold more water. If every load feels wetter than usual, the hose deserves a look.
Bad smells can also point toward standing water inside the drainage path. Dirty water trapped in a low spot or partially blocked hose can grow musty fast. That smell may seem like a detergent problem at first, but switching soap won’t fix a hose that’s holding old water. A clear drain path helps move residue out before it sits and stinks.
Odd noises during draining are another clue. A washer pump that hums, buzzes, or sounds strained may be fighting against a blocked hose. The pump is built to move water, not push through a clogged passage every week. Over time, that extra pressure can wear down parts and make a simple drain hose inspection feel like something you should’ve done sooner.
Water backing up near the standpipe or laundry sink should get attention right away. That backup may come from the home drain, the washer hose, or both. Still, the hose is easy to inspect first because it’s visible and removable on many machines. Catching a partial blockage early can prevent overflow and that awful towel-grabbing scramble.
Check The Hose Position First
Start with the washer turned off, because safety beats speed every time. Pull the machine away from the wall slowly and avoid yanking the hose or power cord. A few extra inches of space can reveal a bend that was hidden behind the appliance. Many drainage problems begin after the washer gets pushed back too tightly.
Look for sections where the hose is flattened, pinched, or sharply folded. A kink may sit near the back panel, behind a storage shelf, or right where the hose enters the standpipe. Even a small bend can reduce water movement enough to cause slow draining. Straightening that area may improve flow right away.
Check whether the hose has enough slack to move naturally during spin cycles. Washers vibrate, and that movement can tug a tight hose into a bad angle over time. A hose pulled too tight may also loosen at the connection point, which can lead to leaks. Keeping a gentle curve supports both drain performance and connection stability.
Watch out for clutter behind the appliance. Boxes, baskets, mop handles, and detergent jugs can press into the hose without looking like a big deal. That hidden pressure may cause a soft collapse in the hose wall. Clear the area so the hose has breathing room, and treat open space behind the washer like part of the drainage system.
Inspect For Cracks And Wear
A drain hose can look fine at a glance and still have weak spots. Run your hand along the hose and feel for soft bulges, brittle areas, or rough sections. A hose that feels gummy, cracked, or unusually stiff may be nearing the end of its useful life. Physical wear matters because drainage pressure can turn weak spots into leaks.
Pay close attention to the hose ends. The connection points take a lot of stress from vibration, clamp pressure, and repeated movement. Loose clamps or worn hose collars can drip slowly, especially during heavy drain cycles. Tight connections support leak prevention, but overtightening can damage older rubber or plastic hoses.
Small cracks may only show up when the hose bends. Flex the hose gently and look for tiny splits along the outer surface. If the material opens up or shows dry cracking, replacement is smarter than patching. A cheap hose fix can get expensive fast if dirty water ends up under the washer or inside flooring seams.
Hose age matters, too. Laundry rooms deal with heat, moisture, detergent residue, and constant vibration. Those conditions slowly wear down materials even if the washer doesn’t move much. If the hose looks tired or has been in place for years, replacement may be the cleaner answer than repeated inspections.
Test For Hidden Blockages
A hose can sit perfectly straight and still be clogged inside. Lint, pet hair, loose fibers, and detergent film can gather along the hose walls over time. Thick fabrics like bath mats, blankets, and towels add more debris to the wash water. That buildup narrows the passage and hurts drain speed.
Detach the hose only after shutting off the washer and preparing for leftover water. Keep towels nearby and place the hose end into a bucket if possible. Some water may spill even after the cycle ends, so don’t trust a dry-looking washer completely. A calm setup keeps mess control from becoming its own little project.
Run water through the hose to see whether it flows freely. A strong, steady stream usually means the hose is clear enough for normal drainage. Weak flow, sputtering, or water backing up inside the hose suggests a blockage. That simple test gives you a practical clue without tearing into the washer cabinet.
For light buildup, rinsing the hose may help. For stubborn clogs, replacement is often less frustrating than trying to snake a flexible hose full of old lint and soap residue. The inside surface can stay coated even after a quick rinse. A clean hose supports faster draining, less odor, and smoother washer cycles.
Check The Standpipe Connection
The drain hose doesn’t work alone. It empties into a standpipe, utility sink, or wall drain, and that connection needs the right fit. A hose shoved too far into the standpipe can create drainage problems or siphoning. Proper placement helps protect steady water removal during each cycle.
Make sure the hose opening isn’t sealed airtight inside the drain pipe. Washers need air space around the hose so water can move without weird pressure issues. A tight seal may cause gurgling, slow drainage, or water pulling out at the wrong time. That little air gap can make a surprisingly big difference in drain behavior.
Standpipe height also matters. If the drain point sits too low or too high compared with the washer design, draining may become unreliable. Appliance manuals often give model-specific guidance for safe drain hose placement. Following those limits helps prevent siphoning, overflow, and repeated drain errors.
Water hammer can show up as banging pipes when water flow stops suddenly. That noise isn’t the same as a hose clog, but it can make laundry plumbing feel rough and unpredictable. To reduce loud pipe shock during washer cycles, compare a water hammer arrestor for washing machine that matches your plumbing setup. A quieter line makes it easier to notice real drainage warning signs instead of guessing through every clank.
How To Check Washer Drain Hose For Kinks Or Blockages
Drain trouble rarely stays polite for long. One week the washer sounds a little louder, and the next week there’s water sitting in the drum like it paid rent. A careful look at how to check washer drain hose for kinks or blockages helps separate a simple hose issue from a bigger appliance headache. The goal is plain enough: keep water moving cleanly, protect the washer pump, and avoid those messy laundry room surprises.
Clean Around The Washer Before Testing
A crowded laundry area can hide the real problem in plain sight. Baskets, storage bins, mop buckets, and detergent jugs often press against the drain hose without looking suspicious. That pressure can flatten the hose slowly, especially if the washer vibrates during spin cycles. Clearing the space gives the hose room to sit naturally and makes kinks much easier to spot.
Pull the washer out gently instead of dragging it in one hard move. A quick yank can loosen the drain hose, scrape flooring, or stress the water lines behind the machine. Keep a towel nearby because leftover water may drip once the hose shifts. Slow movement makes the inspection safer and keeps the laundry room from turning into a puddle zone.
Look behind the machine from more than one angle. A hose can seem straight from the top while hiding a sharp bend near the floor. Flashlights help catch flattened sections, twisted loops, and spots where the hose rubs against the wall. Those little details matter because water needs a smooth path from the washer to the drain.
Heavy older machines can sit tight against the wall and leave almost no breathing room for the drain line. That cramped setup can make even a solid washer drain poorly. If the appliance itself is aging and using more water than expected, compare practical washer choices like a non energy efficient washing machine before assuming every drainage symptom comes from the hose alone. Still, hose position should be checked first because it’s easier, cheaper, and often the real culprit.
Flush The Hose The Smart Way
Disconnecting the drain hose can feel annoying, but it gives the clearest view of what’s happening inside. Turn off the washer, unplug it, and place the hose end into a bucket before loosening anything. Some machines hold more water than expected after a cycle. Planning for spills keeps mess control on your side.
Run water through the hose and watch how it exits. A healthy hose should allow a steady stream without sputtering, backing up, or slowing to a weak trickle. If the flow hesitates, there may be lint buildup, soap scum, or debris stuck inside. That’s a strong sign the washer pump has been working harder than it should.
A garden hose can help flush loose debris, but don’t force high pressure into a fragile or cracked washer hose. Older hoses may split if they’re already weak. Gentle flushing is usually enough to reveal whether the blockage clears or stays stubborn. If water still struggles to pass through, replacement often beats fighting with a dirty, worn-out hose.
Check the rinse water as it comes out. Gray lint, soap flakes, hair, and gritty residue tell a pretty clear story. Those materials collect from towels, pet bedding, rugs, and overused detergent. Keeping the hose clear helps maintain faster draining and reduces that sour smell that loves damp laundry spaces.
Review Detergent Habits And Residue
Too much detergent can quietly clog a drain hose over time. Extra soap doesn’t always mean cleaner clothes, and in many washers it leaves behind sticky residue. That residue grabs lint and hair, then slowly narrows the hose from the inside. Better dosing supports cleaner drainage and fewer musty smells.
Front-load washers are especially sensitive to detergent type and amount. Low water levels can make excess suds harder to rinse away, and that leftover film may travel into the drain hose. To reduce buildup at the source, compare a detergent for front load washing machine that suits low-water wash cycles. The right soap routine helps protect hose flow instead of feeding the clog.
Softener can create similar trouble if it’s used heavily. It may leave a waxy film that sticks to hose walls and traps lint. Over time, the drain hose can smell stale even after the washer drum looks clean. Cutting back on heavy additives gives drainage parts less residue to carry away.
Watch how the washer behaves after changing detergent habits. Faster draining, fewer odors, and lighter-feeling clothes after spin can all point toward improved water movement. The fix may not feel dramatic, but it can make everyday laundry less fussy. Small changes often protect washer performance better than last-minute repairs.
Separate Drain Hose Problems From Home Drain Issues
A clear washer hose won’t fix a clogged home drain. If the hose flows well into a bucket but water backs up from the standpipe, the blockage may sit inside the wall drain instead. That distinction matters because chasing the wrong problem wastes time. Testing the hose separately gives you a better read on where the restriction starts.
Listen for gurgling near the standpipe during draining. That sound may mean the plumbing vent or drain line is struggling to handle the water volume. A washer can push water out quickly, and a sluggish household drain may not keep up. In that case, overflow prevention depends on addressing the drain, not just the hose.
Smells can also travel from the home plumbing rather than the washer itself. A dry trap, dirty standpipe, or slow drain can send odors back into the laundry area. The washer drain hose may get blamed because it’s visible, but the source could be deeper. Checking both areas keeps odor control realistic.
Laundry rooms near kitchens, utility areas, or closed-off spaces may trap odors more easily. Better air movement can help the room feel less stale after washing, especially if damp fabrics sit too long. For nearby indoor odor and dust concerns, compare an indoor hepa air purifier as a separate comfort upgrade rather than a drain repair. Clean airflow helps the room feel fresher, but blocked drainage still needs direct attention.
Know When To Replace The Drain Hose
Some hoses aren’t worth saving. Cracks, stiff plastic, soft bulges, and repeated clogs all point toward replacement. A drain hose handles dirty water every wash day, so weak material becomes a real risk. Swapping it out protects leak prevention and keeps water moving without drama.
Replacement also makes sense if the hose keeps kinking in the same spot. Once a hose has developed a crushed memory, it may fold again even after you straighten it. That repeat bend can keep slowing the drain cycle. A fresh hose with the right length and curve gives water flow a better chance to stay steady.
A hose that’s too long can create loops where water sits after each cycle. That standing water collects lint, odor, and residue over time. A hose that’s too short can pull against the washer or standpipe and loosen during vibration. The best fit allows a gentle curve without sagging into deep low spots.
Use the washer manual as the guide for hose height, length, and connection style. Guessing can create siphoning, leaks, or drainage errors that look like mechanical failures. A proper fit keeps the drain system boring, and boring is exactly what you want from laundry plumbing. Reliable drainage means fewer interruptions, fewer smells, and less stress on the machine.
Build A Simple Drain Hose Check Routine
A quick inspection every few months can catch problems before they make a mess. Look behind the washer, check for sharp bends, and make sure nothing is pressing into the hose. Run a short cycle and listen during the drain stage. Those few minutes can reveal slow drainage before it becomes a flooded-floor situation.
Heavy laundry weeks deserve extra attention. Pet bedding, bath towels, washable rugs, and muddy clothes send more lint and debris through the drain system. After those loads, keep an eye on water removal and odors. High-debris laundry can speed up hose buildup even in a washer that usually behaves.
Keep the washer area easy to access. A drain hose that’s buried behind clutter won’t get checked until something goes wrong. Leaving a little space around the back of the machine makes routine maintenance less annoying. Easy access supports faster troubleshooting when the washer starts acting weird.
Small habits make the biggest difference here. Use the right detergent amount, avoid shoving the washer tight against the wall, and inspect the hose after moving the appliance. Replace worn hoses before they split, not after the water hits the floor. That steady routine keeps washer drainage simple, predictable, and far less likely to ruin laundry day.


10 Best Quality Semi Automatic Washing Machine of 2026 For Leak-Free Laundry

11 Best Small Washer Machine of 2026 For Everyday Laundry

12 Best Vibration Pads For Washing Machine of 2026 To Stop Walking and Shaking

11 Best Selling Front Load Washing Machine of 2026 For Quiet Odor-Free Laundry

11 Best Washing Machine For King Size Bedding of 2026 To Prevent Cycle Errors

10 Best Small Front Loader Washing Machine of 2026 For Tight Closets

12 Best Side Load Washing Machine of 2026 For Low Vibration

11 Best Single Tub Washing Machine of 2026 For Apartments Without Hookups






