
How to Fix or Replace a GE Washing Machine Drain Hose

A puddle of water behind the washer looks alarming, but an issue with the drain line is usually simple to handle at home. Solving the problem comes down to swapping out a cracked line or securing the hose at the right height so wash water empties safely without spilling onto the floor.
The right repair depends on how the hose attaches and where the water escapes. Some models connect directly to the pump inside the cabinet with a metal clamp, while others slip onto an outside port. The height of the wall drain pipe also matters, because a hose hung too low causes siphoning, which is when water accidentally sucks out of the tub mid-cycle. Taking a quick look behind the machine helps you spot the fault and stop the mess before it ruins your floor.
Check for a Cracked Line Before You Clear a Stubborn Clog
When you spot a puddle behind your laundry pair, it is tempting to assume the drain line is completely blocked. A clogged pipe and a split hose cause similar mess on your flooring, but they need completely different fixes. Checking a few specific spots will show you whether water is escaping through a physical tear or spilling backward out of your household plumbing.
Start by running a quick rinse or spin cycle while watching the back of the appliance with a flashlight. Pay attention to exactly when the water appears. If water backs up and spills over the top of the vertical wall drain pipe (standpipe), the line is doing its job by pushing water out, but your home plumbing cannot swallow it fast enough. That points to a lint clog inside the wall pipe rather than a failed hose.
If water drips or sprays directly from the ribbed tubing during the pump-out phase, you are dealing with a crack or a loose joint. Here is a fast checklist to pinpoint the exact failure point:
- The corrugated ribs: Look closely at the small plastic folds along the length of the line. When washers vibrate during high-speed spinning, these plastic ridges rub against the drywall or the metal cabinet. Over time, friction wears tiny pinholes or hairline splits into the plastic valleys.
- The machine outlet connection: Check the rubber boot at the lower rear corner where the line joins the washer. A loose hose clamp (the metal band that tightens the hose onto the pipe) can allow water to seep down the back panel onto your floor.
- Drips when the machine is off: If water collects under the hose connection even when the machine has been off for hours, check your hot and cold water supply hoses and the water shutoff valves above the washer. A drain line only holds water while the machine empties, so persistent standing drips usually come from the pressurized fill valves instead.
- Excessive soap bubbles: Make sure you are using low-suds HE (High Efficiency) detergent. Regular laundry soap creates thick foam that cannot clear the drain neck easily. The foam pushes up through the standpipe opening and melts into a puddle that mimics a leak.
Whether you run a deep-fill top loader or you are considering should you buy a front load or top load washer for your space, keeping the rear drain path clear of friction points is the best way to stop wear before water touches your floor.
Keep Your Drain Line at the Right Height to Prevent Siphoning
One of the most common drain issues on a washing machine has nothing to do with cracks or holes. It happens when the hose is installed at the wrong height or shoved too deep into the wall pipe. This mistake triggers siphoning (water accidentally sucking out of the tub while the machine fills or washes).
Your washer relies on a built-in drain pump that pushes water up into a kitchen sink or standpipe. Unlike household sinks that hold water with a mechanical stopper valve, a washing machine tub relies entirely on the height of the drain loop to keep wash water inside. If the top curve of your drain hose sits too low, water will simply spill out of the tub by gravity as fast as the water inlet valves pour it in.
To keep the water where it belongs, follow these standard installation rules:
- Maintain the 30-to-96-inch height rule: The top bend of your drain hose must reach at least 30 inches above the floor, but it should not rise higher than 96 inches (8 feet). If the drain outlet sits below 30 inches, the machine will siphon continuously. If it sits higher than 96 inches, the built-in drain pump will struggle against the weight of the water column, leaving dirty water in the bottom of your wash basket.
- Never jam the hose all the way down the pipe: Insert the curved end of the hose only 4 to 7 inches into the vertical wall drain pipe. Shoving two or three feet of tubing down the pipe drops the open end below the water level of the tub, creating a continuous vacuum siphon that drains the machine mid-cycle.
- Preserve the air gap: Never seal the opening between the drain hose and the standpipe with duct tape, expanding foam, or tight rags. The drain line needs an open air gap around it so air can flow freely as water rushes downward. An airtight seal creates suction that pulls water straight out of the stainless steel clothes tub.
- Use the plastic U-shaped hose guide: Always snap the discharge line into the rigid plastic hook bracket that came with the appliance. This keeps the hose bent at a smooth radius, stops it from kinking shut, and prevents the force of rushing water from whipping the hose out onto your floor.
Follow These Steps to Swap Out a Damaged Drain Hose
Replacing a split or brittle drain line is a straightforward repair that takes about thirty minutes. You only need a bucket, a couple of old towels, slip-joint pliers, and a screwdriver or nut driver to loosen the clamps. Work through the steps below to complete the swap safely.
- Disconnect power and water: Safety comes first on any appliance repair. Unplug the power cord from the standard 120-volt 3-prong grounded wall outlet. Turn both water shutoff valves clockwise until they are fully closed so you do not risk bumping a supply handle while working behind the cabinet.
- Pull the washer forward: Carefully walk the washer away from the wall. You will need about two to three feet of working room behind the unit. Take care not to drag the front leveling legs roughly across finished tile or vinyl flooring.
- Catch the standing water: Lower the curved end of the old hose out of the standpipe and aim it down into your shallow bucket or pan. Water always remains in the bottom bend of the line after a wash cycle, so let gravity drain that leftover water before unhooking the other end.
- Loosen the hose clamp: Look at the base of the machine where the hose connects to the internal pump nozzle or the rear exterior coupler. Use your pliers to squeeze the tabs of a spring clamp, or use a nut driver to loosen a screw-type band clamp. Slide the clamp several inches up the hose body away from the connection point.
- Pull off the old line: Wiggle the rubber neck of the hose back and forth to break the seal against the plastic pump fitting. Old rubber can stick firmly to plastic over time, so twist gently until it pulls free. Have a rag ready to catch any small spills from the pump nozzle.
- Mount the replacement hose: Slide your hose clamp onto the new rubber fitting first. Push the rubber neck firmly over the washer outlet nozzle until it seats completely against the stop ridge. Position the hose clamp directly over the thickest part of the connection neck and tighten it down snug. Do not overtighten screw clamps, as excessive force can crack plastic pump housings.
- Route and anchor the line: Snap the new line into the factory routing clips on the back panel of the machine. Hook the upper end into the rigid U-shaped guide bracket, and place the tip 4 to 7 inches into your standpipe. Fasten the hose to the standpipe or laundry tub faucet with a zip tie so the kick from the pump cannot fling it loose.
- Inspect for leaks before pushing the machine back: Plug the washer back into the wall outlet and open the water shutoff valves. Run a quick wash or spin-only setting to fill and pump out a small amount of water. Run your dry hand or a paper towel along the connection clamp to confirm there are no damp spots. Once you confirm the seal is bone-dry, slide the washer back into place, keeping at least 4 to 6 inches of clearance so the line does not get pinched against the rear wall.
Use a Proper Coupler Kit When Extending Your Drain Line
Laundry rooms are not always laid out with the drain right next to the washer. If your utility sink or vertical wall drain pipe sits further away than the standard 4-to-5-foot hose can reach, you must extend the line without introducing weak points that could leak inside your walls.
Never try to stretch a rubber hose to reach a distant pipe. Stretching puts tension on the connection boot, pulling it sideways until the seal fails or the corrugated plastic kinks shut. Similarly, do not attempt to join two lines together with household duct tape, silicone, or electrical tape. Water pressure from the drain pump easily blows taped joints apart during a heavy drain cycle.
To lengthen the line properly, pick up a dedicated extension kit that includes a rigid plastic barbed connector and two stainless steel screw clamps. Push one end of the barbed coupler firmly into the original hose and the other end into your extension piece. Position a metal hose clamp over each side of the connector and tighten them until the rubber compresses slightly against the barbs.
Keep total hose length in mind. The built-in drain pump that pushes water up into a kitchen sink or standpipe is designed to push a specific weight of water. Extending your drain line beyond 10 to 12 feet total length forces the pump motor to work harder and run longer to clear the clothes tub. Over long distances, water can flow backward into the machine when the pump shuts off, leaving sour moisture sitting in the bottom of your wash basket.
Choose a Direct-Fit Replacement Hose to Protect Your Floors
When shopping for a replacement drain hose or an extension assembly, matching the physical connection style of your specific washer model is the most important step. A poorly fitting rubber boot will either leak around the pump neck or slip completely off under the pressure of rushing water.
Look for replacement parts that match the factory connection type of your machine. Some models use an internal pump boot with an angled elbow, while others use an external slip-on cuff that mounts directly to the back exterior panel. Choosing a hose with thick, reinforced corrugated walls prevents the line from flattening or kinking when the washer shifts during its spin cycle.
Make sure your replacement includes or accommodates a sturdy U-shaped hook bracket and solid stainless steel band clamps. Flexible, universal-fit kits can work well for distant utility sinks, but always measure your machine outlet diameter before buying to confirm the cuff fits snugly over the nozzle before the clamp is tightened.

- TAR Score9.2
TAR Score is a ranking system developed by TopAppliancesReviews.com. TAR score has no relationship or impact from any manufacturers or sales agent websites. Learn more
- BrandBudora
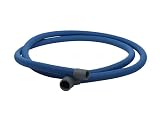
- TAR Score8.9
TAR Score is a ranking system developed by TopAppliancesReviews.com. TAR score has no relationship or impact from any manufacturers or sales agent websites. Learn more
- BrandGE
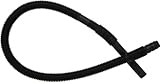
- TAR Score8.5
TAR Score is a ranking system developed by TopAppliancesReviews.com. TAR score has no relationship or impact from any manufacturers or sales agent websites. Learn more
- BrandGE

- TAR Score8.4
TAR Score is a ranking system developed by TopAppliancesReviews.com. TAR score has no relationship or impact from any manufacturers or sales agent websites. Learn more
- BrandElyfree
Last update on 2026-10-31 / Affiliate links / Images, Product Titles, and Product Highlights from Amazon Product Advertising API
FAQs
How far down should the drain hose go into the standpipe?
The drain hose should go between 4 and 7 inches down into the vertical wall drain pipe. Inserting the line too far drops it into sitting water, which causes siphoning that drains your washer while it tries to wash clothes. If you do not push it in at least 4 inches, the water pressure from the pump can push the hose up and spill water onto your laundry room floor.
Why does my GE washer fill and drain at the same time?
This problem happens when the drain hose is set up in a way that creates a continuous siphon. If the top curve of the hose is lower than 30 inches off the floor, or if the hose is shoved too far down the wall pipe, gravity pulls water out of the clothes tub as fast as the inlet valves fill it. Raising the top loop to the proper height and pulling the hose end up to the 4-to-7-inch mark will stop the siphoning.
Can I connect two washing machine drain hoses together?
You can connect two drain lines safely, but you must use a rigid barbed coupler and two metal hose clamps rather than tape or glue. Keep the combined length under 10 to 12 feet so you do not overwork the built-in drain pump. Always anchor the connected line securely along the wall so it does not sag or drag on the floor.
How do I keep the drain hose from shaking loose during the spin cycle?
Secure the curved plastic guide bracket to your standpipe or utility sink using a heavy-duty cable tie or hook-and-loop strap. Washing machines shake and vibrate as the inner basket spins damp-dry at high speeds, and the force of the pump kicking on creates sudden movement. Fastening the hose directly to the plumbing pipe keeps it from bouncing out of the opening.


10 Best Washing Machine For King Size Comforter of 2026 For Bulky Bedding

11 Best Semi Automatic Washing Machine Under 10000 of 2026 For Apartments and RVs

9 Best Compact Refrigerator For Beer Bottles of 2026 For Upright Bottle Fit

10 Best Quality Semi Automatic Washing Machine of 2026 For Leak-Free Laundry

11 Best Small Washer Machine of 2026 For Everyday Laundry

12 Best Vibration Pads For Washing Machine of 2026 To Stop Walking and Shaking

11 Best Selling Front Load Washing Machine of 2026 For Quiet Odor-Free Laundry

11 Best Washing Machine For King Size Bedding of 2026 To Prevent Cycle Errors







