
How to Replace or Extend an LG Washer Drain Hose

Water pooling behind the machine is stressful, but a leaking or stubborn drain line is an easy fix that rarely requires an expensive service call. The direct fix is to replace the entire line with a model-matched part if the plastic is cracked, or add a clamped extension if the tube simply cannot reach the wall pipe. Keeping the high curve of the hose between 29 and 96 inches off the floor also stops dirty water from pulling back into the wash tub.
The right approach depends on where the issue starts. A tear near the back cabinet calls for a fresh factory line matched to the model number stamped inside the door frame. If the current tube is undamaged but falls short of the vertical wall pipe or laundry sink, a tightly clamped splice solves the reach. Here is how to swap the line, join an extension safely, and keep your laundry floor dry.
The Short Version
- Pick the right fix: Replace the whole line if the plastic is cracked, split, or brittle near the washer cabinet. Use an extension kit only if your current line is in good condition but cannot reach your drain.
- Match the machine: Find your exact model number on the cabinet frame before ordering parts. An exact fit prevents loose connections at the internal pump.
- Watch your drain height: Keep the discharge hook between 29 and 96 inches above the floor. If the hook is lower or higher, your machine will either drain prematurely or flash an OE error code.
- Clamp and check: Always lock joints with a metal hose clamp (a tightening ring that locks the hose onto the outlet fitting). Run a short rinse cycle to verify there are no drips before pushing the washer back against the wall.
Full Replacement vs. Extension Kit: Which Setup Do You Need?
Water pooling behind your laundry setup usually points to a damaged drain line. Before you order any hardware, you need to know whether you should swap the entire line or simply add extra length. Making the wrong choice leads to wasted money or water leaking across your laundry room floor.
A full replacement is necessary whenever the existing plastic shows signs of physical damage. Look closely at the ribbed body of the tube. If you notice splits, small pinholes, or rubber cuffs that feel mushy or brittle, the entire part must come off. Trying to wrap waterproof tape around a cracked drain line will fail. The internal drain pump pushes water out under noticeable force, and pressurized water will quickly find a path past glue or tape.
A full replacement is also the safest route if the hose has worn down from rubbing against the sharp sheet-metal cutout on the back of the washer cabinet. Over years of spin cycles, washer vibration can saw right through unprotected plastic. If the leak sits inside or right at the back of your front-load or top-load washing machine, install a fresh factory-spec hose.
An extension kit is the right choice when your current drain line is completely intact but sits a foot or two short of your household drain. This happens often when moving into a home with an awkward laundry hookup or when placing the washer on the far side of a dryer. A good extension kit connects to your existing rubber end-cuff with a rigid plastic adapter and metal clamps. It gives you the extra reach you need without requiring you to open up the washer cabinet.
How to Locate Your LG Model Number to Find the Right Part
LG makes dozens of washer styles, and their internal pump outlets do not all share the exact same connector size. Buying a replacement based on looks alone often results in a loose connection that slips off the pump during heavy spin cycles. You need your exact model number to buy the right part.
Check these specific spots to find the factory label on your machine:
- On a front-load washer: Open the round door and look around the perimeter of the door frame or the flat face of the machine front. You will see a silver or white sticker with barcodes.
- On a top-load washer: Lift the main lid and check the back edge of the top deck, near the hinges. If your model has a center post or a flat bottom wash plate, you can learn more about how internal layouts differ in our guide on agitator and impeller washers.
- On the exterior cabinet: If the label inside the door is worn away, look at the lower side panel or the upper back corner of the outer metal cabinet.
Write down the full model number shown on the sticker, including any letters or numbers after the period or hyphen. For example, a model like WM3400CW or WT7300CW uses specific internal routing and clamp sizes. Having this complete code allows you to confirm that the replacement line matches the exact shape, internal diameter, and rubber boot needed for your pump outlet.
Step-by-Step Removal and Replacement of an Internal Drain Hose
Replacing the entire drain line requires getting behind the washer and opening up the lower access area. This job takes about 30 to 45 minutes and requires a few basic tools: a Phillips-head screwdriver, slip-joint pliers, a shallow bucket, and old towels.
- Disconnect power and water: Unplug the washer power cord from the standard 120-volt 3-prong grounded wall outlet. Turn off both hot and cold water shutoff valves behind the machine. Pull the washer forward so you have at least two feet of working space.
- Catch leftover water: Place a towel and shallow tray under the small clean-out door on the bottom front of a front-load washer. Unscrew the lower pump filter catch or pull the small rubber drain plug to empty the residual water sitting in the pump. This prevents gallons of dirty wash water from flooding your floor when you pull the main line.
- Remove the rear access panel: Look at the lower back of the washer cabinet. Use your screwdriver to remove the screws holding the small metal service panel in place. Set the panel and screws aside.
- Release the internal pump clamp: Follow the ribbed hose from the back panel inward until you reach the plastic drain pump housing. You will see a spring-wire hose clamp (a tightening ring that locks the hose onto the outlet fitting). Squeeze the two tabs of this clamp together with your slip-joint pliers and slide it back two inches onto the hose body.
- Wiggle the old hose free: Gently twist and pull the rubber end off the plastic pump nozzle. Have a towel ready underneath to catch any remaining drops. Unclip the hose from any plastic routing brackets inside the cabinet, push the rubber grommet out through the cabinet hole, and pull the old line free.
- Install the new replacement hose: Slide your hose clamp onto the new rubber end. Push the new hose firmly over the pump nozzle until it seats completely against the plastic stop. Squeeze your pliers and slide the clamp back over the rubber neck, making sure it sits directly in the raised groove.
- Route and close up: Snap the plastic cabinet grommet into the metal hole in the back frame so the sharp steel edges cannot rub against the plastic tube. Secure any internal retaining clips, reattach the rear metal access panel with its screws, and plug the power cord back into the wall outlet.
Standpipe Height Rules to Stop Siphoning and OE Error Codes
Once your new line is hooked to the washer, how you hang the other end matters just as much as how tightly you clamped it. LG washers rely on precise physics to pump water out and hold fresh water in.
The drain hose must discharge into a standpipe (a vertical wall drain pipe) or a laundry sink that sits at the proper height. LG specifies that the top curve of the drain line must sit between 29 inches and 96 inches above the floor. If you place the drain outlet outside of this range, the washer cannot function properly.
Here is what happens when the height is wrong:
- If the drain sits lower than 29 inches: Water will trigger siphoning (dirty water pulling back into the machine or fresh water draining out prematurely). As the washer fills with clean water, gravity pulls the water straight down the drain hose and into your plumbing. The machine will keep adding water, the clothes tub will never fill, and the cycle will stall.
- If the drain sits higher than 96 inches: The built-in drain pump has to push water against too much gravitational weight. The pump motor will overheat, water will drain too slowly, and the washer will display an OE code (the washer screen message meaning water cannot drain within the allowed time limit).
You must also avoid sealing the hose into the pipe. Always leave an open air gap between the ribbed hose and the inside of the vertical wall drain pipe. Never wrap duct tape around the top of the standpipe to close the gap. An airtight seal creates a vacuum suction that pulls water out of the machine mid-wash, ruining your cycle.
How to Connect an Extension Hose and Clamp It Leak-Free
If your factory line is in great shape but falls short of your drain pipe, an extension kit provides a simple fix. Do not simply jam two smooth hoses together. You need a dedicated extension kit that includes a rigid barbed coupler and adjustable screw-tight clamps.
- Check the connection ends: Look at the discharge end of your existing washer line. Most LG lines have a stepped rubber cuff designed to fit multiple pipe openings. If the cuff has several sizes molded together, cut off the smaller sections with a utility knife only if you need to match a wider adapter.
- Insert the barbed coupler: Push the rigid plastic connector halfway into the rubber end of your original line. Barbed fittings have small raised ridges that grip the inside of the rubber so it cannot slide off under pressure.
- Push the extension hose on: Take the female rubber end of your new extension line and slide it over the remaining half of the barbed connector until both hoses meet in the middle.
- Tighten the metal clamps: Slide a stainless steel worm-gear hose clamp over each side of the connection. Use a flathead screwdriver or small nut driver to tighten each clamp down directly over the barbed section. Tighten the screws until the rubber compresses firmly against the plastic fitting. Do not overtighten so hard that you crack the inner plastic core.
- Fit the curved guide: Snap the plastic U-bend hook bracket onto the discharge end of the extension hose. This curved bracket keeps the flexible line from kinking as it bends down into your vertical wall drain pipe or laundry sink.
- Anchor the hose to the wall: Fasten the hose to the standpipe or nearby water pipe using a heavy-duty cable tie. When the washer pump discharges, the sudden rush of water can whip an unsecured hose right out of the pipe, dumping dirty water across your room.
Quick Checks Before Running Your First Full Laundry Load
Never shove your washer back into place and walk away without checking your work. A tiny pinhole drip or a loose clamp can quietly rot your subfloor over several weeks. Run through this quick checklist before doing your laundry:
- Confirm clearance: Slide the washer back into place, keeping at least 4 to 6 inches of clearance between the back of the cabinet and the wall. Make sure the ribbed drain hose curves smoothly without getting pinched, crushed, or sharply kinked behind the machine.
- Check machine stability: Place both hands on opposite corners of the washer and try to rock it. If it wobbles, adjust the front leveling legs until the unit sits completely flat on the floor. Severe vibration from an unlevel machine will shake drain connections loose.
- Run an empty drain cycle: Leave your laundry basket aside for now. Turn on the washer, select a quick rinse-and-spin or a spin-only setting, and let the tub fill with a small amount of water.
- Inspect with a flashlight: While the drain pump runs, shine a bright light behind the washer. Look at the lower cabinet opening, along the length of the line, and directly at the extension coupler joint. Feel the connections with a dry paper towel. If the towel comes away damp, turn off the machine and tighten the hose clamp half a turn.
- Watch the standpipe: Stand near the vertical wall drain pipe and watch the water discharge. Make sure the water flows away quickly without backing up or splashing out over the top of the pipe.
Choosing the Right Replacement Hose or Extension Kit
When shopping for a replacement drain line or an extension kit, focus on structural durability rather than finding the lowest price. A good drain line must withstand hot water, detergent chemicals, and continuous vibration from high-speed spin cycles.
Look for replacement lines made from thick, ribbed polypropylene plastic. The accordion-style ribs prevent the hose from collapsing under pump suction or kinking when bent around corners. The ends of the hose should feature thick, flexible rubber boots rather than hard, brittle plastic. High-grade rubber stretches over the pump outlet to create a watertight seal that absorbs machine movement without leaking.
If you need an extension kit, choose one that includes a solid plastic joining piece and stainless steel screw clamps. Avoid kits that rely only on push-fit friction or cheap spring clips, as warm water and water pressure can cause friction joints to slide apart over time. Always measure the distance from your washer cabinet to your wall drain before ordering, adding at least two extra feet so the line hangs with a gentle, natural curve.

- TAR Score9.2
TAR Score is a ranking system developed by TopAppliancesReviews.com. TAR score has no relationship or impact from any manufacturers or sales agent websites. Learn more
- BrandWPL

- TAR Score9.2
TAR Score is a ranking system developed by TopAppliancesReviews.com. TAR score has no relationship or impact from any manufacturers or sales agent websites. Learn more
- BrandEZAPEX

- TAR Score8.4
TAR Score is a ranking system developed by TopAppliancesReviews.com. TAR score has no relationship or impact from any manufacturers or sales agent websites. Learn more
- BrandElyfree
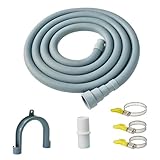
- TAR Score7.7
TAR Score is a ranking system developed by TopAppliancesReviews.com. TAR score has no relationship or impact from any manufacturers or sales agent websites. Learn more
- BrandMAREKINEKO
Last update on 2026-10-31 / Affiliate links / Images, Product Titles, and Product Highlights from Amazon Product Advertising API
FAQs
Why is water leaking from my LG washer drain hose during the spin cycle?
Leaks during the spin cycle usually happen because the drain pump is actively forcing water through the line under high pressure. This pressure will expose loose hose clamps, cracked rubber boots, or small splits in the ribbed plastic body. Washer vibration during fast spins can also shake an unanchored discharge hose right out of the wall drain pipe.
Can I glue or tape a cracked LG washing machine drain hose?
No, you should never attempt to glue or tape a cracked washer drain line. The internal pump pushes water with strong force, and the flexible plastic expands and contracts with changes in water temperature. Tape and glue will peel away after one or two wash cycles, leading to sudden water damage on your subfloor.
How far down into the standpipe should the LG drain hose go?
Insert the drain hose roughly 6 to 8 inches down into the vertical wall drain pipe. If you push the hose too far down into the pipe, it can dip below the water level in the P-trap, causing dirty sewer water to siphon back into your clean clothes tub. Use the plastic U-shaped bracket that came with the hose to lock it at the correct depth.
What should I do if my LG washer shows an OE code after installing a new hose?
An OE code means the washer cannot drain water within the required time limit. Check behind the machine to make sure the new line was not pinched or kinked when you pushed the washer back against the wall. Also verify that the top curve of the hose is not higher than 96 inches from the floor, which forces the pump to work harder than intended.


10 Best Washing Machine For King Size Comforter of 2026 For Bulky Bedding

11 Best Semi Automatic Washing Machine Under 10000 of 2026 For Apartments and RVs

9 Best Compact Refrigerator For Beer Bottles of 2026 For Upright Bottle Fit

10 Best Quality Semi Automatic Washing Machine of 2026 For Leak-Free Laundry

11 Best Small Washer Machine of 2026 For Everyday Laundry

12 Best Vibration Pads For Washing Machine of 2026 To Stop Walking and Shaking

11 Best Selling Front Load Washing Machine of 2026 For Quiet Odor-Free Laundry

11 Best Washing Machine For King Size Bedding of 2026 To Prevent Cycle Errors





